

Last Updated on June 29, 2024
Managing permissions?
In this guide, I will walk you through the different best practices you can apply when managing SharePoint permissions.
Let’s get started.
Table of Contents:
- SharePoint Permissions and Levels
- Best Practices for Managing SharePoint Permissions
- 1. Apply security at the site level
- 2. Use built-in security groups
- 3. Manage site sharing settings
- 4. Disable external sharing on sensitive sites
- 5. Regularly review shared files and permissions
- 6. Grant the least permissions possible
- 7. Manage inheritance of permissions
- 8. Educate users on permissions management
- Advanced Permission Management Tips
Basically, SharePoint permissions control the access users have within a SharePoint environment.
Properly setting these permissions is essential for maintaining both security and workflow efficiency.
There are various permission levels in Sharepoint:
- Site permissions
- List permissions
- Document library permissions
- Folder permissions
- Item permissions
👉 Related: SharePoint Groups & Permissions Explained: How Permission Levels Work
SharePoint uses groups to simplify permission management (more on this later).
It’s also important to regularly review and update permissions to match current organizational needs.
Overusing unique permissions can lead to a complex system that’s hard to manage, so use groups whenever possible.
Sign up for exclusive updates, tips, and strategies
Now let’s talk about the best practices:
1. Apply security at the site level
Setting permissions at the site level helps maintain a structured and secure environment.
Well, it’s easier to manage than granular levels and provides a clear overview of who has access to what.
Here are some key steps to follow:
- Set default groups: Use built-in groups like site owners, members, and visitors for straightforward management.
- Control sharing settings: Manage sharing options to prevent unauthorized access.
- Regular Audits: Periodically review permissions to ensure they are up to date.
Applying permissions at the site level, rather than individual files or folders, simplifies management.
It ensures that all users within the site have the appropriate level of access without having to adjust settings for each item.
On the part of regular audits, they’re essential to maintain security.
These checks help identify and remove unnecessary permissions, ensuring only authorized users have access.
⚠️ Note: Over time, roles and responsibilities can change, so it’s important to keep permissions aligned with current needs.
2. Use built-in security groups
This simplifies the management of permissions even further.
That’s because built-in security groups come with predefined roles that fit most common scenarios.
Here are the main groups:
- Owners: Have full control over the site.
- Members: Can add, edit, and delete content.
- Visitors: Have read-only access to the site.
Default groups are designed to cover typical use cases, making them ideal for most organizations.
They also help maintain a consistent permission structure across your SharePoint environment by default.
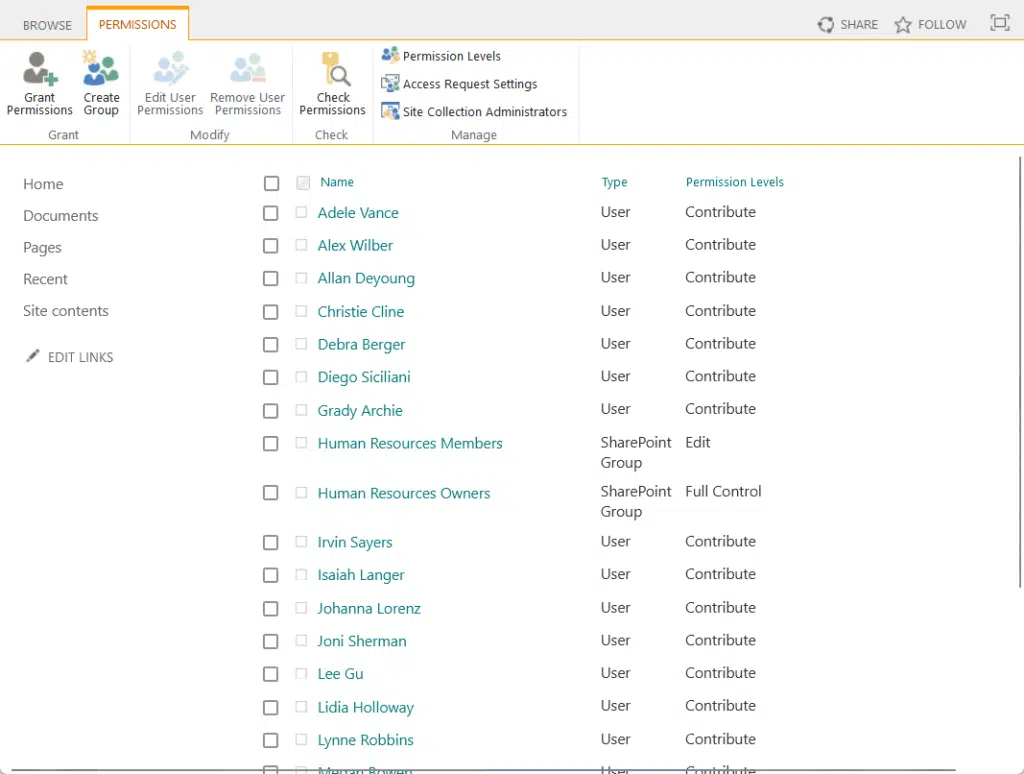
You can easily find them in the permissions settings:

This also ensures that users have the appropriate level of access without overcomplicating the permission setup.
Custom groups can be created if needed, but for most situations, the default groups will suffice in handling permissions effectively. 🙂
👉 Related: How to Create a SharePoint Custom Permission Level (Guide)
3. Manage site sharing settings
Managing site-sharing settings is vital for controlling who can access your SharePoint content.
Proper configuration of these settings helps prevent unauthorized sharing and protects sensitive information.
Here are some key actions to take:
- Restrict external sharing: Disable or limit sharing with external users.
- Set default sharing links: Configure default sharing options to limit broad access.
- Review sharing permissions: Regularly audit shared content and adjust permissions as needed.
Setting default sharing links to more restrictive options, such as “specific people,” helps limit who can view shared content.
This prevents the link from being forwarded to unauthorized users, ensuring tighter control over access.
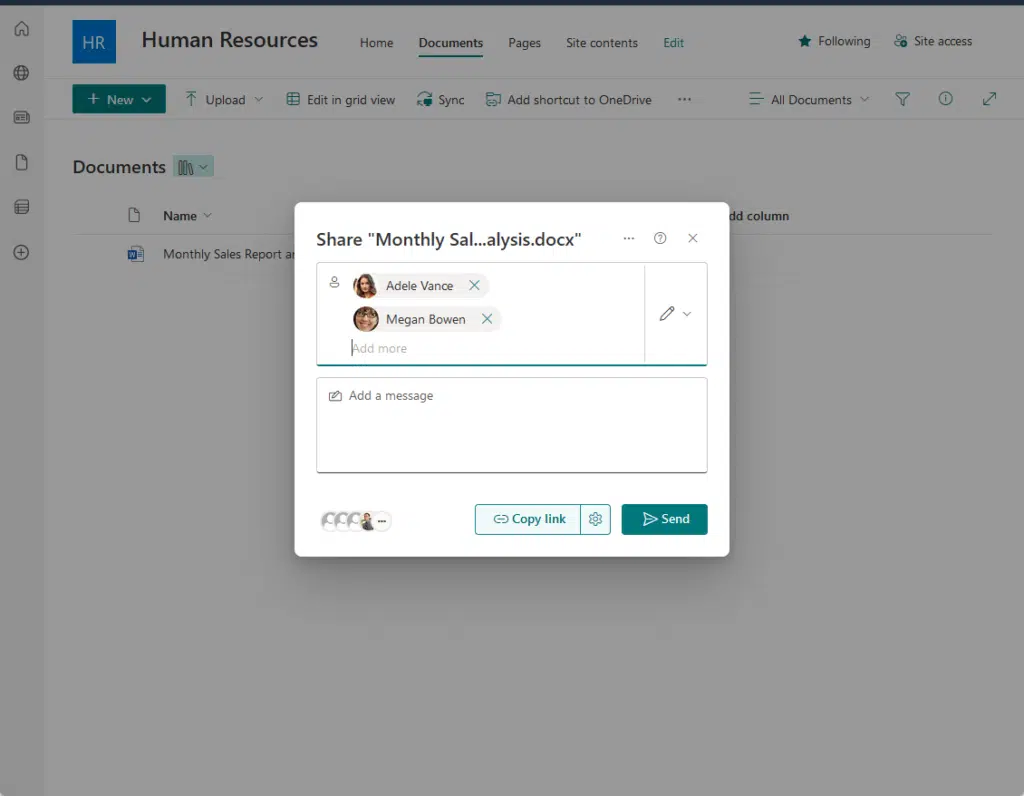
For example, when sharing a document, you can directly enter the people to whom you want to share it with:
But remember that regularly reviewing sharing permissions is essential to maintaining a secure environment.
Periodic audits on the links help identify any unnecessary sharing links or permissions that need to be revoked.
4. Disable external sharing on sensitive sites
The goal here is simple —to protect your organization’s most critical information.
By limiting who can access these sites, you can naturally reduce the risk of data breaches.
Here’s what you can do:
- Identify sensitive sites: Determine which SharePoint sites contain sensitive or confidential information.
- Adjust sharing settings: Disable external sharing for these sites.
- Monitor external access: Regularly review access logs to ensure no unauthorized sharing occurs.
Identifying sensitive sites involves assessing which sites hold critical business data or confidential information.
This can include:
- Financial records
- Legal documents
- Proprietary information
Adjusting sharing settings can be done through the SharePoint admin center.
Simply go to active sites > find and click the site > settings > choose the last option (only people in your organization):
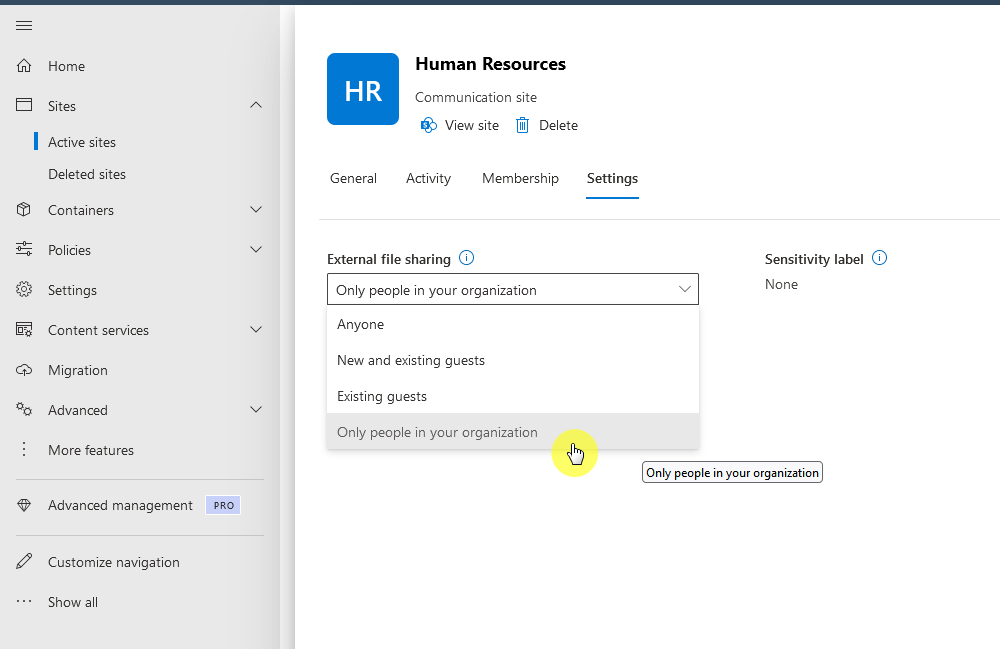
With that, only internal users have access to the sensitive content, preventing accidental or malicious sharing.
Like the first few practices above, regularly monitoring external access is essential to maintain security.
As I implied earlier, regular reviews of shared files and permissions are necessary to maintain a secure environment.
Here’s what to do here:
- Schedule regular audits: Set up a routine schedule to review permissions.
- Identify unnecessary shares: Look for files and folders shared with unnecessary users.
- Update permissions: Adjust permissions to reflect current needs and remove outdated access.
Scheduling regular audits is a proactive way to keep your SharePoint Online environment secure.
Set aside time, perhaps monthly or quarterly, to make sure that permissions are reviewed consistently.
Remember that updating permissions is a continuous process (and updated accordingly) as roles and projects change.
👉 Related: How to View SharePoint Online Audit Logs: Beginner’s Guide
6. Grant the least permissions possible
You might have figured out already that granting minimum permissions necessary is a fundamental practice.
Like the other items I mentioned above, this approach minimizes the risk of unauthorized access and data breaches.
Key practices include:
- Assign permission roles based on needs: Grant permissions based on the specific needs of the user’s role.
- Use read-only access: Default to read-only access unless editing permissions are absolutely required.
- Limit full control: Reserve full control permissions for a minimal number of administrators.
Assigning roles based on needs ensures that users have just enough access to perform their duties without exposing sensitive data.

Using read-only access by default means that users can view documents and information without the ability to alter/delete it.
Limiting full control to a few admins reduces the number of people who can make sweeping changes to the site or its contents.
👉 Related: How to Easily Change Group Permissions in SharePoint
7. Manage inheritance of permissions
Inheritance allows child sites and items to adopt the permissions of their parent site, simplifying management.
Here’s what to remember here:
- Understand inheritance: Know that permissions flow from parent to child sites unless broken.
- Break permission inheritance when needed: Stop inheritance if a sub-site or item needs unique permissions.
- Monitor inheritance settings: Regularly review inheritance settings to ensure they are appropriate.
Here’s what happens with inheritance:
Permissions applied at a higher level, like a site, will automatically apply to lower levels (lists and libraries) unless manually adjusted.
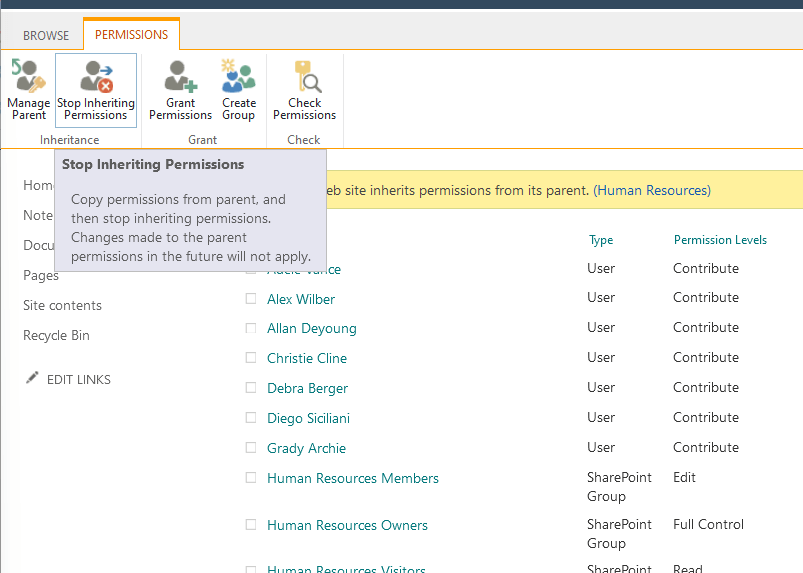
Breaking inheritance is necessary when certain sub-sites or items require different permissions from their parent site.
You can do this from the site settings of item settings:
You also need to monitor this to ensure that permissions remain suitable as the structure and needs of your environment change.
Regular reviews can identify where inheritance needs to be stopped or re-established to maintain security and proper access.
👉 Related: How to Set Unique Permissions on a SharePoint Subsite Only
8. Educate users on permissions management
No matter what practices and implementations you have, it won’t work unless users know what not to do.
Educating users is vital since proper training ensures users understand how to handle permissions responsibly.
Here’s what to do here:
- Provide training sessions: Conduct regular training to explain permissions basics and best practices.
- Create documentation: Offer clear, accessible guides on how to manage permissions.
- Promote ongoing learning: Encourage users to stay updated with the latest practices and tools.
Training sessions should cover the fundamentals of SharePoint permissions, including how to assign, manage, and audit them.
On the other hand, creating documentation ensures that users have a reference to turn to when they need guidance.
Promoting ongoing learning (additional training, webinars, etc.) involves encouraging users to update their knowledge regularly.
👉 Related: SharePoint Tips for Beginners: Easy Guide for Newbies
Advanced Permission Management Tips
There are a few more that you can do, though these require more planning on your part.
Using custom permission levels
Creating custom permission levels in SharePoint allows for more detailed control over user access.
This approach can help you fine-tune permissions to match specific needs since you can basically mix and match them.
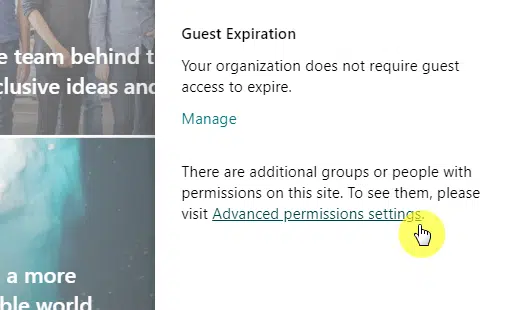
For this, go to the advanced permissions settings of the site:
Find the permission levels button on the ribbon on the next page.
This will bring you to the different permission levels on the site where you can add your own custom level.
Like this:
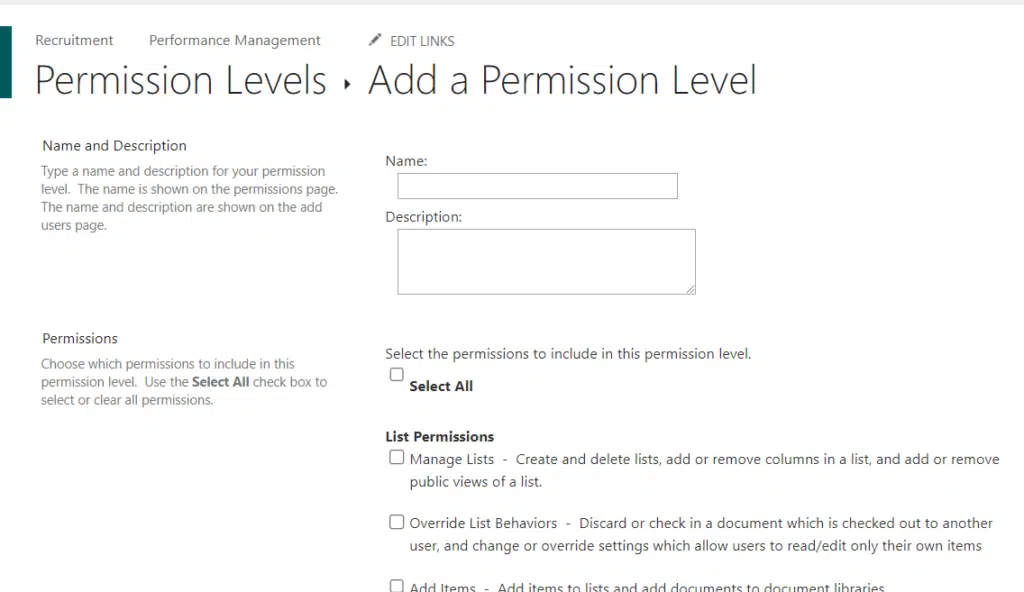
Simply go through the form.
Then check the permissions to include in the permission level.
It looks like this:
Custom permission levels enable you to grant only the necessary permissions required for specific roles.
Here’s a list of typical custom permission settings:
- Read-only access: Allows users to view but not edit content.
- Contribute without delete: Users can add and edit content but cannot delete it.
- Edit specific content: Grants editing rights to particular lists or document libraries only.
Make sure that these custom permission levels are documented and communicated to all relevant users.
You can read more information about creating a custom permission level in SharePoint in the guide below.
👉 Related: How to Create a SharePoint Custom Permission Level (Guide)
Integrating with Microsoft 365 groups
I explained this a little above about how SharePoint groups simplify permissions management and improve collaboration.
Using different groups rather than individuals allows for centralized control over group memberships and access rights.
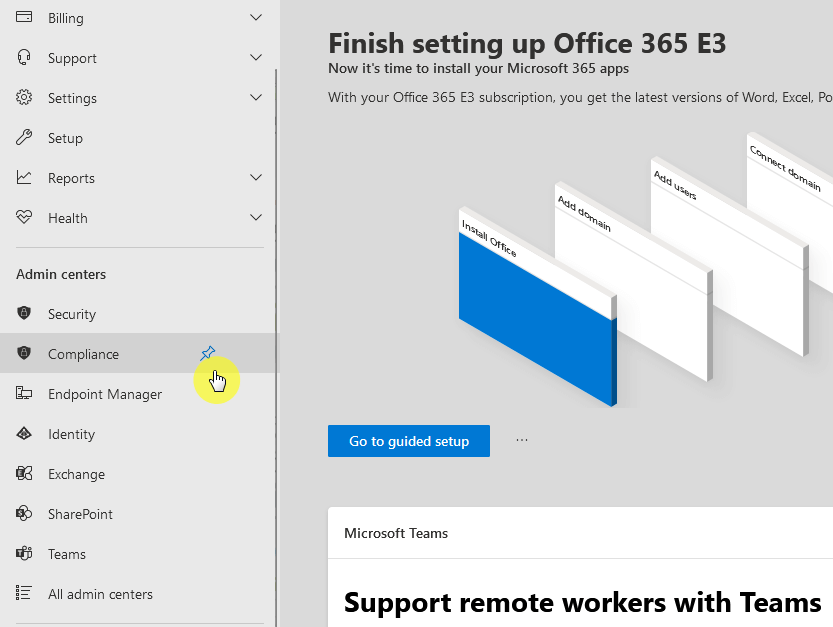
Fortunately, you can create groups from different places, like in the Microsoft 365 admin center:

This will also create different things like:
- SharePoint site collection
- Outlook Group calendar
- Outlook email distribution list
- Planner
You can also create groups from the SharePoint admin center, Microsoft Teams, Outlook, OneDrive, and more.
Creating a group involves setting up a collaborative space that includes shared resources like Outlook, Planner, and SharePoint.
Assigning permissions to the group is straightforward — it’s just like assigning to an individual (and it affects everyone in the group).
You can read more about creating a group in the guide I linked below. 🙂
👉 Related: How to Create a Microsoft 365 Group: The Ultimate List
Using audit logs and alerts
Using audit logs and alerts in SharePoint is key for maintaining security.
If you’re not familiar with it yet, audit logs basically track user activities and alert you to any unusual behavior.
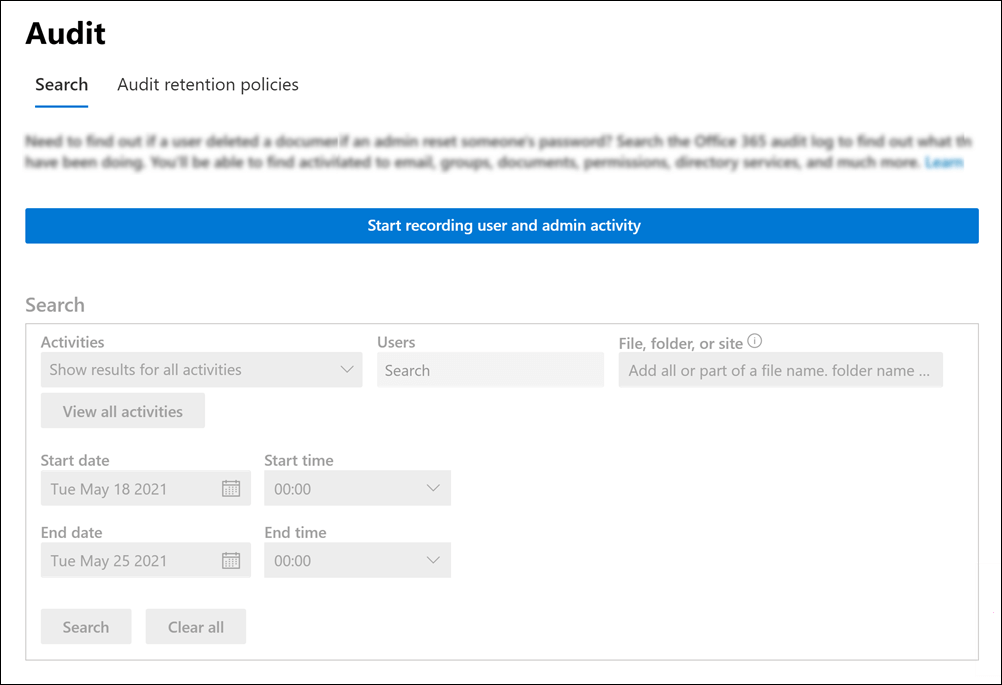
To set this up, you need to go to the Purview app (compliance center) first and go to the audit solution:
It’s likely the audit log tracking isn’t enabled yet.
Click the start recording user and admin activity button to start the recording.
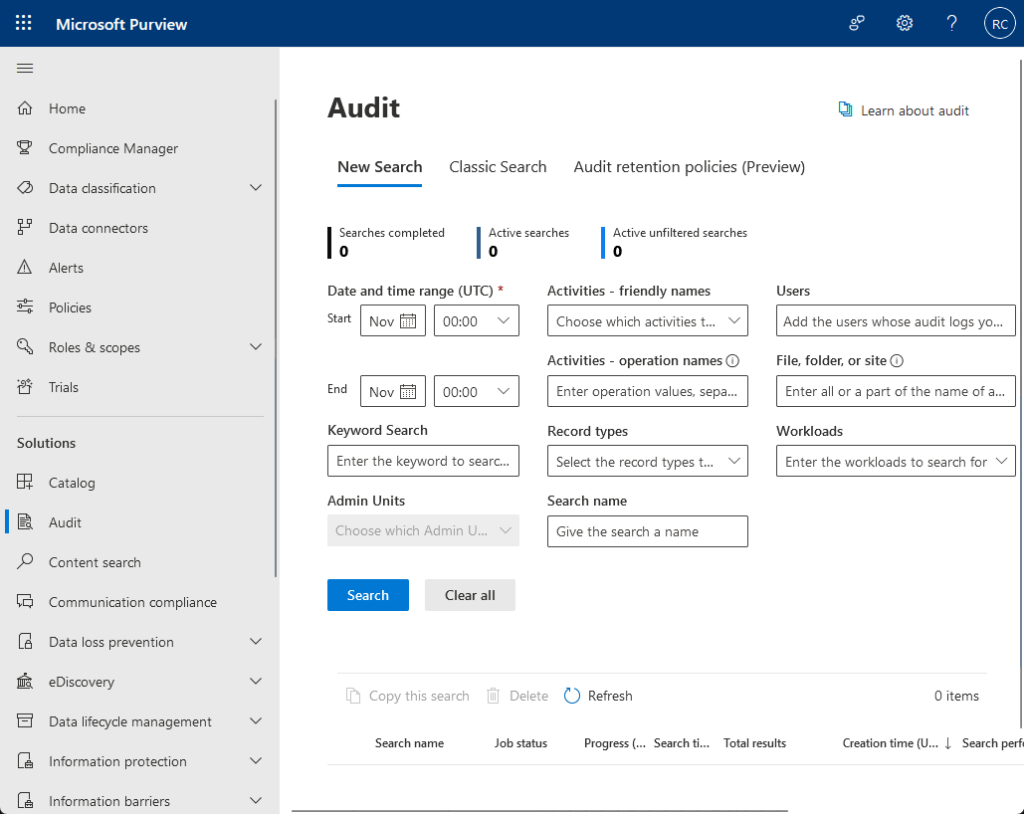
It’s in the search tab:
After the log tracking is enabled, the page will look different.
You will be able to create a new search with custom search parameters according to what you need to track or see.
Here’s a list of activities to monitor:
- File access: Track who is accessing sensitive files.
- Permission changes: Monitor changes in user permissions.
- File deletions: Keep an eye on deleted files to prevent data loss.
Make sure that audit logs are retained for an appropriate period to allow for thorough reviews and historical analysis.
If you want to read more about online audit logs in SharePoint, you can check out the guide for it in the link below. 👇
👉 Related: How to View SharePoint Online Audit Logs: Beginner’s Guide
Anyway, got any questions about the best practices for managing permissions in SharePoint? Let me know.
For any business-related queries or concerns, contact me through the contact form. I always reply. 🙂


