

Last Updated on June 9, 2024
Need to set up unique permissions for a subsite?
In this guide, I will walk you through setting unique permissions for a subsite in SharePoint Online.
Let’s get started.
Table of Contents:
Why set unique permissions for a subsite?
Setting unique permissions can significantly improve how you manage access and security within your organization.
It ensures that only the right people have the right level of access to specific content.
- Unique permissions help protect sensitive information by restricting access to authorized users only.
- Different teams can work on their projects within the same SharePoint environment without interfering with each other’s work.
- Ensuring that only specific users have access to certain data can help in meeting regulatory requirements.
Additionally, setting unique permissions can simplify user management and auditing processes.
It allows administrators to quickly see who has access to what and make necessary adjustments.
👉 Related: SharePoint Groups & Permissions Explained: How Permission Levels Work
Sign up for exclusive updates, tips, and strategies
Setting Unique Permissions for a Subsite
Here’s how to do it:
Step 1: Access the subsite settings
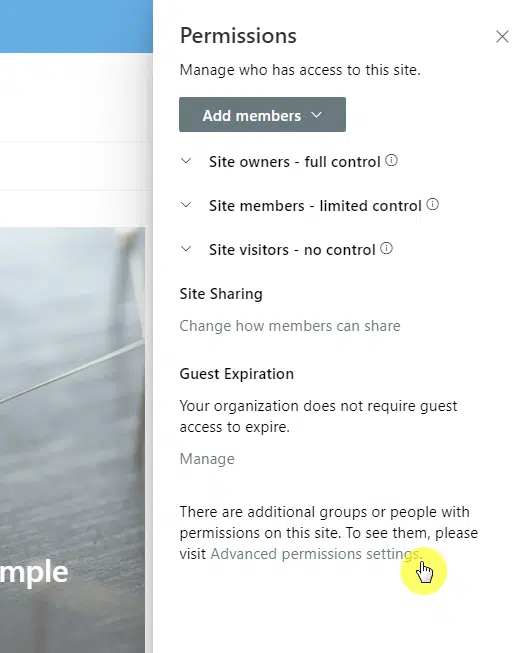
Assuming you already have a subsite created, you need to visit the site permissions page of that subsite.
There are two ways to go there from the gear icon:
- Site information > view all site settings > site permissions
- Site permissions > advanced permissions settings
By the way, if you have yet to create the SharePoint subsite, you can set it beforehand to have unique permissions.
Scroll down on where you can create a subsite from the site contents until you see the permissions settings.
Make sure to select “use unique permissions”:
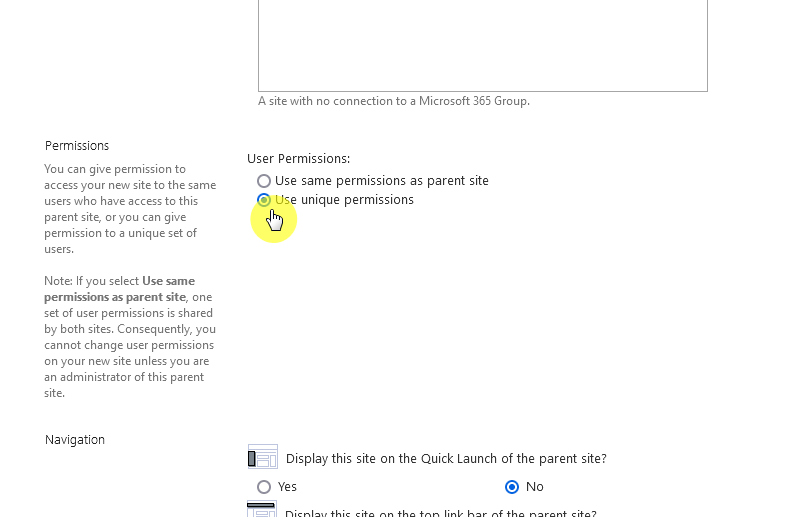
At least you know now that you can set this before the subsite gets created. 🙂
👉 Related: How to Create a Subsite in SharePoint Online: Step-By-Step
Step 2: Break permission inheritance
But if the subsite was already created, it will inherit the permissions from the parent site or main site.
Anyway, the step earlier will bring you to a page that’s reminiscent of SharePoint’s classic experience.
Click the stop inheriting permissions button from the permissions tab in the ribbon:
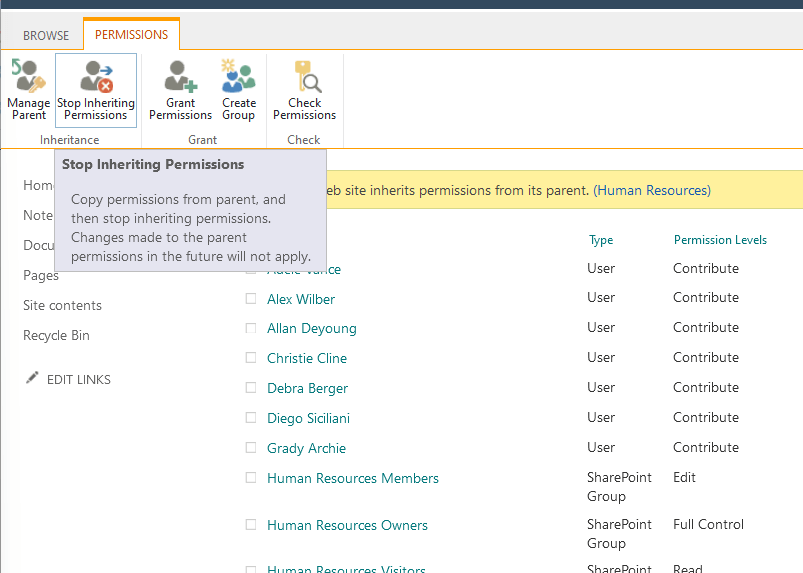
You can see that there’s also a banner informing you that the SharePoint site inherits permissions from its parent.
After you stop inheriting permissions, the screen will change to where you can set up groups for the site.
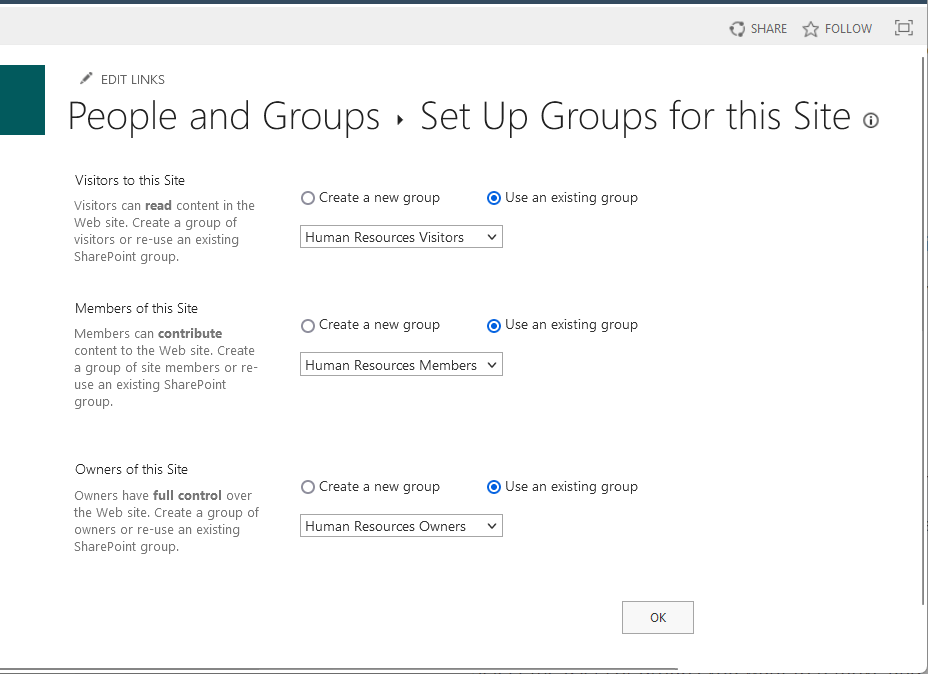
You should only change the settings here after you create permission groups specific to that subsite.
Other than that, feel free to skip this part and leave the settings as they are.
👉 Related: How to Easily Change Group Permissions in SharePoint
Step 3: Remove unwanted permissions
The next step is to remove user permissions.
Select the names of those users and/or groups > click the remove user permissions button from the top bar:
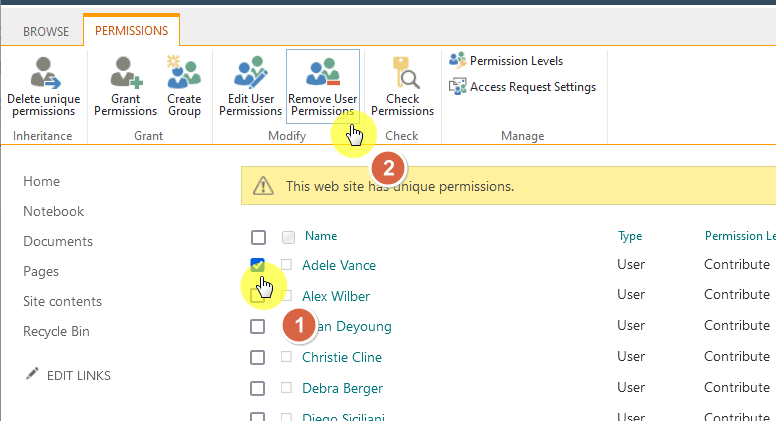
That will then remove all permissions for the user or group that you selected.
Step 4: Add unique permissions
You can then create unique permissions for specific users or groups.
If you select a user or group, you can edit its user permissions (the one beside the remove button).
This will bring you to this page where you can change permissions for those users/groups:
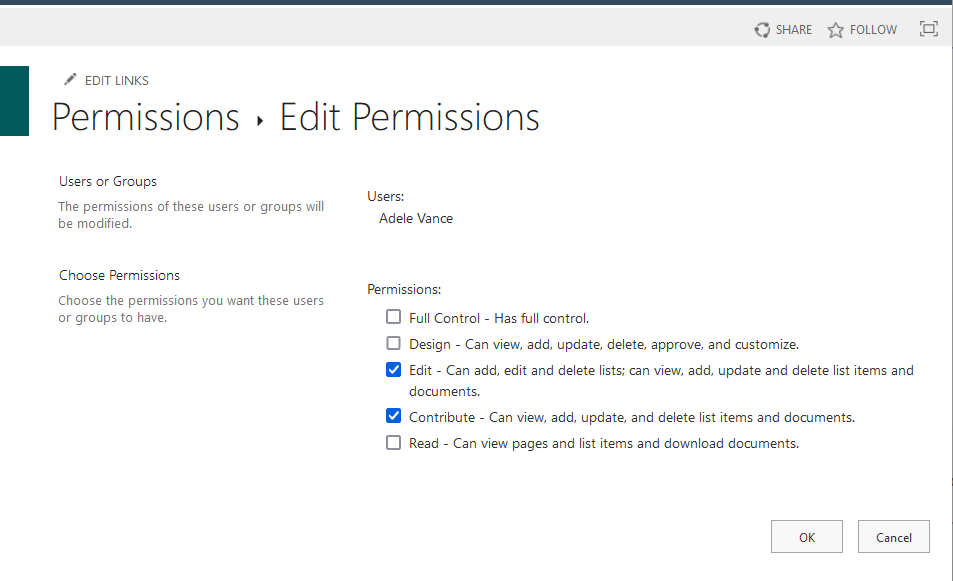
You can then click different permissions for the user or group.
Besides this, you can also grant unique permissions to users or groups if they’re not added yet.
The best practice would be to create a permission group and then grant permissions to them.
Click its button from the ribbon:
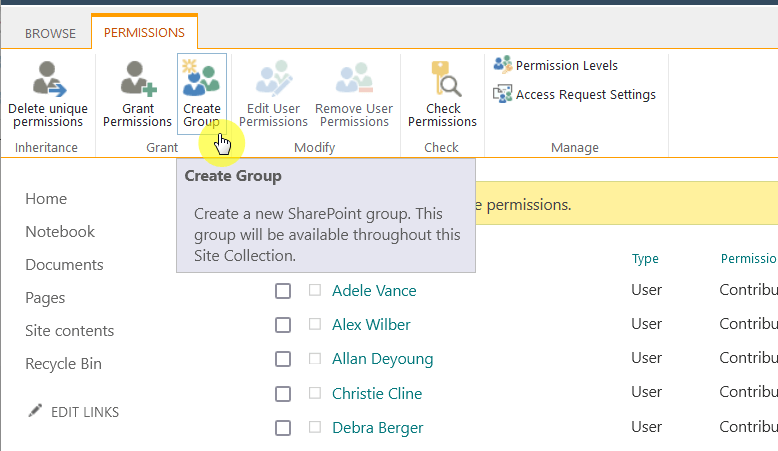
This will create a new SharePoint group that will be available throughout the whole subsite.
At the bottom of the form, you can select the permissions for this new group.
Like this:
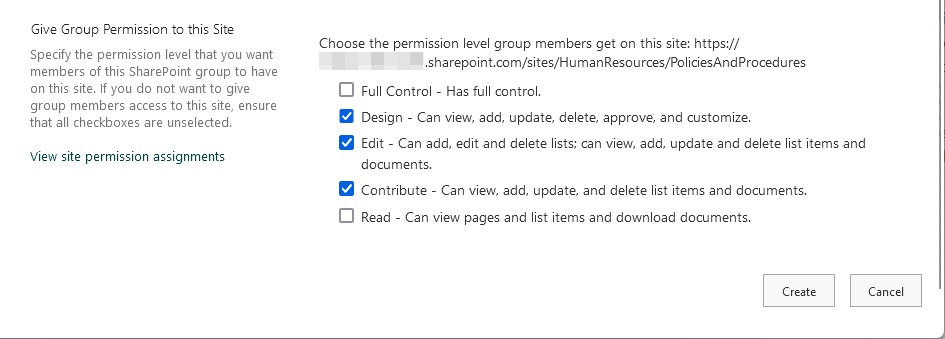
That’s it! 🙂
⚠️ Note: If you want to add a custom permission level, and found that you can’t, that’s because you can only create a custom permission level on the parent or top-level site.
👉 Related: How to Create a SharePoint Custom Permission Level (Guide)
Additional Tips for Subsites
Managing permissions for subsites in SharePoint can be a straightforward process if you follow some best practices.
Here are some tips that can help:
- Periodically review permissions to ensure that only the right users have access.
- Keep your permission structures as simple as possible to avoid confusion and errors.
- Provide training for users on how to manage and request permissions effectively.
It’s also helpful to document any changes you make to permissions.
This documentation can serve as a reference for future audits and troubleshooting.
Anyway, got any questions about setting unique permissions for a subsite? Let me know.
For any business-related queries or concerns, contact me through the contact form. I always reply. 🙂


