

Last Updated on June 2, 2024
Need to create a document library?
In this guide, I will walk you through creating a document library, step-by-step, and much more.
Let’s get started.
Table of Contents:
What is a document library?
A document library is a specialized folder where you can store, organize, and manage various documents and files.
It provides a centralized location for team members to:
- Collaborate on documents
- Share information
- Ensure that everyone has access to the most current version of a file
Technically speaking though, a document library is still a list — although it’s designed to store files.
Key features:
- Version control: Keeps track of document changes, allowing users to view or revert to previous versions.
- Metadata columns: Enables you to add specific details about documents for better organization and searchability.
- Permission management: Allows you to control who can view, edit, or manage documents within the library.
- Co-authoring: Multiple users can work on the same document simultaneously, promoting real-time collaboration.
- Alerts and notifications: Users can set up alerts to be notified about changes or updates to documents.
Document libraries support a wide range of file types and integrate seamlessly with other Microsoft 365 applications.
Moreover, document libraries can be customized with different views and metadata to fit the unique needs of your organization.
👉 Related: SharePoint Document Library Types: Differences Between Them
Sign up for exclusive updates, tips, and strategies
Creating a Document Library (Step-by-Step)
Creating and managing document libraries would be a regular task if you use SharePoint.
Fortunately, the creation process itself isn’t really that difficult (maybe only the customization part).
Step 1: Create a new document library
There are two places where you can add a new document library:
- Home
- Site contents
Both of them follow the same steps where you click on the new button > document library option:

You’re almost done. 🫡
Step 2: Select how to start
You should now see a small window where you have three options:
- Blank library
- From existing library
- Templates
It looks like this:
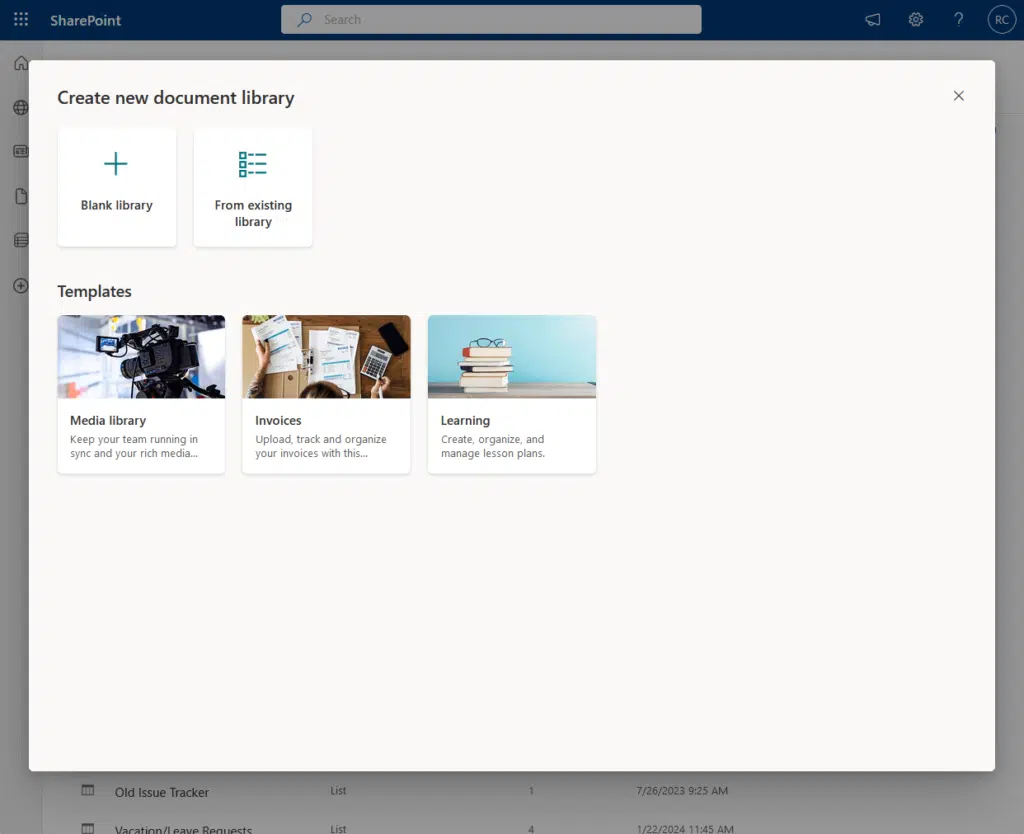
Starting with a blank library means you start from scratch.
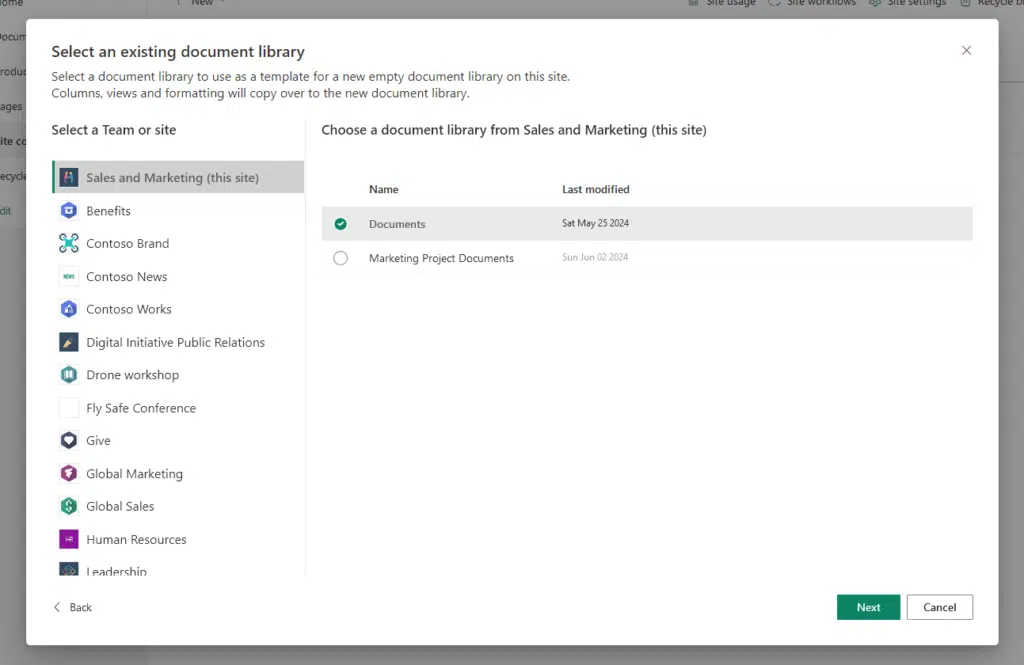
If you start from an existing library, you will be able to choose an existing library from all the SharePoint sites in the tenant.
Like this:
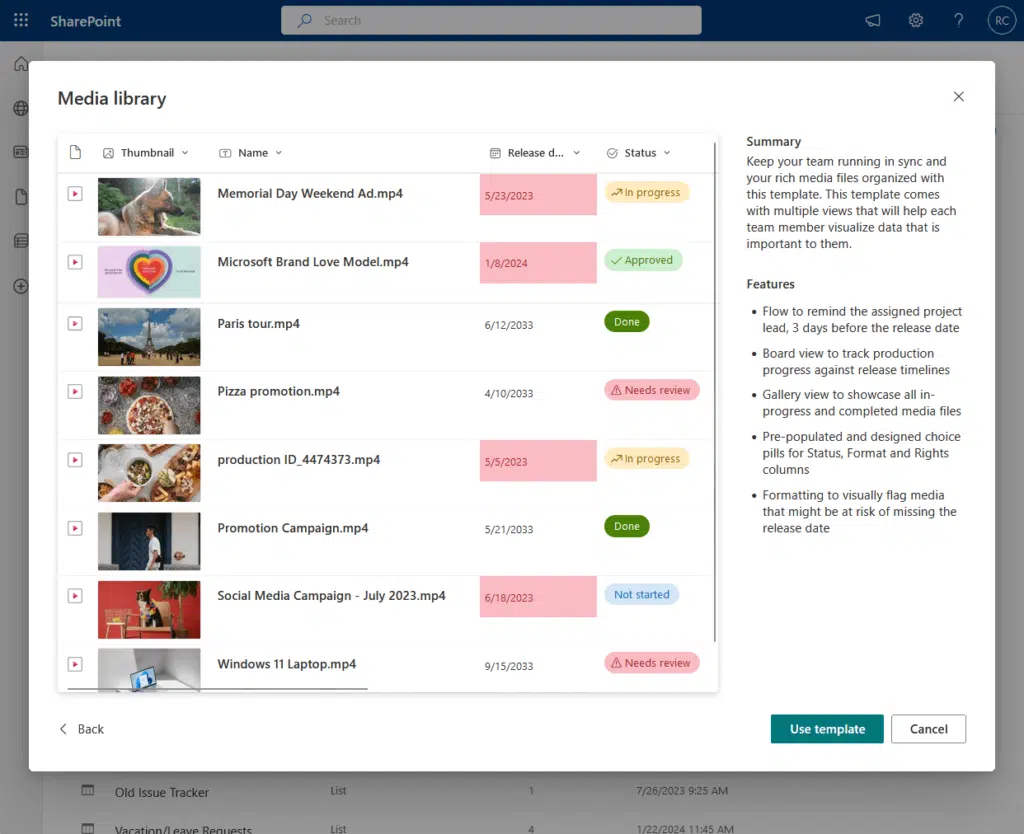
You can also start from a document library template.
These are premade templates that already contain various elements like:
- Metadata columns
- Custom flows
- Document library views
- Formatting
Once you select a template, you will be able to see a preview of it and what features it includes.
After selecting a template, you will be able to give the new document library a name and a description (optional).
You can also opt to show it in site navigation (enabled by default), though I prefer not to unless it’s needed.
Like I say — if there’s a template for what you want to do, you better start from it to save time and reduce effort.
👉 Related: How to Use SharePoint Modern Document Library Templates
Step 3: Populate the document library
Now that you have a document library, you can populate it with files and documents.
There are a lot of ways you can do this:
- Drag the file
- Create a new document from the library itself
- Upload button
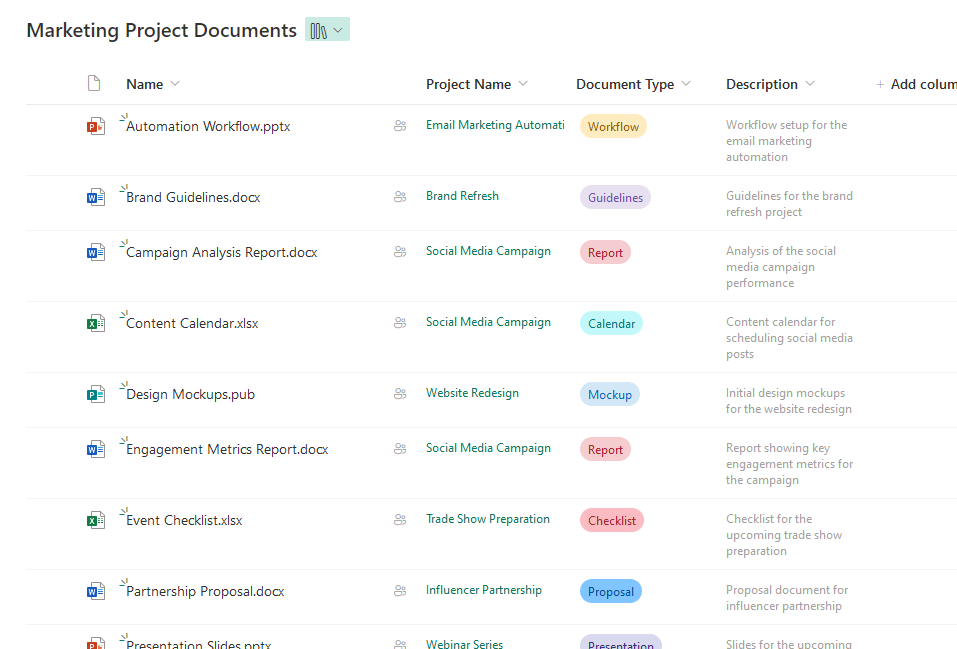
To give you an idea, here is what a document library filled with files looks like:
When uploading files, you need to take note of the following:
- The total upload mustn’t be more than 100 GB
- There should only be 30,000 files or less
- The file or document itself mustn’t be more than 15 GB
Technically speaking, this is due to what’s called the “5,000-item limit threshold” in SharePoint that’s a pain to fix.
👉 Related: How to Resolve the SharePoint 5,000 Item List Limit Threshold
Document Library Customization
Customizing your SharePoint library improves the searchability and accessibility of information.
Let’s talk about the most basic ones:
What are metadata columns?
Creating columns allows you to add metadata to your documents, which makes it easier to categorize, sort, and filter files.
There are all sorts of columns, such as:
- Single line of text: Allows users to enter a single line of text for each document
- Choice: Provides a dropdown menu with predefined options
- Date and time: Enables users to add specific dates and times to documents
- Number: Allows users to enter numerical values, useful for tracking quantities or other numeric data
- Person or group: Enables selection from a list of users or groups in the organization
Adding metadata columns helps maintain consistency across your document library, so it’s more structured and user-friendly
Properly defined columns facilitate better document management and improve search accuracy within the library.
👉 Related: SharePoint Column Types Explained: Overview and Use Cases
How to create these columns?
Adding columns is also a regular task that you would be doing in SharePoint.
Click the add column button in the document library > select the type of column to add > next button:
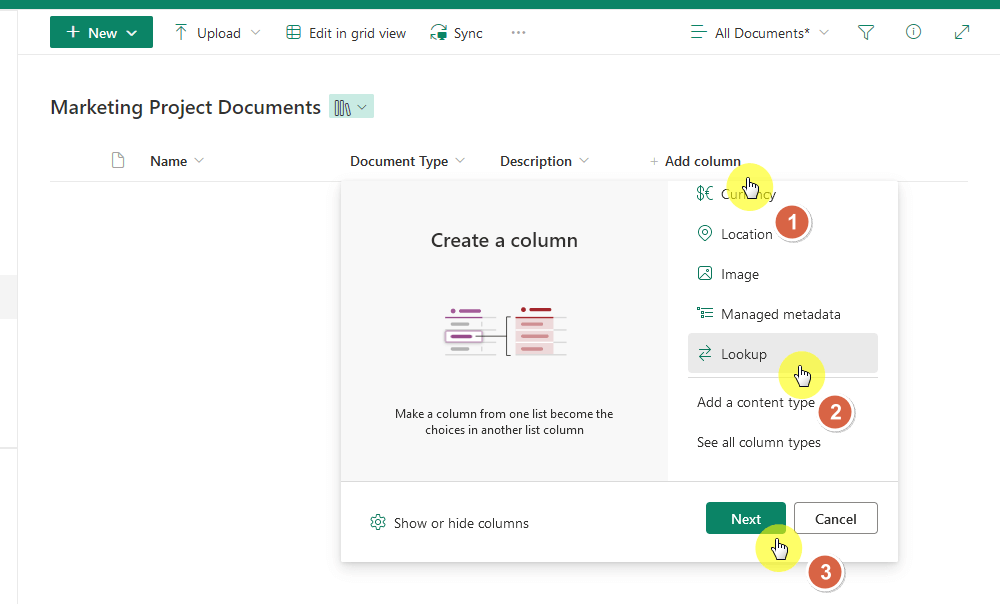
It will then open the property pane where you can configure the new column.
The options are different depending on the column type.
Here’s an example of the property pane in a lookup column:

Once you save that column, you will be able to add information for each item on that column.
The easiest way to add metadata to a file in a document library is to right-click on it > more > properties.
Like this:
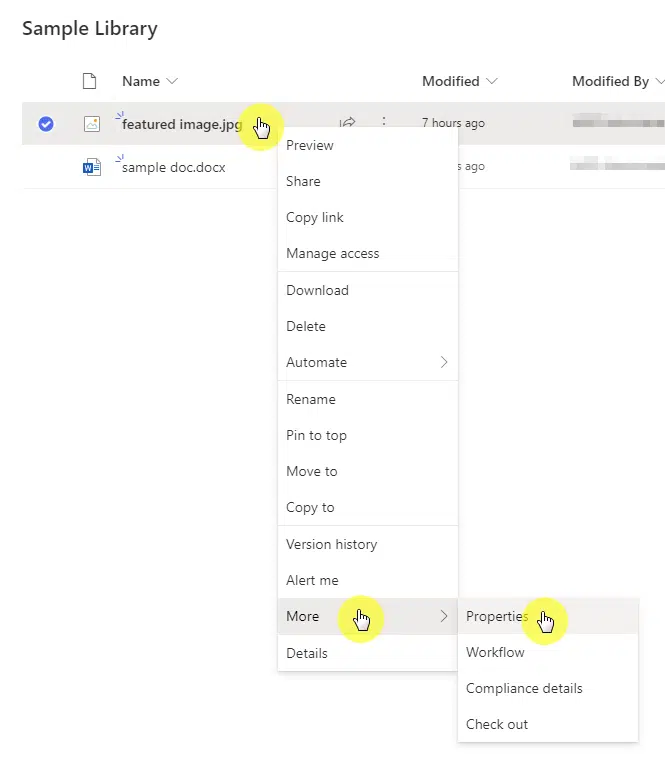
It will then open a modal where you can edit the properties of that file or item and enter information for a column.
Easy! 👏
What are these “views”?
Creating new views allows you to display documents in various ways, depending on your requirements.
Views can be customized to show specific columns, filter items, and sort documents, which is a nice help.
There are three basic types of views:
- Standard view: Displays documents in a traditional list format with customizable columns
- Calendar view: Shows documents with date metadata in a calendar layout, useful for tracking deadlines
- Gallery view: Displays documents as visual thumbnails, helpful for image libraries
Views can also be personal or public.
Basically:
- Personal views are only visible to the user who created them
- Public views can be accessed by anyone with permission to the document library
This flexibility allows you to create views that best suit your or your team’s needs.
Creating custom views helps streamline document management by allowing you to focus on the most relevant information.
You can switch between different views depending on your task, improving productivity and document organization.
Views can also be modified or deleted as requirements evolve so your document library remains flexible and user-friendly.
How to create these views?
By default, there are already views created for your document library (though these are default ones).
You can see them when you click the switch view options button — and this is also where you can create a new view.
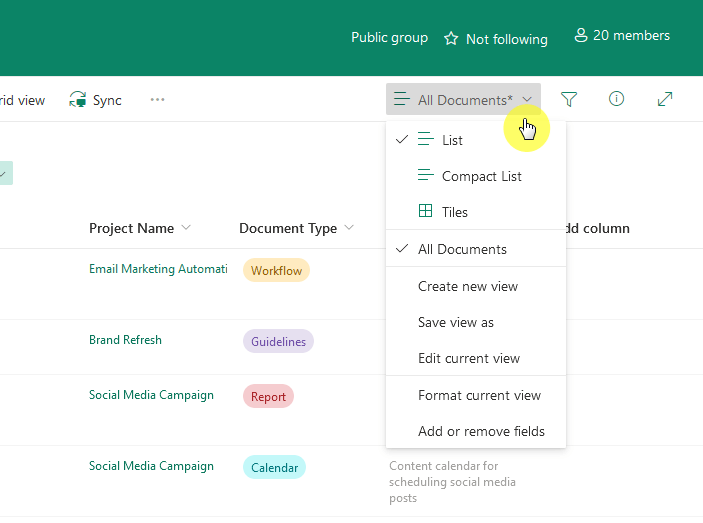
When you click on the “create new view” instead, a small pop-out will appear.
The default view is the standard “list”, while the calendar view has the most configurations.
The gallery view has the same config options as the standard view.
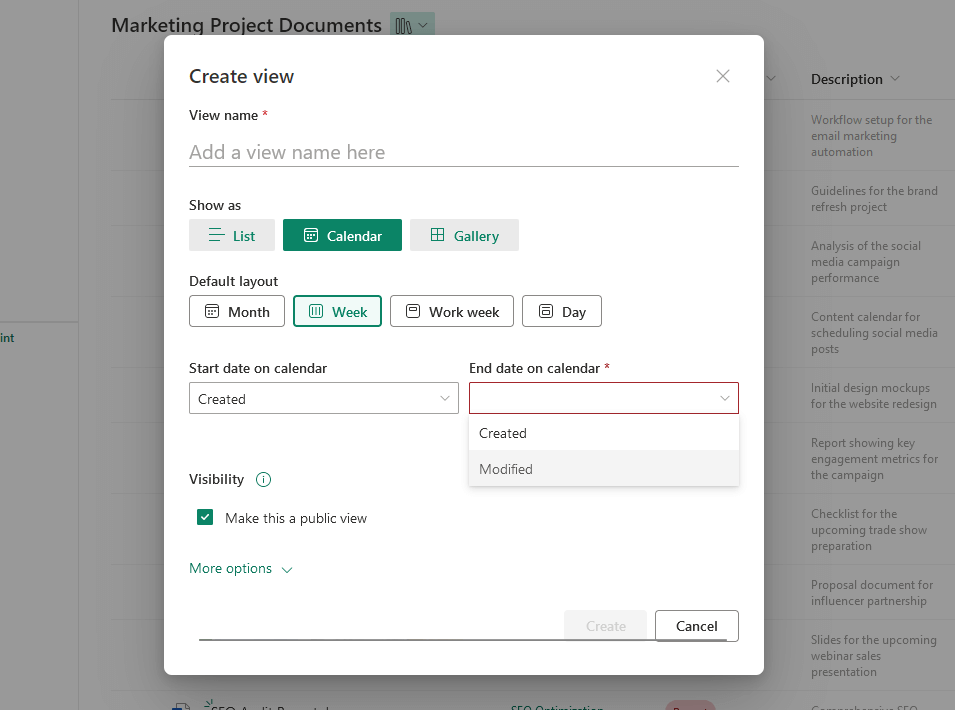
The calendar view is useful if you have “created” and “finished” columns in the library.
But for demo purposes, here’s what a calendar view looks like:
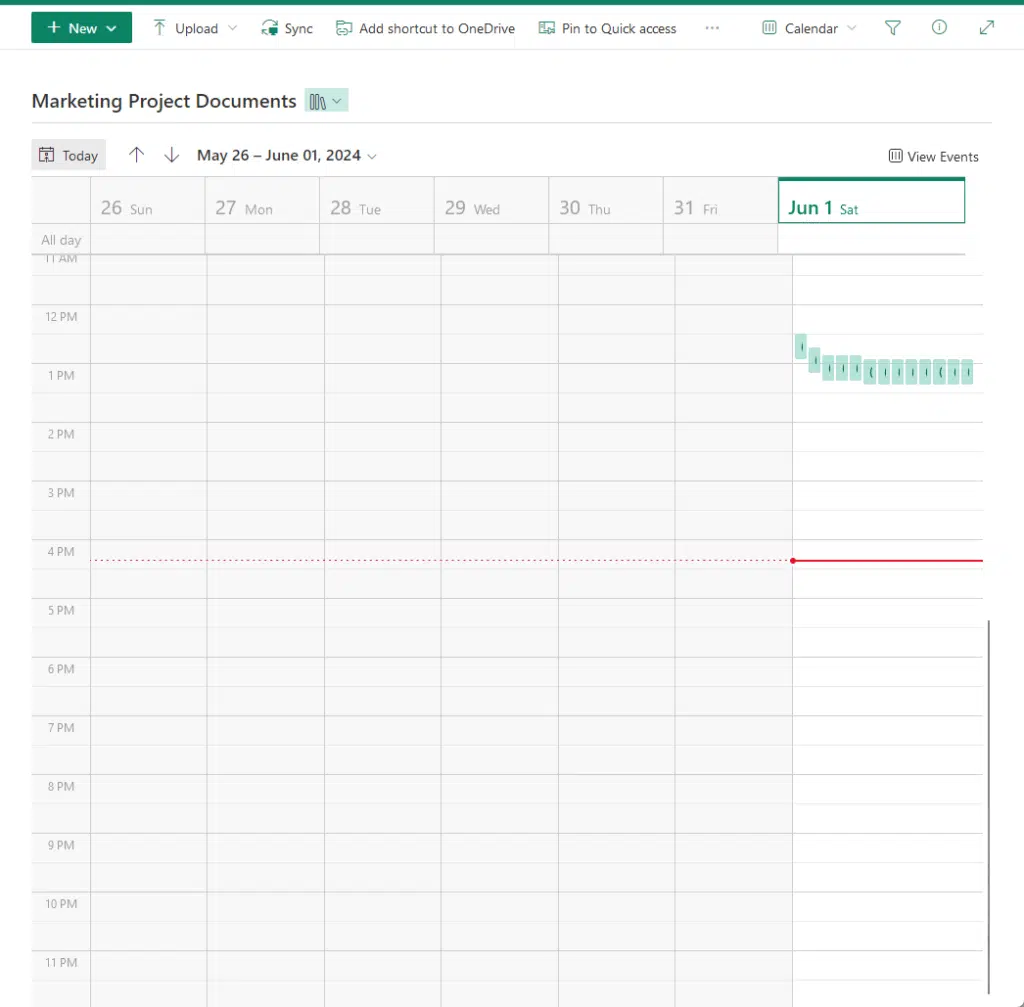
Nice! 👍
👉 Related: How to Create a SharePoint Custom List View (Quick Tutorial)
Advanced Features and Settings
SharePoint document libraries have basic and advanced settings.
You would know it’s an advanced setting if it’s not in the modern interface and it’s, well, a little confusing. 😅
Anyway, if you wish to see more settings, click the gear icon > library settings while in the document library.
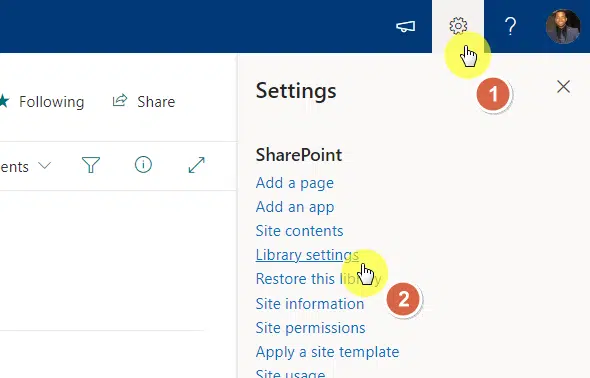
Not yet.
You need to click the “more library settings” button in the panel:
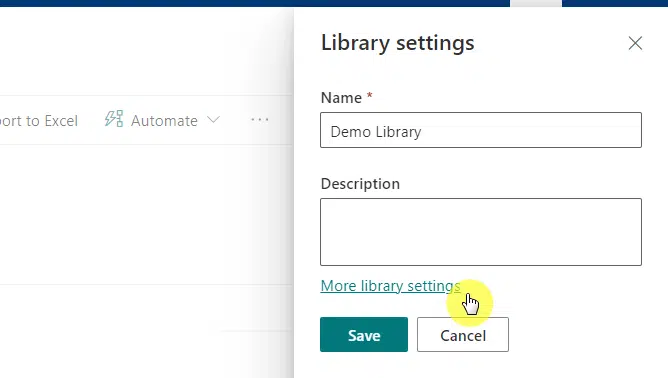
The settings page will then appear.
It looks like this:

Well, it’s a little overwhelming, but rest assured that you don’t need to know everything to use SharePoint. 🙂
Many users get by without visiting this page, especially since the modern experience is slowly bringing out the settings.
👉 Related: Beginner’s Guide to SharePoint Library Settings (Overview)
Content types
Content types in SharePoint are a way to define the attributes of a certain kind of item or document.
They enable you to manage and organize content by grouping related columns, document templates, and settings.
Examples of content types:
- Document: Standard type for Word, Excel, and PowerPoint files
- Image: For storing and managing image files with additional metadata
- Form: Used for creating and managing digital forms
- Task: Defines attributes for task items, including due dates and status
- Event: Manages event details such as dates, locations, and descriptions
Using content types ensures that similar documents and items are handled in the same way.
But to add a content type, you must have created a content type first in the content type gallery.
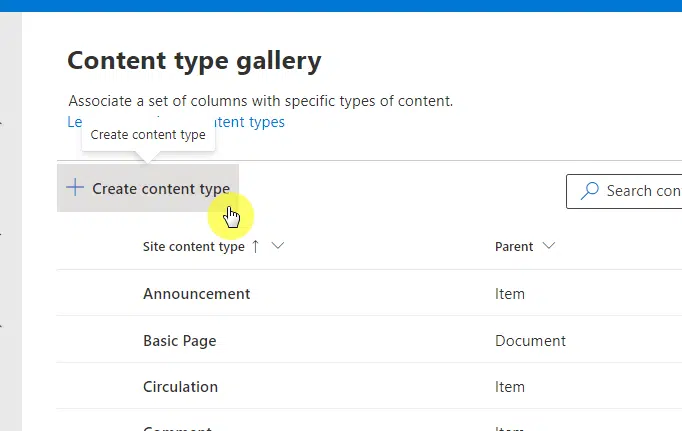
👉 Related: How to Create Modern Content Types: The Ultimate Guide
If you have already had one, the steps are quite similar to adding a new column:
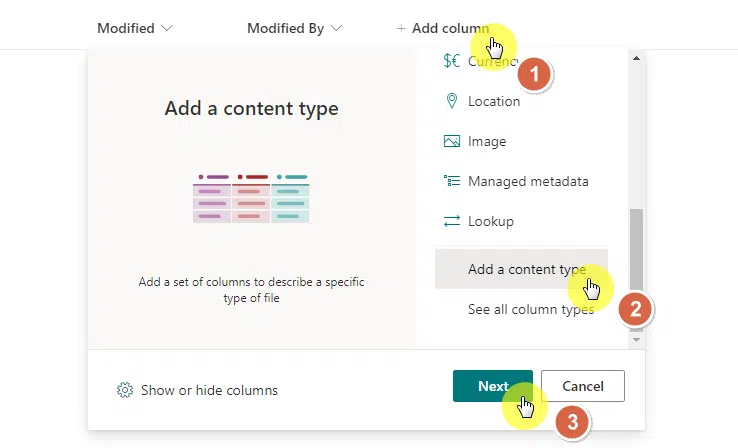
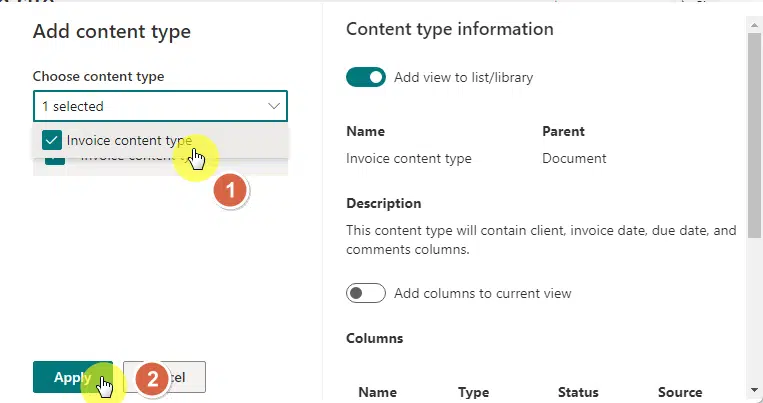
This will then open another panel.
From there, you will be able to select the content type you created and apply it to the document library in SharePoint.
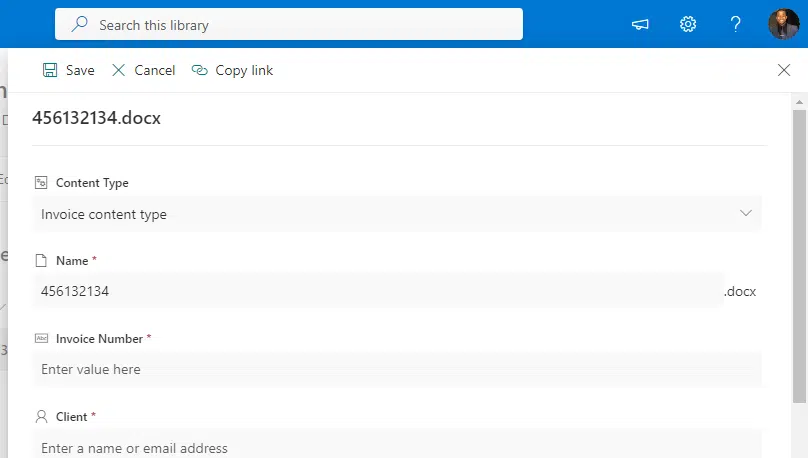
Content types have predetermined columns (so you won’t have to add them every time you create a similar library).
For example, I once created an invoice content type that requires me to enter invoice-related metadata.
Like this:
Content types can be reused across different libraries and lists within a SharePoint site.
They can also be updated or modified as needed to accommodate changing requirements (like when requirements change).
Managing permissions
Managing permissions in SharePoint allows you to control who can view, edit, and manage documents and libraries.
This ensures that only authorized users have access to sensitive information and can perform specific actions.
There are different types of permissions:
- View only: Users can view documents but cannot edit them
- Edit: Users can add, edit, and delete documents
- Contribute: Users can add new items and edit existing ones
- Full control: Users have complete access and can manage all settings
- Read: Users can only view documents without making changes
Permissions can be managed at different levels, including site, library, folder, and document levels.
This flexibility allows for granular control over access and actions within your SharePoint environment.
This helps protect sensitive data and ensures that users only have access to the information they need.
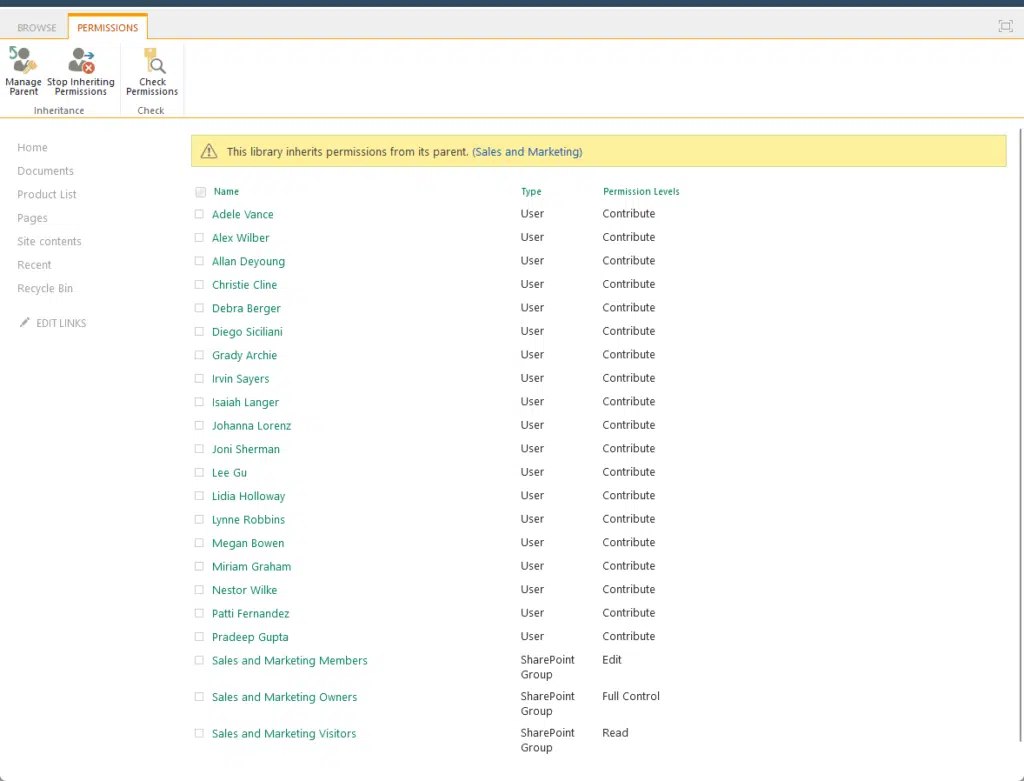
Anyway, the permissions in the library are inherited permissions, you can either:
- Manage the parent permissions
- Break the inheriting permissions
When you break the inheritance, you will be able to create custom permissions (explained in another article).
👉 Related: How to Create a SharePoint Custom Permission Level (Guide)
Automating workflows
Automating workflows in SharePoint allows you to streamline repetitive tasks and processes.
Workflows can automate tasks such as document approvals, notifications, and data collection.
Here are some common workflow types:
- Approval: Routes documents for approval to specific users
- Review: Assigns documents for periodic review and feedback
- Feedback: Collects feedback from multiple users on a document
- Notification: Sends email notifications based on specific triggers
- Data collection: Gathers information from users via forms
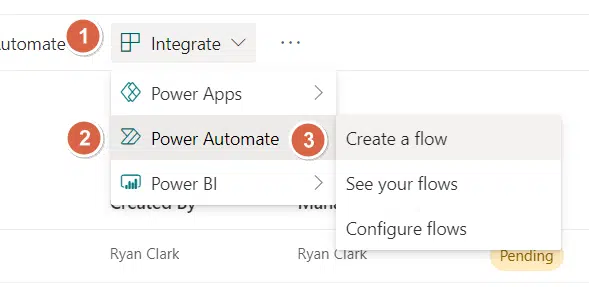
If you want to create a workflow, go to integrate > Power Automate > create a flow:
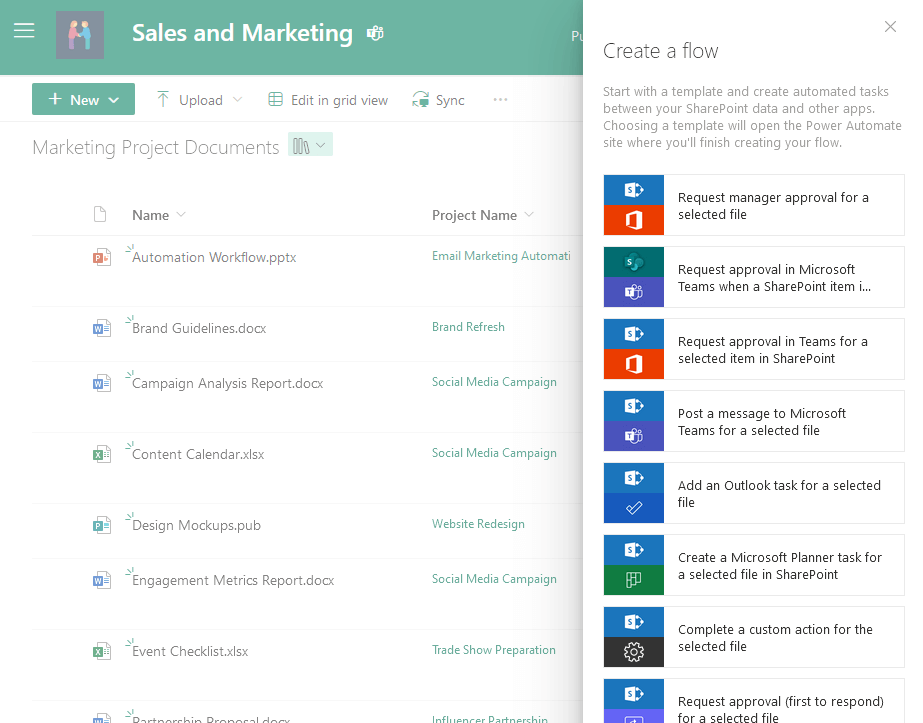
This will open a panel where you can browse for flows.
If you click on one, another page will open that will take you to Power Automate and enable you to configure the flow.
Regularly reviewing and updating workflows is important to ensure they remain aligned with business processes.
Documenting workflows helps in tracking changes and provides a reference for training new users.
👉 Related: SharePoint Workflow Options: Business and Project Management
Adding your document library to the navigation in SharePoint makes it easily accessible for users.
This helps in promoting its usage and ensures that team members can quickly find and use the library.
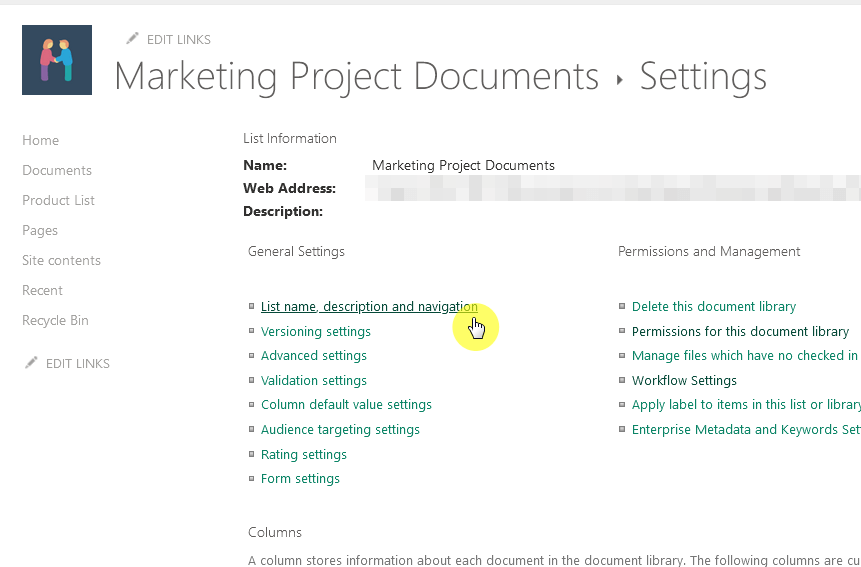
If you didn’t opt to have the library be shown in site navigation, you can still do it from the library settings.
Go to the list name, description, and navigation settings of the library:
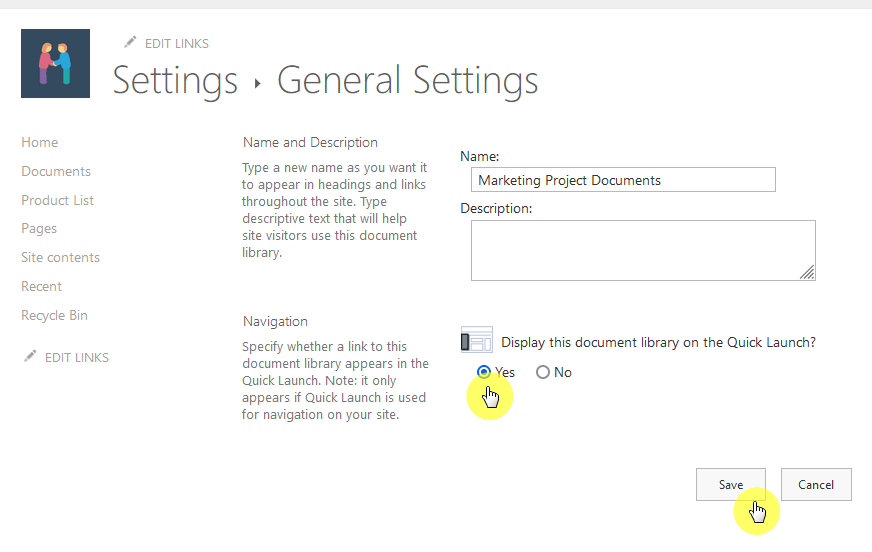
There are only two choices on the next page, with navigation being the last.
Click on the “Yes” button and press the save button:
You will then see a link in the quick navigation to the SharePoint document library. 🙂
Going forward, regularly review and update navigation links to reflect changes in site structure and user needs.
Removing outdated links and adding new ones ensures that navigation remains relevant and useful.
👉 Related: The SharePoint Online Quick Launch Navigation Menu
Anyway, got any questions about creating a document library in SharePoint Online? Let me know.
For any business-related queries or concerns, contact me through the contact form. I always reply. 🙂


Hello!
I need to create a new library from an existing one. I want to retrieve the whole folder structure and custom columns, without the files. However, the SharePoint site I need to create this new library on, is a Document Center. So the “new” button, doesn’t open the pop-up to choose the option “from an existing library”. Any idea how to do that? Thanks!