

Last Updated on June 2, 2024
Need to connect a certain list and library?
In this guide, I will walk you through connecting a list and a library in SharePoint Online easily.
Let’s get started.
Table of Contents:
Lookup Column (Connection)
When you set up a lookup column, it creates a direct link between your list and library.
This allows you to pull information from the list into your library and maintain a cohesive and organized structure.
For this guide, I will be using these:
- Marketing projects list
- Marketing projects documents library
Both the list and library have a common column — project name — which I will use as the lookup field.
⚠️ Note: Power Automate isn’t included here. All the steps and methods are in SharePoint.
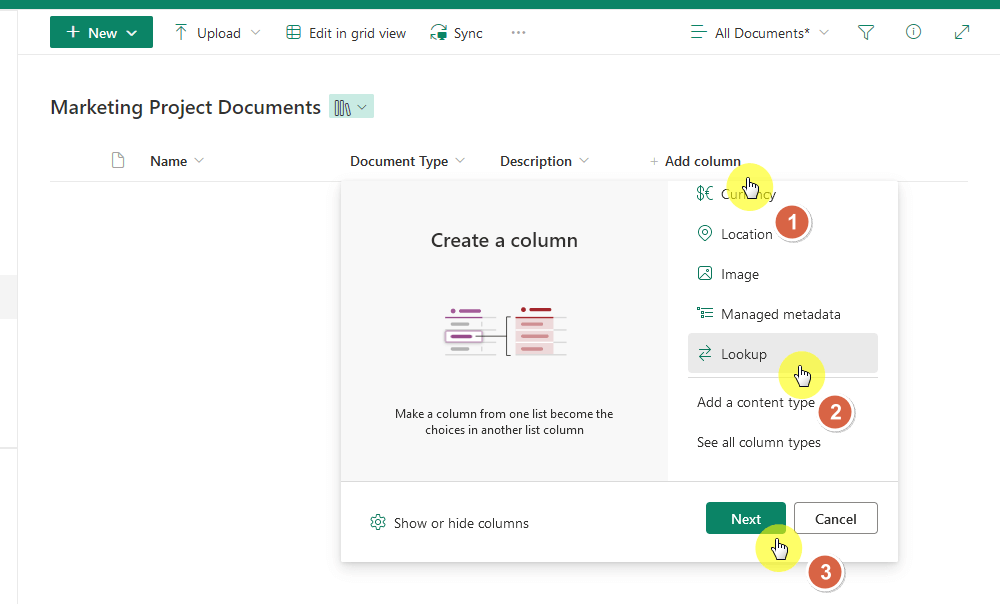
Step 1: Add a lookup column
I already have the list, so what I’m about to show you is on the side of the document library.
Click the add column > lookup option and click the next button:
The next part is to configure the lookup column.
Step 2: Configure the column
The common column would be the project name, which is also the renamed title column of the list.
To make things easier, that’s also the name I would use for the lookup column in the document library.
After entering the name, simply indicate the:
- List source (data source)
- The target column from that list
Like this:

Save to create that column. 🙂
⚠️ Note: In the modern version of SharePoint, there is no need to go into the list settings for basic configurations.
To know whether or not it works, you must try it.
Here’s what it looks like after I uploaded the documents and then linked them up with the list:
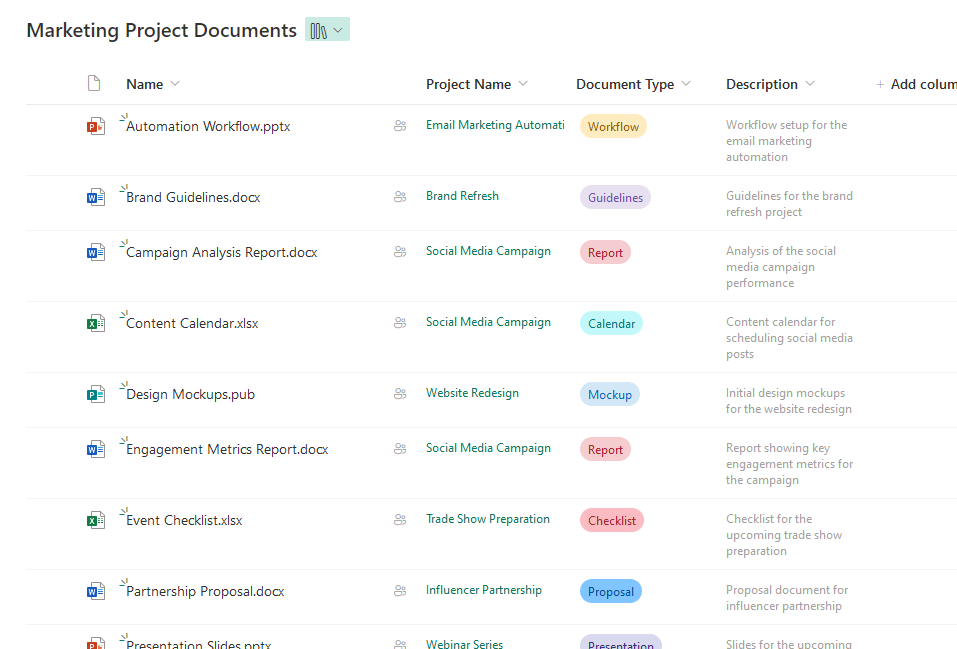
As you can see, the information under the lookup column looks like hyperlinks.
Well, that’s because they are. 🙂
If you click on one, it will open that specific item on another page.
Like this:
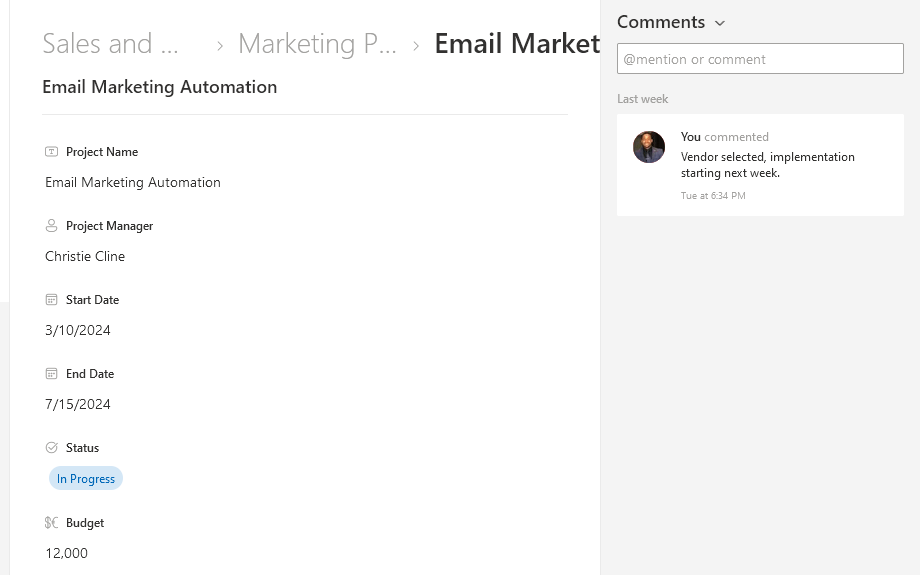
If you want another lookup column on the other list or library, you need to create another lookup column there.
The list or library that has the lookup column is the only one that can visit the specific item from the other.
👉 Related: SharePoint Lookup Column, List – How to Create One Easily
Sign up for exclusive updates, tips, and strategies
Dynamic Filtering (No Linking)
Dynamic filtering allows you to view and organize data without creating permanent links between lists and document libraries.
This helps you manage large sets of data by allowing you to filter information dynamically based on specific criteria.
By the way, this is the option to go if you don’t want to mess anything up in the list or library (this is on a page).
Step 1: Add the list and library web parts
Since this is more of a feature of a web part, you need to add those web parts first to a page.
Click the add button > search for the list (or document library) web part:
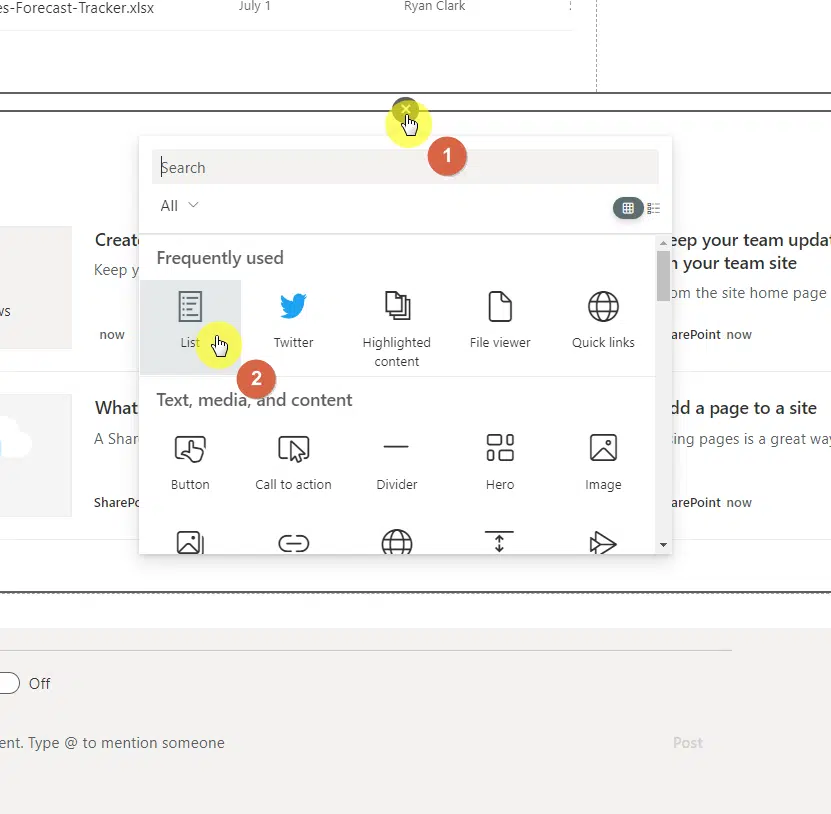
Make sure to add both the list and document library web part to the page and then open the list and library to connect.
Step 2: Configure the dynamic filter
Similar to the first method, this option is “sort of” a one-way communication between the list and the library.
Here’s a bit of an explanation here:
- The web part where you set up the dynamic filter option will be where the filtering will take place.
- The other list (where dynamic filtering wasn’t set up) is where the user will click and it will filter the other list/library
⚠️ Note: If it’s not clear yet, skip to step 3 where I visualize what exactly happens here.
For example, in my list, I want to be able to select a specific project name.
What will happen then is that the library will filter out only those documents that belong to that “project name”.
This is how I set up the dynamic filter from the document library web part:
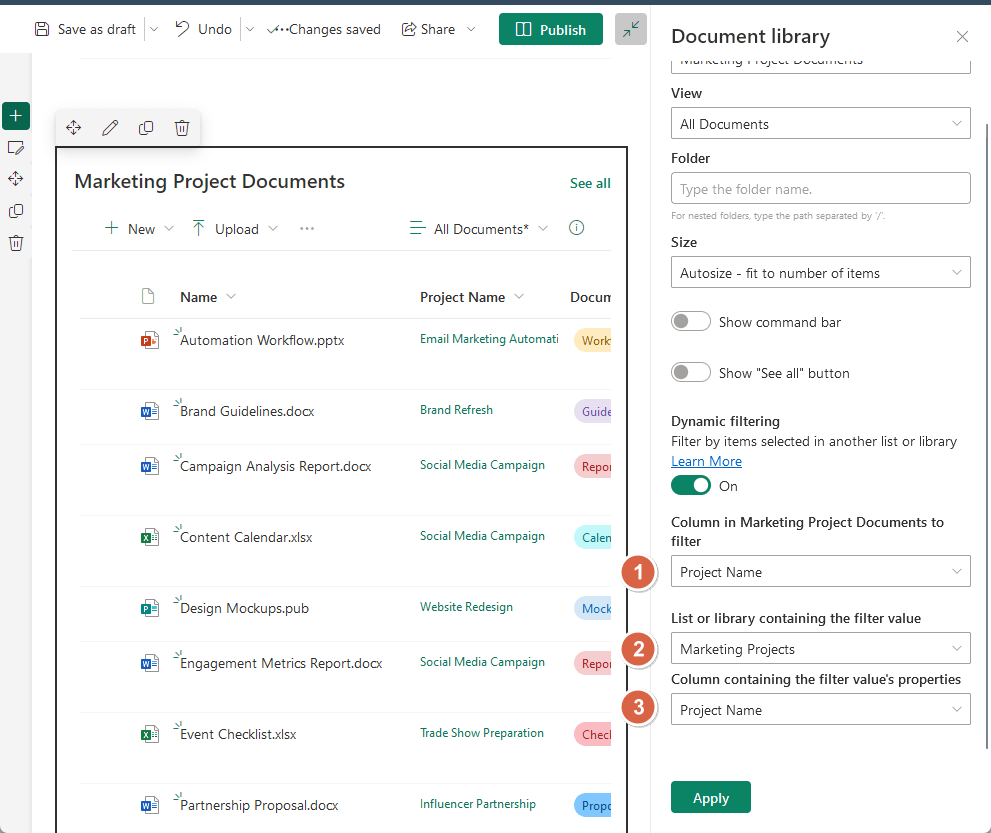
The settings here are:
- Column in list/library to filter (name of the related column)
- List or library containing the filter value (the source; this is where you select an item)
- Column containing the filter value’s properties (name of the related column on the other list/library)
It’s easier on my part since both of the columns have the same name.
By the way, if you’re not sure how to get to this, select the web part first and then click on the pencil icon.
The property pane will then appear (list and library web parts have the dynamic filtering option).
⚠️ Note: The list or library you can add on the page using the web part must be on this SharePoint site.
Step 3: Test the dynamic filter
Now that I set up everything, we can test it out:
- The left one is the list
- The right one is the library where I set up the dynamic filter
Here’s how both look side-by-side without selecting any item:
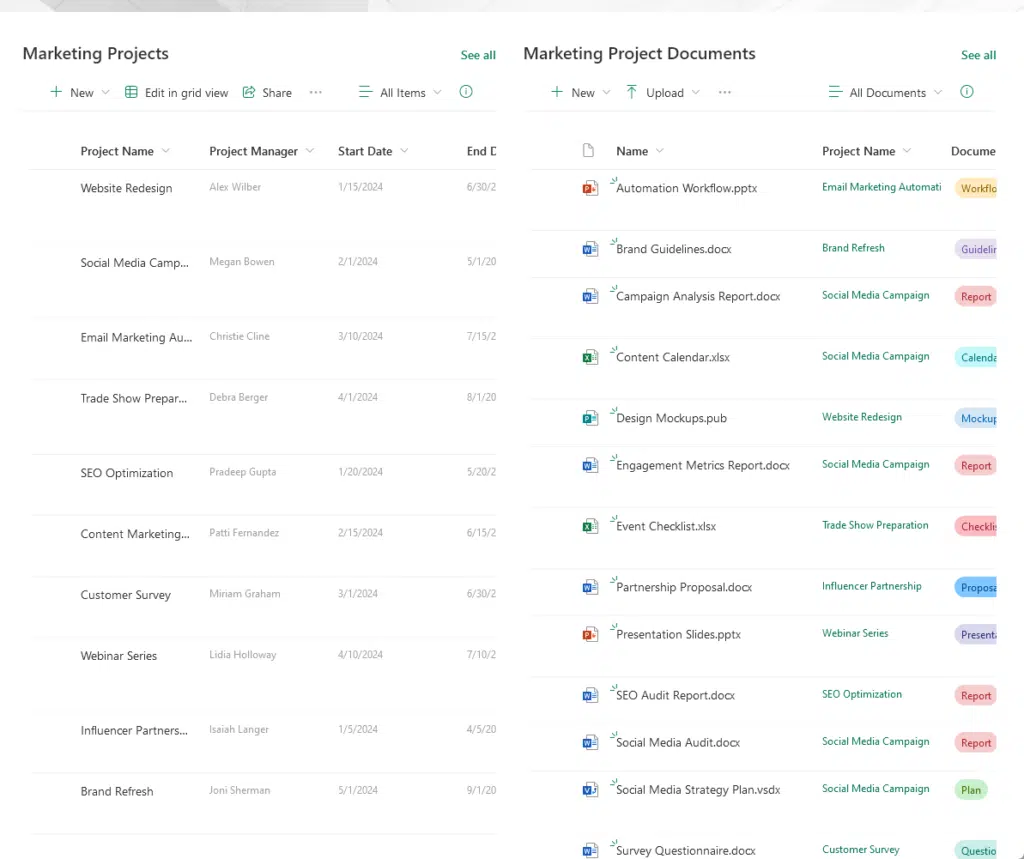
This is the default look.
If you don’t know, this is also how the list and library look by default when viewed on their separate pages.
Watch what happens when I select the “social media campaign” item on the list (left side):
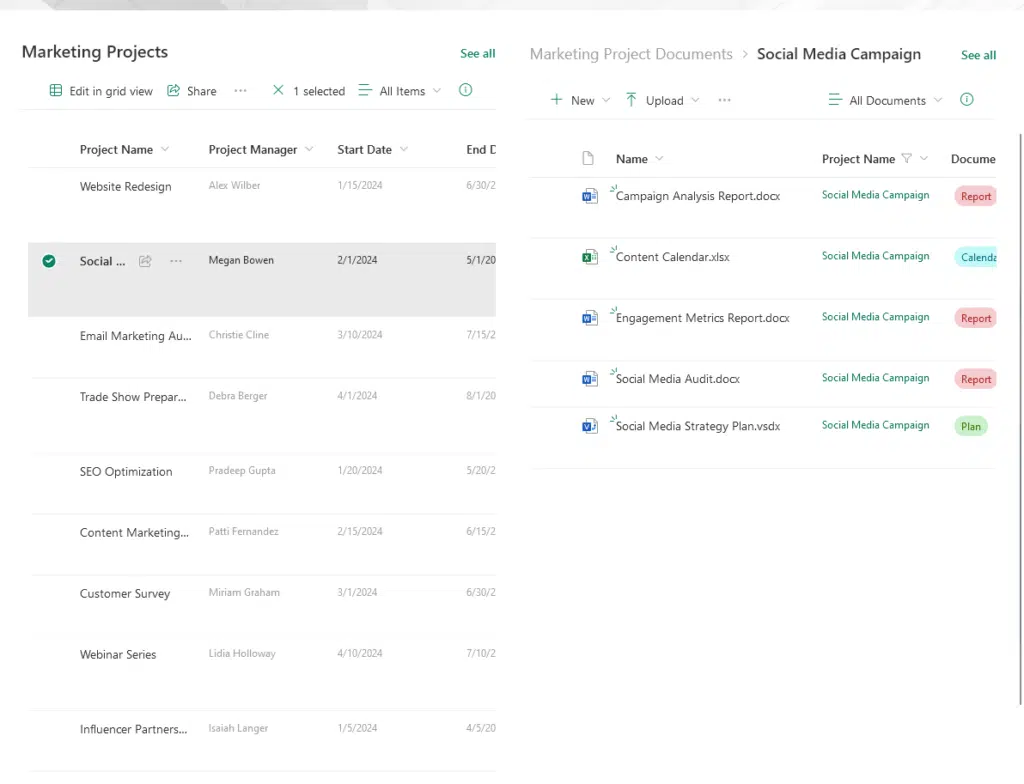
As you can see, the document library (right) was filtered based on the value (item) selected on the list (left).
Nice! 👏
How Connecting Lists and Libraries Help
Connecting multiple lists in SharePoint Online ensures that related information is always accessible and well-organized.
This can help with:
- Centralized information: All related data and documents are stored in one place.
- Improved collaboration: Team members can easily find and share project-related files.
- Better organization: Information is structured and easy to navigate.
In short, you can create a cohesive system where everything you need for a project is interconnected.
This reduces the time spent in the search results for documents and ensures that everyone has access to the latest information.
It also helps maintain consistency across your projects, as all relevant data is easily available and up-to-date.
Caution Before Connecting Them
Naturally, it’s also important to consider a few key factors to avoid potential issues.
Some considerations include:
- Data integrity
- Permissions
- Complexity
Plan carefully that your lists and SharePoint libraries are well-organized and that the relationships between them are clear.
Proper planning helps prevent confusion and ensures that your system remains efficient and easy to manage.
Anyway, got any questions about connecting lists and libraries in SharePoint? Let me know below.
For any business-related queries or concerns, contact me through the contact form. I always reply. 🙂


