

Last Updated on May 28, 2024
Need to sign a document?
In this guide, I will walk you through signing a Word document electronically (no need to print the document first).
Let’s get started.
Table of Contents:
Draw the Signature
There are two scenarios where this is applicable:
- You’re using a mobile device
- You can sign (maybe a shorthand) using your mouse
This is actually easy to do through the “draw” tab in the ribbon, so you need to make sure first that it’s enabled.
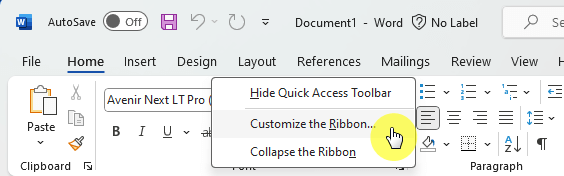
Right-click on the ribbon first > customize the ribbon:
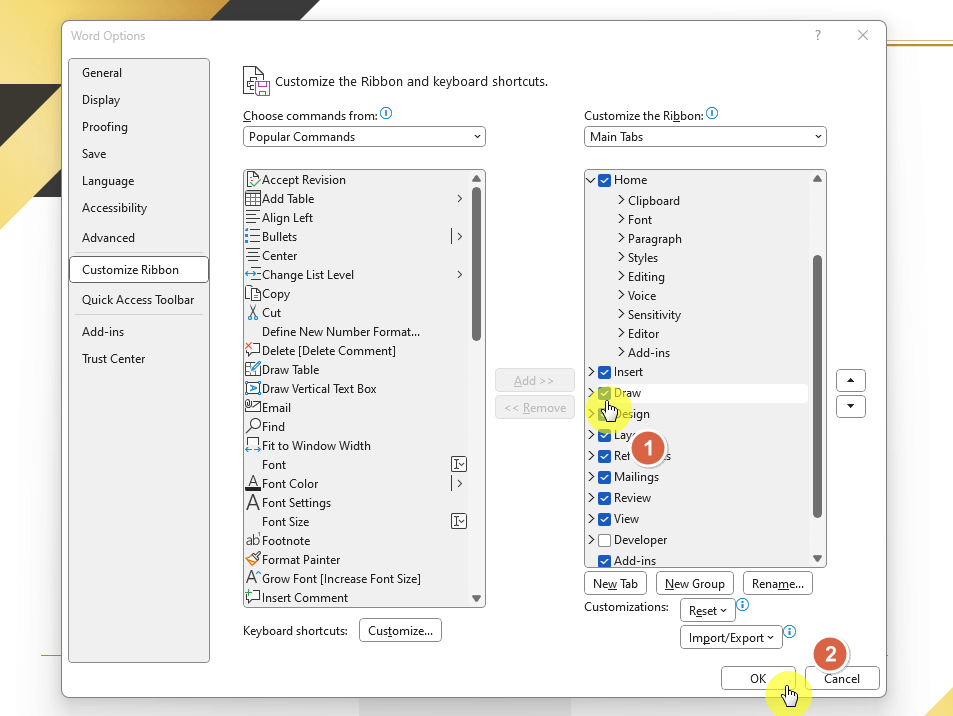
From there, make sure to check the “draw” tab on the right box.
Then click on the “ok” button:
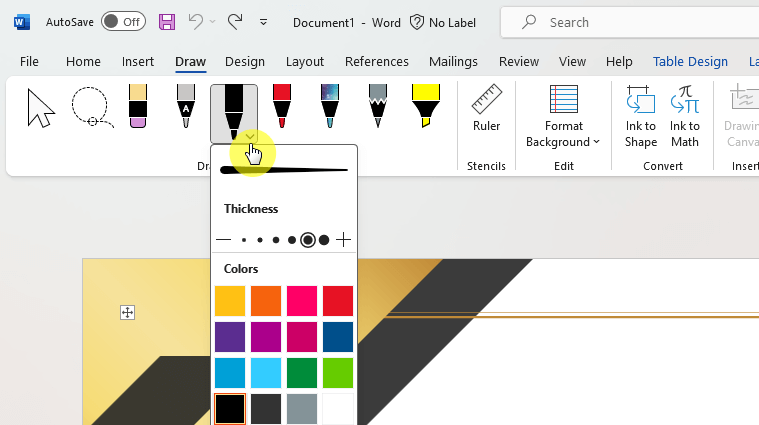
Once it’s enabled, you will now see the draw tab in the ribbon between “insert” and “design”.
Go to the draw ribbon > select the black pen > adjust the thickness to preferred:
All you have to do now is sign into the document. 🙂
If you have a shorthand signature, then that’s preferable.
Like this:
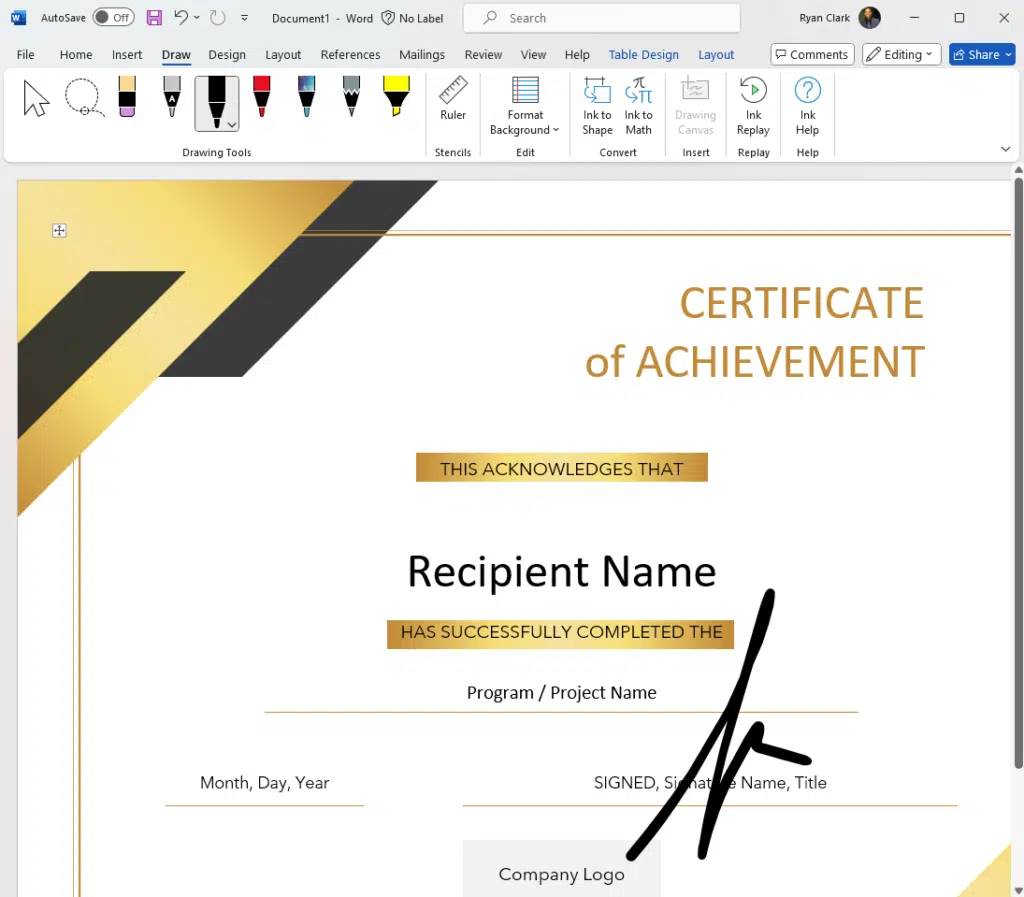
You can also try to draw your whole signature, though it may look a little wobbly, it will still look great.
Don’t worry though, you can save as many digital signatures as you want to use to sign a Word document.
Sign up for exclusive updates, tips, and strategies
Insert an Image
If you don’t want to write your signature directly to the document (well, electronically), here’s what you can do:
- Find a document with your handwritten signature or write it on clean paper
- Take a picture of your signature and send it to your computer (or have it scanned)
After that, add the scanned signature to the document by clicking insert > pictures > this device:
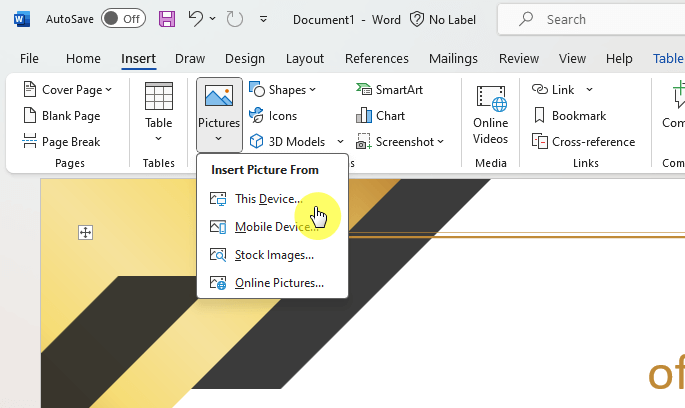
⚠️ Note: If your mobile phone is connected to your computer and you can access it from Word, you can also insert the picture from there directly.
Find the image of your signature and it will then be added to the document.
Adding it also selects it automatically, which means the “picture format” tab is automatically opened.
In case you clicked somewhere else on the document, select the image again to open the “picture format” tab.
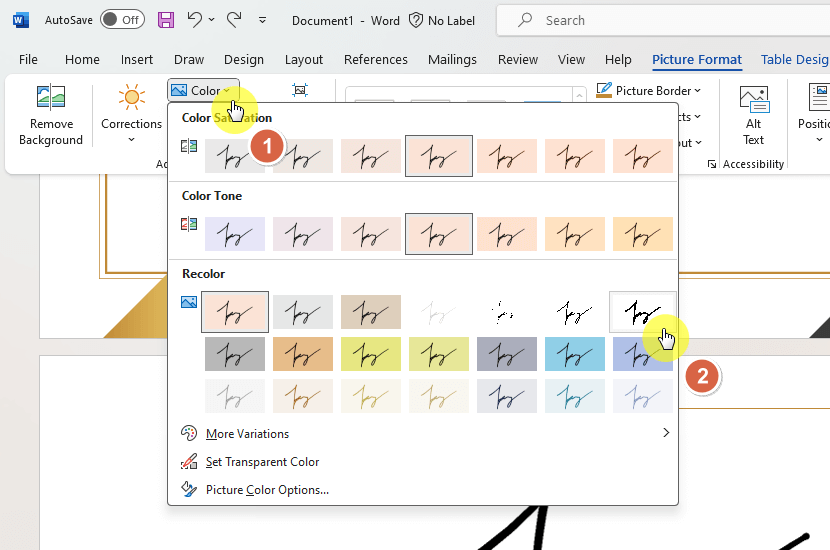
From there, clean the picture by clicking color > any black and white recolor that hides the background color.
For example, for my demo picture, the 75% option works the best:
In case the following happens:
- The picture wasn’t cleaned thoroughly
- The background color of the signed document isn’t white
You need to select “remove background” and click on the background color (white) of the picture.
After that (or if you don’t need to remove the background), change the layout option to “in front of text”.
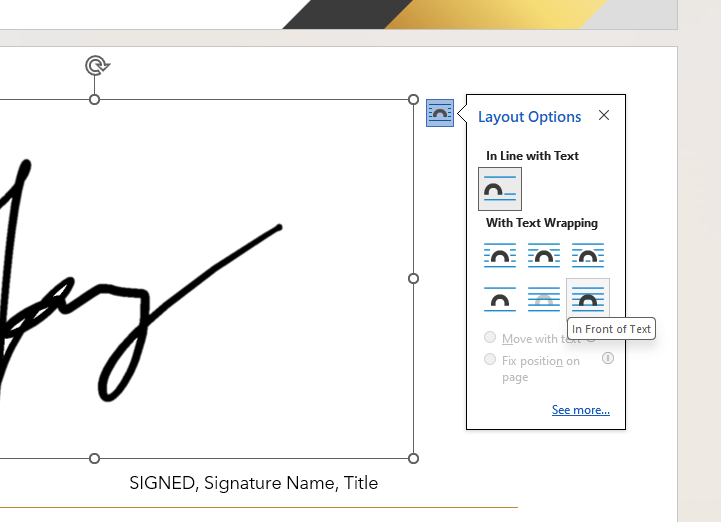
Doing that will allow you to move the signature without affecting the text and other elements in the document.
You can also resize the signature so it fits with the document (you don’t want the signature to be too big or too small).
Like this:

Nice! 👏
Save the Signature as Autotext
If you want the signature to become reusable, you don’t have to repeat the steps earlier.
The trick is that you can save it as a quick part:
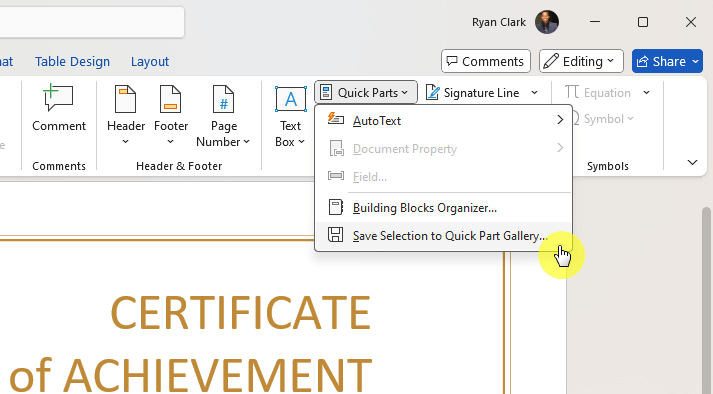
- Select the digital signature
- Go to the insert tab > quick parts > save selection:
It will open a small window in the middle of the document.
Write the name of the block (can be “signature”) and click the ok button:

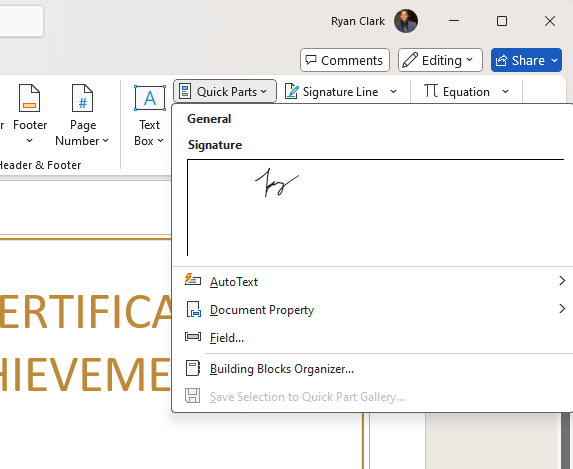
When you need to add the signature again to Word documents, click the quick parts button again.
You will then see your electronic signature there:
This makes it convenient for you to use the signature on another Microsoft Word document. 🙂
⚠️ Notes: You can even include the Microsoft Office signature line and its text in what you save whenever it’s possible.
Save the Signature as a Picture
About using the signature on another document, you can also save it directly as a picture (ready to go).
Right-click on the signature > save as picture:
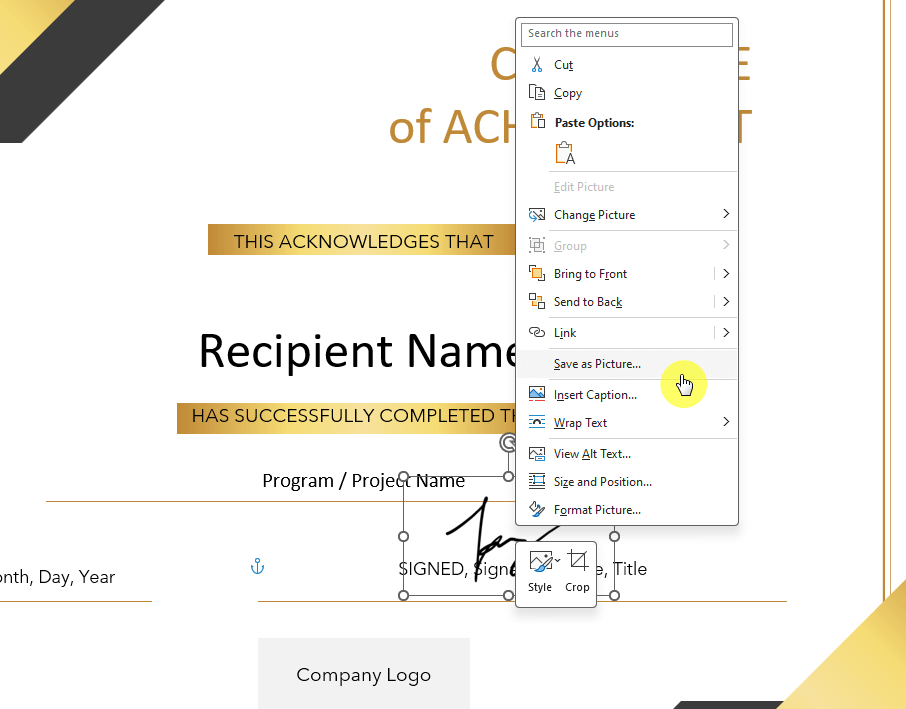
After saving it as a picture, you will be able to add it to another document as a picture.
Though it’s now cleaned of its background color, you may still have to change the layout option.
Anyway, got any questions about signing a Word document digitally? Leave a comment.
For any business-related queries or concerns, contact me through the contact form. I always reply. 🙂


