

Last Updated on February 25, 2024
Missing some files from a user?
In this guide, you will learn how to request the files from a user in SharePoint without leaving the document library.
Let’s get started.
Table of Contents:
What is this request files feature?
From the name, the purpose of this feature is to enable others to upload files using a link to a specific library folder.
Here are some details regarding this feature:
- Others with the link don’t need to have an account to upload a file
- These people can only upload the files into a specific folder
- The files will contain a prefix for identifying who uploaded it
What’s amazing here is that the recipient won’t be able to view or edit what’s in the folder — they can only upload.
By the way, the request files feature works too in OneDrive and OneDrive for Business.
Related: How to Request Files With OneDrive: Quick Feature Tutorial
Sign up for exclusive updates, tips, and strategies
How to Enable the Request Files Feature
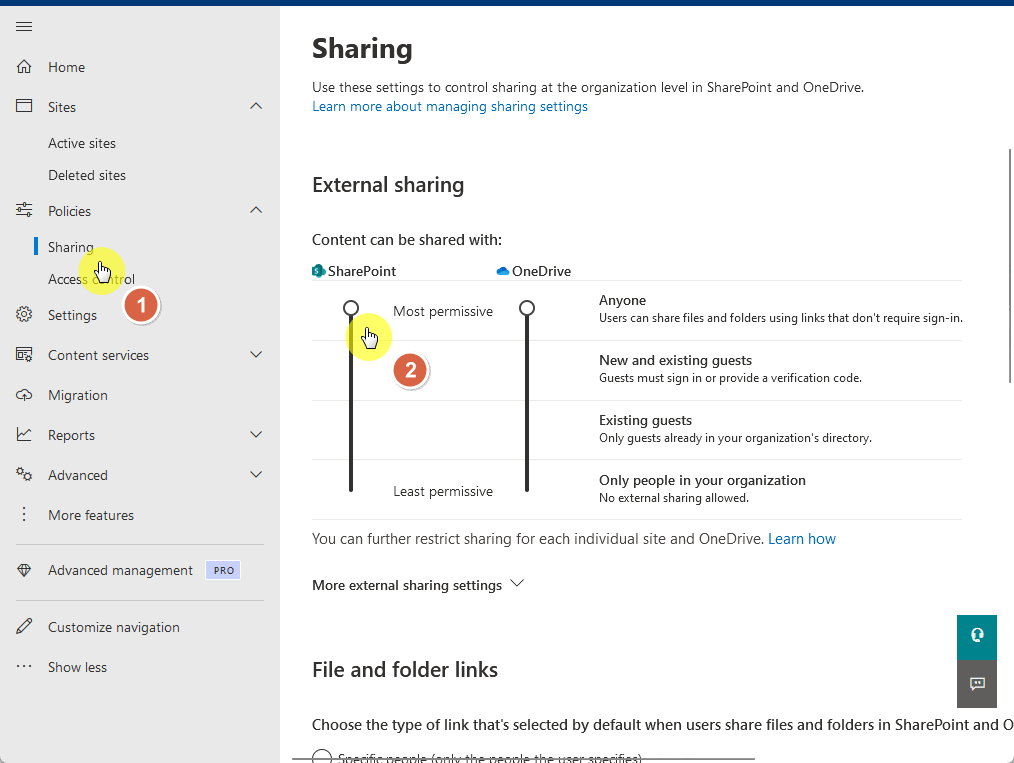
The key here actually lies in the sharing policies in the SharePoint admin center.
To get there:
- There’s a SharePoint admin center shortcut in the Microsoft 365 admin center
- Expand the policies menu in the left-hand corner
- Go to the sharing page
The first part here is to make sure that external sharing for both SharePoint and OneDrive is set to the most permissive.
Related: External Sharing in SharePoint Online: How Does It Work
From there, scroll down a little bit until you see a dropdown for files and folders.
You need to make sure that the sharing link permission for folders is set to view, edit, and upload as you can see here:
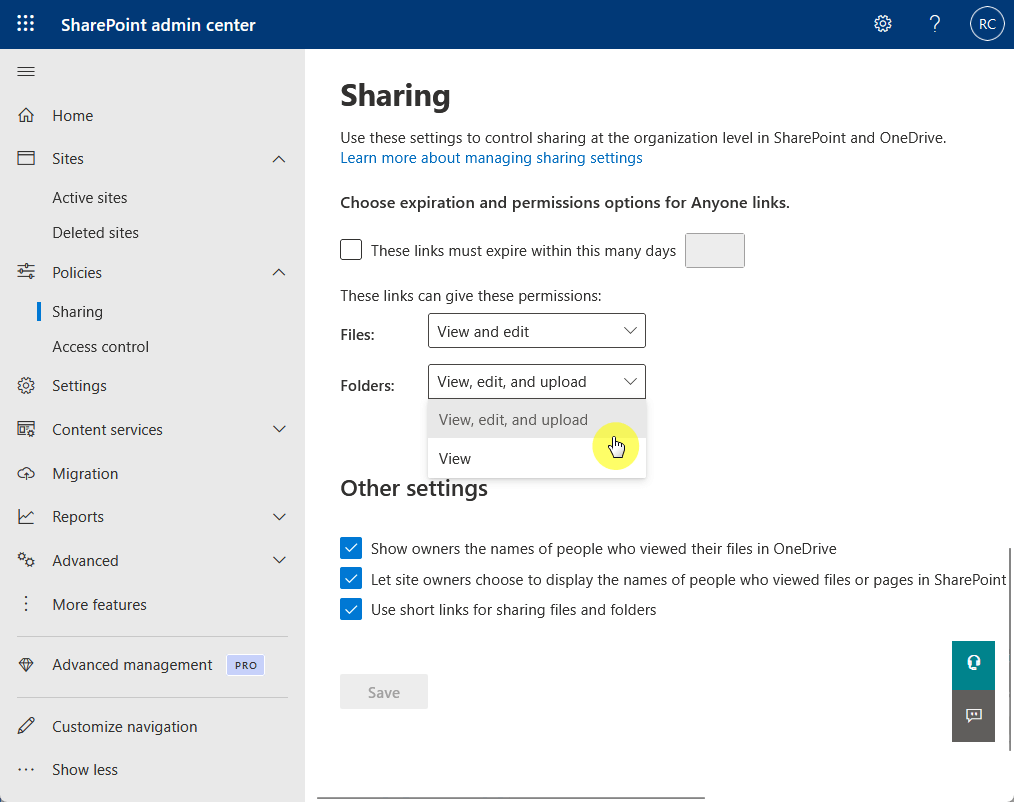
After making the changes, click the save button at the bottom.
How to Use the Request Files Feature
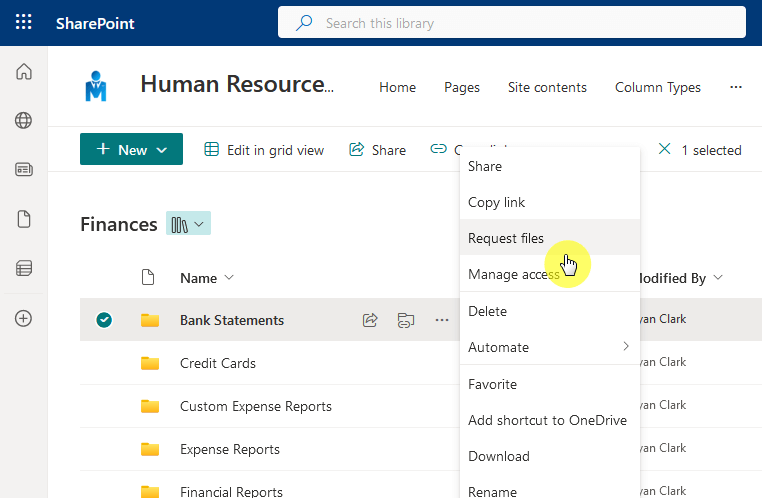
Using the file request feature is actually easy and straightforward:
- Navigate to the document library
- Right-click on the folder
- Select request files
Remember that the recipient wouldn’t see anything on the folder or its document library.
This is why the next step is to let the recipient know what files are needed.
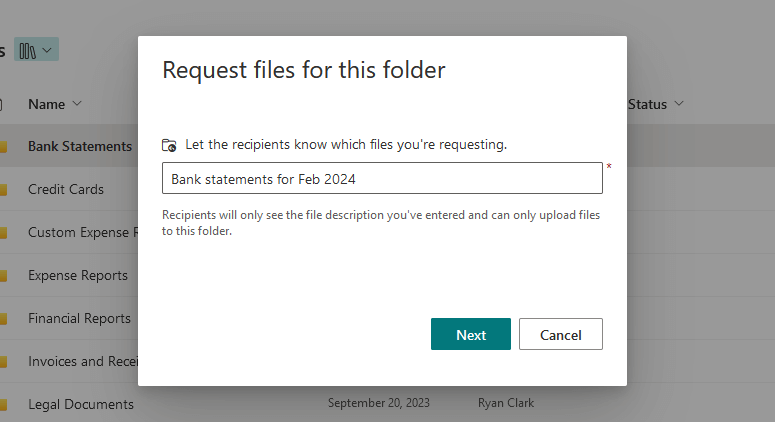
The next page is similar to when you share a document or page with anyone.
From here, you can simply copy the link and send it to the user, or enter their email address and message (optional).
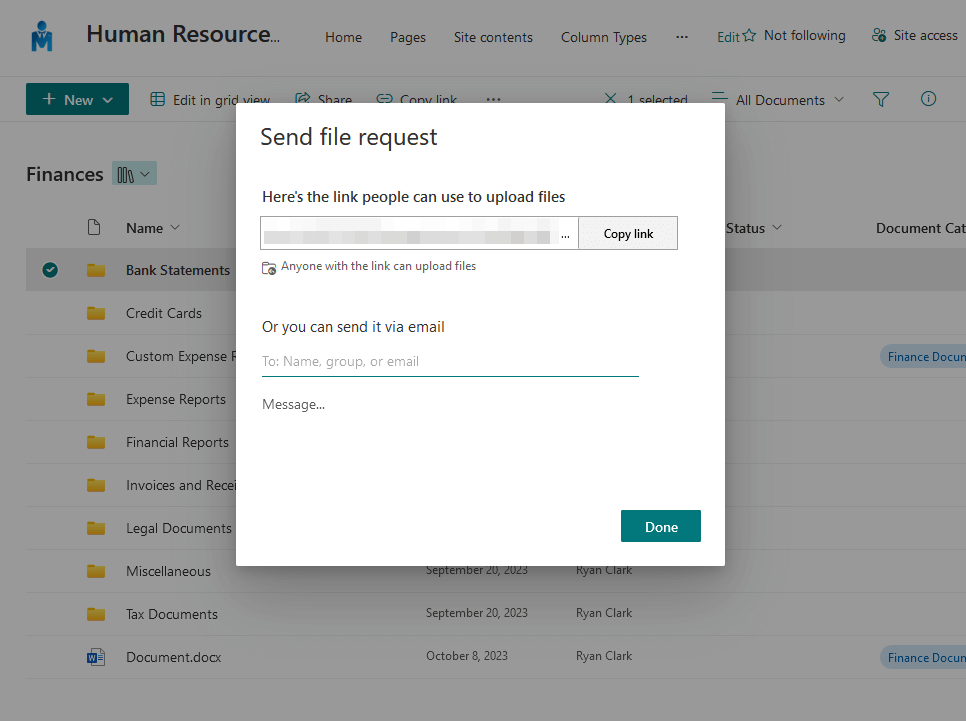
Don’t forget to click the done button.
Related: How to Add External Users to SharePoint (Beginner’s Guide)
What does the recipient see?
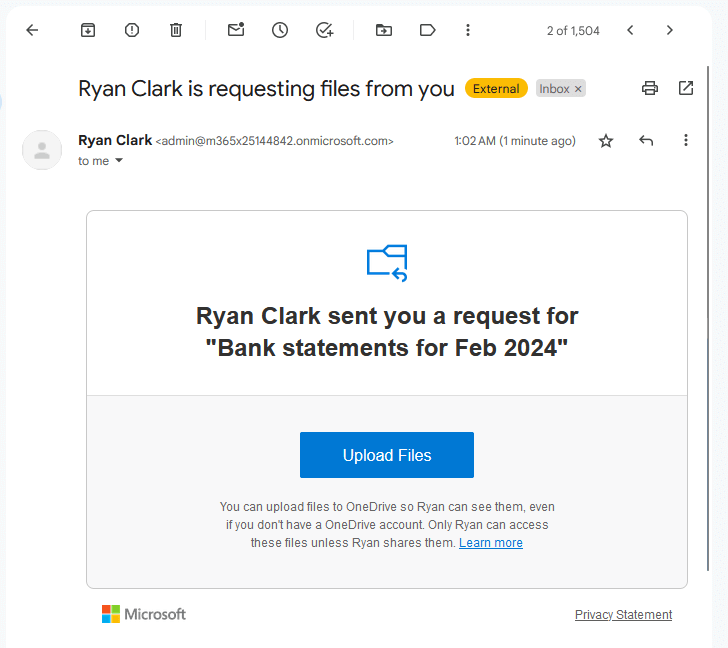
Let’s say you sent it to someone outside your organization (which is most likely the case).
If you sent it via email, this is what they will receive:
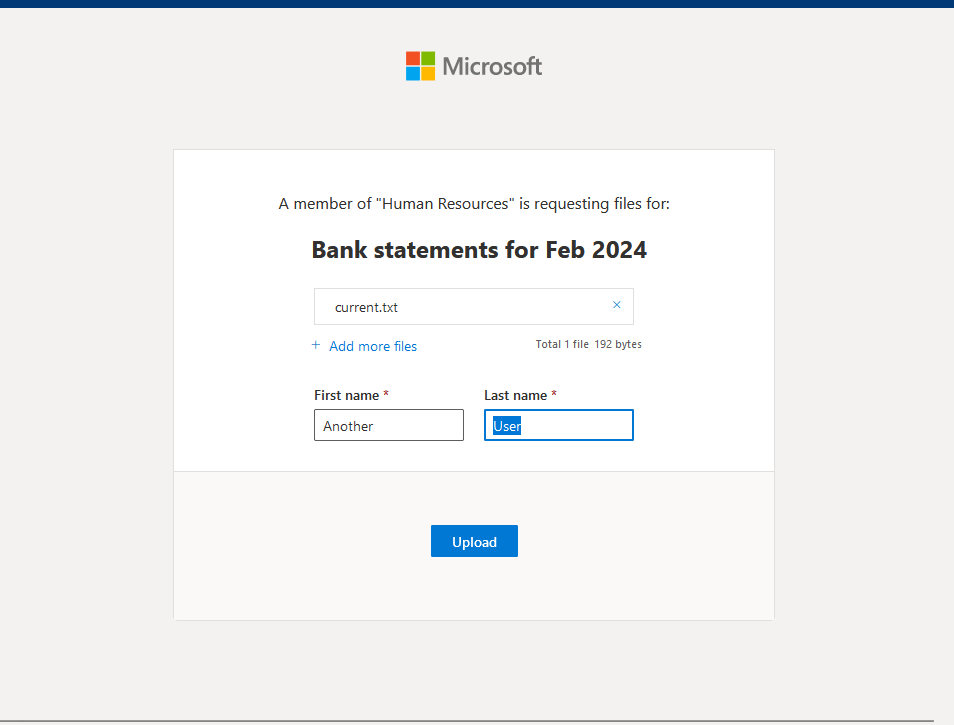
The next screen will be a simple page where you can upload files and enter your name.
The user won’t be able to proceed if he/she doesn’t fill out the first and last name.
Now what happens after the user uploads the files?
This is what you will see:

You can see that the file has been renamed, with the contributor’s name as the prefix.
After you confirm that the user uploaded all the required files, I recommend you stop sharing the folders anymore.
Related: How to Restrict Access to Documents in SharePoint Online
How to Disable the Request Files Feature
This is a great feature but at the same time, you can see how it can potentially cause some problems.
For example:
- Someone might’ve sent file request links to the wrong person
- A recipient might’ve shared request files links with another person
If you want to disable file requests, you can enter the following PowerShell script:
Set-SPOTenant -CoreRequestFilesLinkEnabled $FalseThis will automatically hide the file request feature in all the sites in your tenant.
On the other hand, not setting the external sharing settings to “anyone” will also disable this feature automatically.
Got any questions about the file request feature on SharePoint Online? If yes, kindly leave a comment.
For business-related concerns and inquiries, please contact me using the contact form. I’ll reply asap.


