

Last Updated on November 20, 2024
Tired of your classic root site?
In this guide, you will learn two methods you can use to modernize the root site of your SharePoint tenant.
Let’s get started.
Table of Contents:
What is a root site?
A root site is the main site in a SharePoint Online environment.
It acts as the central hub for the organization’s SharePoint tenant, which also serves as the starting point for users.
Here are key points about the root site:
- It’s the default site created when the SharePoint Online environment is set up.
- Located at the root domain (e.g.,
https://yourdomain.sharepoint.com), making it easily accessible. - Often used to organize and link to other sites within the organization.
Modern root sites differ significantly from their classic counterparts.
They support modern features like responsive design, better integration, and improved navigation options.
Classic root sites, on the other hand, may lack these functionalities and require manual upgrades.
👉 Related: SharePoint Start Page vs Home Site vs Hub Site vs Root Site
Sign up for exclusive updates, tips, and strategies
How to Modernize the Root Site
Modernizing the root site in SharePoint Online involves several steps and considerations.
Here’s a detailed guide on how to do it:
Considerations and Limitations
Before you start the modernization process, it’s important to understand its implications and limitations:
| Aspect | Details | Action Required |
|---|---|---|
| Backup | Create a backup of the current root site in case you need to revert. | Use SharePoint or third-party tools to secure data. |
| Customizations | Some classic customizations may not function in the modern experience. | Review existing customizations and plan alternatives. |
| Site Address | Root site address remains the same; the source site address changes (e.g., /sites/archive). | Update links and inform users about the new source site address. |
| Site Usage Data | Usage data does not transfer to the new root site. | Save historical site usage data separately if needed. |
| Microsoft 365 Group | Group connections for the source site are not swapped. | Reconnect or reassess Microsoft 365 group usage post-swap. |
| Search Index | Search index resets for both sites and takes time to update. | Communicate expected delays in search functionality to users. |
| SharePoint Home Sites | Designation must be removed from the root site before swapping. | Unregister the site as a home site in the SharePoint Admin Center. |
| Hub Sites | Hub site registration must be removed for both the root and source sites. | Detach hub site settings, then re-register after swapping. |
| Site Designs | Source site designs do not carry over to the new root site automatically. | Manually reapply site designs to the modernized root site. |
As for the process, you can either create a replacement modern site or a temporary one.
Step 1: Prepare the replacement site
The first step is to replace it with a modern communication site or a modern team site that is not connected to a Microsoft 365 group.
Get into the SharePoint admin center first:
- App launcher > admin
- Expand all options > SharePoint


If you already have a ready-to-use site, you can proceed directly to step #2 of this guide.
Otherwise:
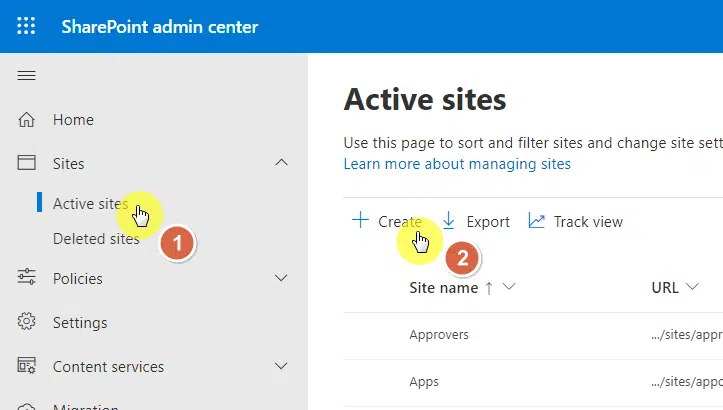
- Go to sites > active sites
- Click the create button
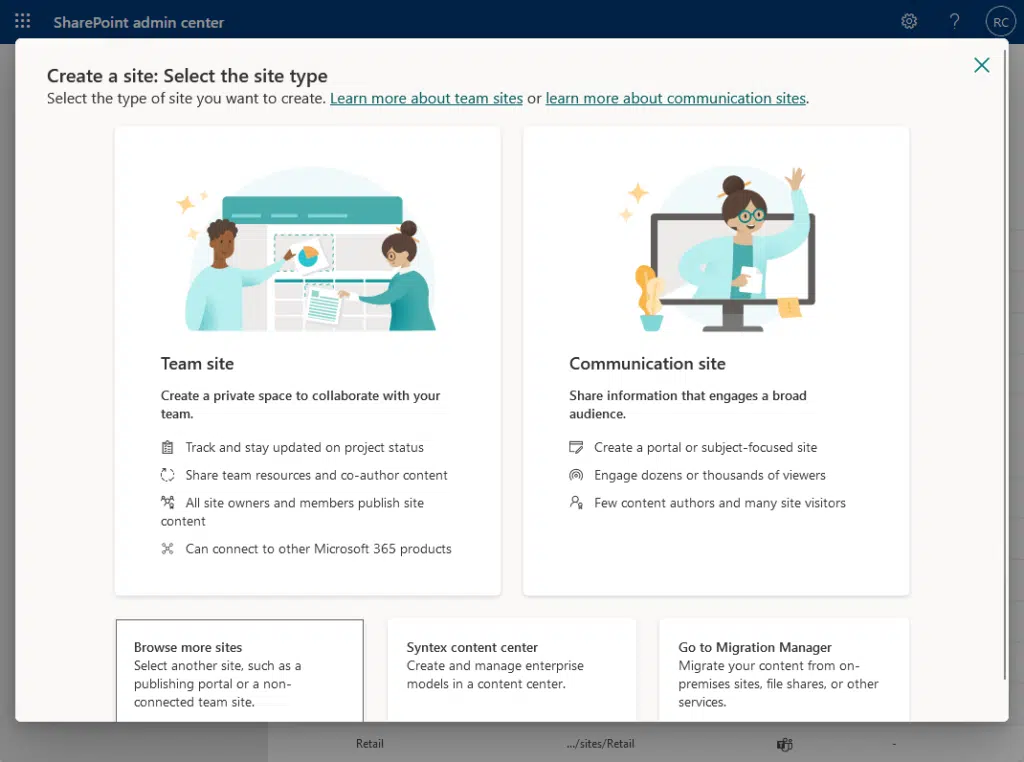
You will then have choices on the type of site to create as a stand-in root site (if you don’t have any yet).
Just click on your choice and create the new site:
Step 2: Replace the root site
Once you have the replace site, you will need to find the root site from the active sites page.
If you don’t know the site name, you can simply find it by looking for the site with a URL that’s the same as the tenant.
That could be https://mrsharepointguru.sharepoint.com.
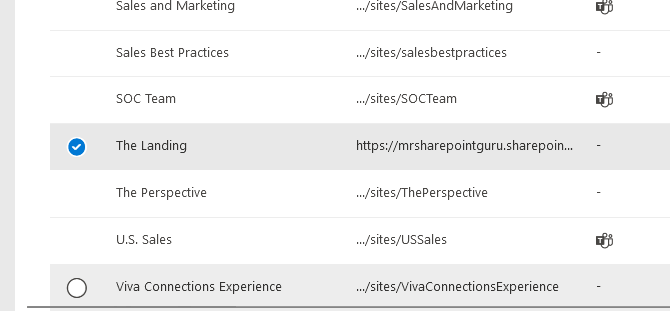
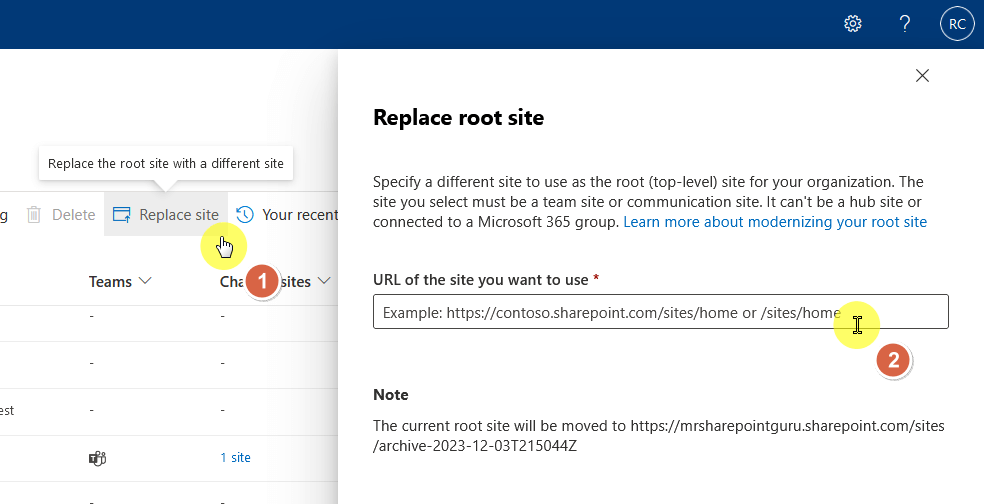
Select that site and then click the replace site button on the command bar.
From there, enter the URL of the replacement site and click the save button:
Now, here’s what’s going to happen:
- If the replacement site (new root site) is specifically created to “replace” the classic root site, then you can stop here.
- But if you want to transform the classic site into a modern site, you will need to proceed with the next steps.
Step 3: Convert to a modern site
The next part is about using PowerShell commands.
For this step, make sure that:
- You have the latest PnP PowerShell
- Run Windows PowerShell ISE as administrator
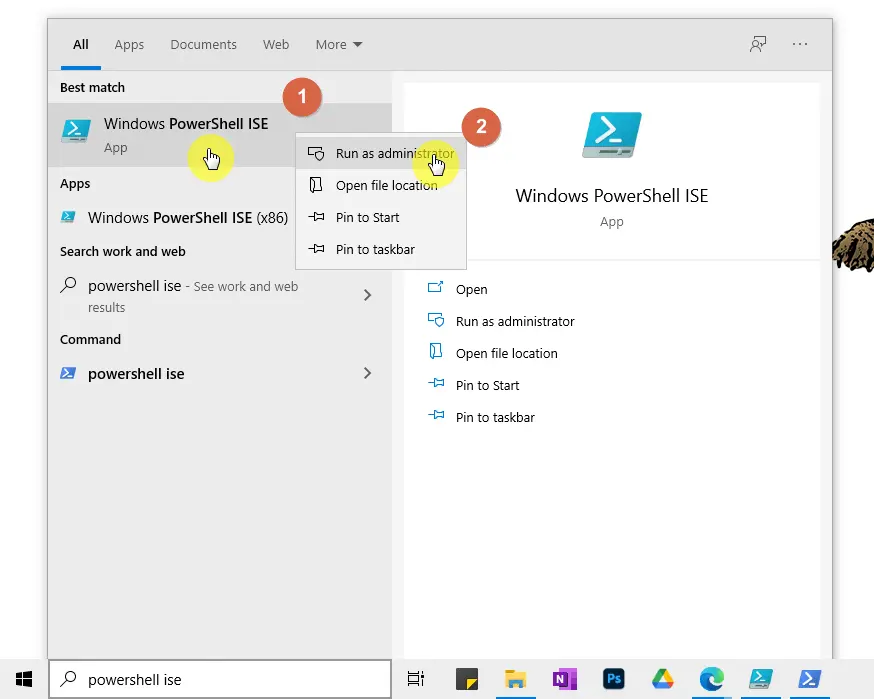
From there, you simply need to copy the commands.
Here they are:
<#

.Synopsis

    Converts all classic wiki and web part pages in a site.
    You need to install PnP PowerShell version 3.16.1912.* (December 2019) or higher to use this script.

    Sample includes:
        - Conversion of wiki and web part pages
        - Connecting to MFA or supplying credentials
        - Includes Logging to File, log flushing into single log file

.Example

    Convert-WikiAndWebPartPages.ps1 -SourceUrl "https://contoso.sharepoint.com/sites/classicteamsite" -TakeSourcePageName:$true

.Notes

    Useful references:
        - https://aka.ms/sppnp-pagetransformation
        - https://aka.ms/sppnp-powershell
#>

[CmdletBinding()]
param (

    [Parameter(Mandatory = $true, HelpMessage = "Url of the site containing the pages to modernize")]
    [string]$SourceUrl,

    [Parameter(Mandatory = $false, HelpMessage = "Modern page takes source page name")]
    [bool]$TakeSourcePageName = $false,

    [Parameter(Mandatory = $false, HelpMessage = "Supply credentials for multiple runs/sites")]
    [PSCredential]$Credentials,

    [Parameter(Mandatory = $false, HelpMessage = "Specify log file location, defaults to the same folder as the script is in")]
    [string]$LogOutputFolder = $(Get-Location)
)
begin
{
    Write-Host "Connecting to " $SourceUrl

    if($Credentials)
    {
        Connect-PnPOnline -Url $SourceUrl -UseWebLogin
        Start-Sleep -s 3
    }
    else
    {
        Connect-PnPOnline -Url $sourceUrl -SPOManagementShell -ClearTokenCache
        Start-Sleep -s 3
    }
}
process
{
    Write-Host "Ensure the modern page feature is enabled..." -ForegroundColor Green
    Enable-PnPFeature -Identity "B6917CB1-93A0-4B97-A84D-7CF49975D4EC" -Scope Web -Force

    Write-Host "Modernizing wike and web part pages..." -ForegroundColor Gree
    # Get all the pages in the site pages library.
    # Use paging (-PageSize parameter) to ensure the query works when there are more than 5000 items in the list
    $pages = Get-PnPListItem -List sitepages -PageSize 500

    Write-Host "Pages are fetched, let's start the modernization..." -ForegroundColor Green
    Foreach($page in $pages)
    {
        $pageName = $page.FieldValues["FileLeafRef"]

        if ($page.FieldValues["ClientSideApplicationId"] -eq "b6917cb1-93a0-4b97-a84d-7cf49975d4ec" )
        {
            Write-Host "Page " $page.FieldValues["FileLeafRef"] " is modern, no need to modernize it again" -ForegroundColor Yellow
        }
        else
        {
            Write-Host "Processing page $($pageName)" -ForegroundColor Cyan

            # -TakeSourcePageName:
            # The old pages will be renamed to Previous_.aspx. If you want to
            # keep the old page names as is then set the TakeSourcePageName to $false.
            # You then will see the new modern page be named Migrated_.aspx

            # -Overwrite:
            # Overwrites the target page (needed if you run the modernization multiple times)

            # -LogVerbose:
            # Add this switch to enable verbose logging if you want more details logged

            # KeepPageCreationModificationInformation:
            # Give the newly created page the same page author/editor/created/modified information
            # as the original page. Remove this switch if you don't like that

            # -CopyPageMetadata:
            # Copies metadata of the original page to the created modern page. Remove this
            # switch if you don't want to copy the page metadata

            ConvertTo-PnPClientSidePage -Identity $page.FieldValues["ID"] `
                                        -Overwrite `
                                        -TakeSourcePageName `
                                        -LogType File `
                                        -LogFolder $LogOutputFolder `
                                        -LogSkipFlush `
                                        -KeepPageCreationModificationInformation `
                                        -CopyPageMetadata
        }
    }

    # Write the logs to the folder
    Write-Host "Writing the conversion log file..." -ForegroundColor Green
    Save-PnPClientSidePageConversionLog

    Write-Host "Wiki and web part page modernization complete! :)" -ForegroundColor Green
}
end
{
    Disconnect-PnPOnline
}
After that, you will need to enter the URL of the site (it has the word ‘archive’ in it) and your username and password.
You will then receive a notice that the modernization is complete (the time it takes will depend on the site’s size:

That’s it!
Check the site and its pages first to confirm (the new modern pages start with ‘Migrated_’ including the home page).
👉 Related: SharePoint Modern Pages: How to Transform Classic Sites
Step 4: Return the root site
From there, all you have to do is repeat step #3.
But this time, you need to replace the replacement site with the now modernized (original) root site collection.
Modernizing Your Root Site
While the process of modernizing your root site in SharePoint Online may seem complex, it is a worthwhile task.
Plan carefully, address challenges, and provide user training for the new modern site, as with any major change.
Do you have more questions regarding modernizing root sites in SharePoint Online? Feel free to share your thoughts.
For business inquiries, please use the site’s contact form to get in touch, and I’ll get back to you as soon as possible.


