

Last Updated on December 14, 2023
Need to share a term set?
In this guide, you will learn the exact steps to take to share a term set with another site collection in SharePoint, and why do it in the first place.
Let’s get started.
Table of Contents:
In SharePoint, a term set is essentially a collection of related terms.
Think of it as a folder that contains a group of similar or related keywords, which you can use for tagging and categorizing content.
They are a critical component of SharePoint’s managed metadata service, serving as a centralized, hierarchical collection of terms.
There are three primary reasons why term sets in SharePoint are important:
- Content management
- Consistency
- Flexibility
Term sets can be customized extensively to meet specific organizational needs to aid in content classification.
Sign up for exclusive updates, tips, and strategies
Sharing a term set with another site offers several advantages that we can group into five groups:
- Streamlined content management
- Enhanced collaboration
- Increased efficiency
- Improved governance and compliance
- Resource optimization
1. Streamlined Content Management
The first one is unified tagging:
When you share a term set, you’re essentially standardizing the tags used across multiple sites.
This approach makes it easier to manage and locate content.
2. Enhanced Collaboration
There are two benefits here:
- Interdepartmental consistency
- Ease of collaboration
For organizations with multiple departments or teams using separate SharePoint sites:
Sharing a term set ensures everyone is on the same page when it comes to tagging documents or other content.
In addition, shared term sets make it more straightforward for teams to collaborate on projects that span multiple sites.
Everyone uses the same language, reducing misunderstandings and speeding up project timelines.
3. Increased Efficiency
Specifically:
- Time-saving
- Easy updates
Creating a term set for each site is repetitive and time-consuming, so sharing one saves you the effort of duplicating term sets.
When you update a shared term set, those changes are reflected across all the sites using that term set — no additional changes are required.
4. Improved Governance and Compliance
What I mean here is:
- Standardized metadata
- Controlled vocabulary
Shared term sets ensure that metadata is consistent across sites, which is crucial for regulatory compliance and data governance.
With a shared term set, you can ensure that all users are utilizing approved, official terminology to enhance quality and integrity.
5. Resource Optimization
There are advantages here:
- Reduced errors
- Better resource
Sharing minimizes the risk of errors that can occur when manually recreating the same term set on different sites.
Centralized term sets allow your IT and admin teams to focus on other tasks instead of spending time managing multiple sets of identical terms.
The process is straightforward.
But it does require administrative access (at least a term store administrator) to the SharePoint Online term store.
Here are the steps:
Step 1: Access term store management
There are actually two term stores in SharePoint where you can manage terms:
- Site level
- SharePoint admin center
Since we’re talking about sharing site-level term stores here, then that’s where you need to go.
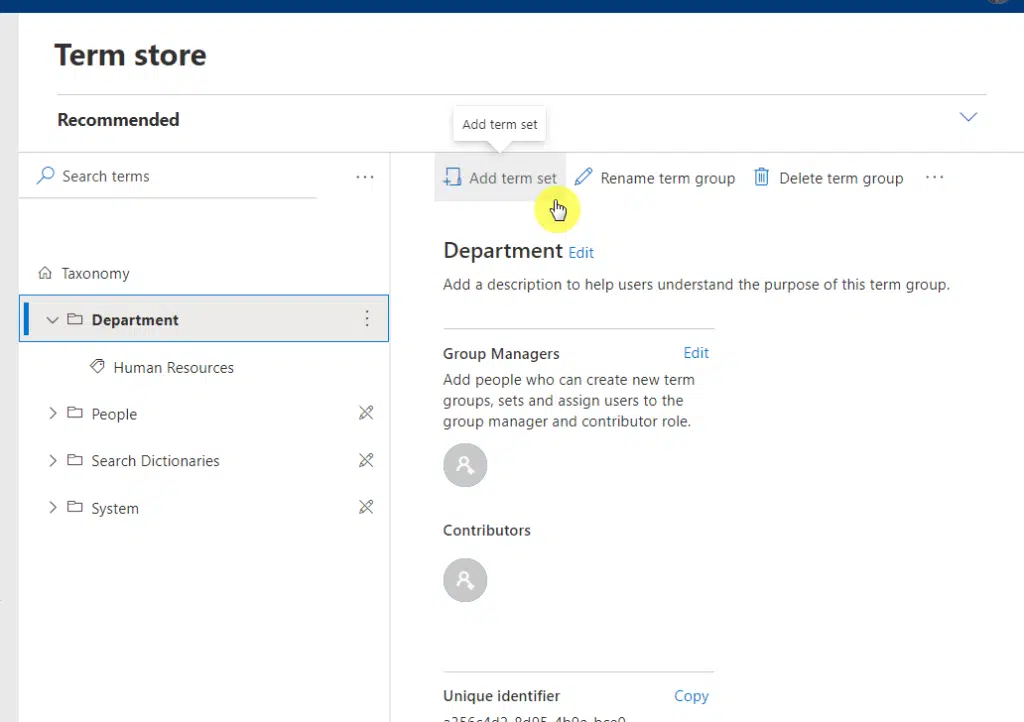
From the site settings (gear icon > site information > site settings), click term store management under site administration:
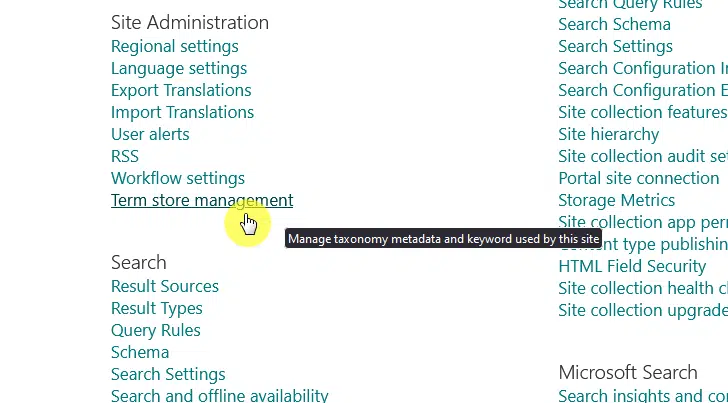
Related: How to Manage Term Stores in SharePoint Online
Step 2: Return to classic mode
This will now bring you to the site-level term store where you can see all the site-level term groups that you have.
Note: I assume that you already have some site-level term sets you want to share. If not, you can always create a new term set under the site-level term groups.
For illustrative purposes, I have here a term set added to the HR site:

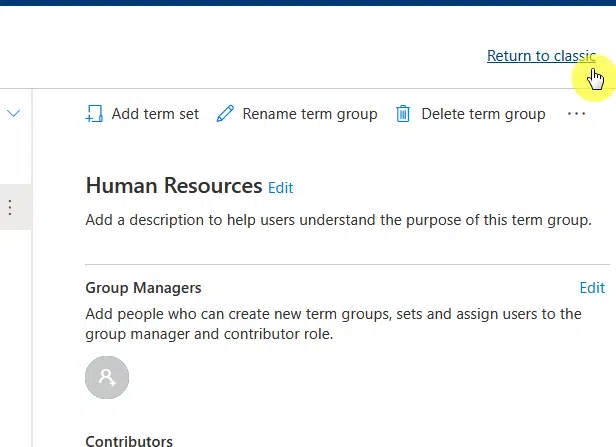
The modern experience, with all its shiny features and capabilities, unfortunately, doesn’t include yet a way to share site-level term sets.
This is why you need to revert to the classic term store by clicking the return to classic button on the upper-right corner:
Step 3: Enter the site collections
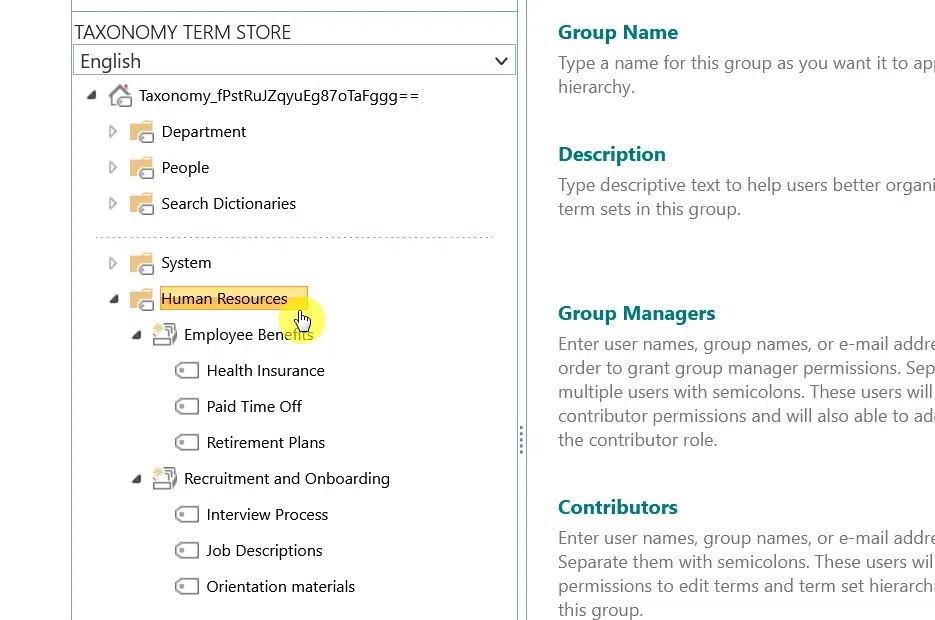
The next page will show you the term store management tool.
On the left sidebar, you will see your site term set (or sets) below the system folder (folders are term sets here).
Click or select on the term set (folder) that you wish to share:
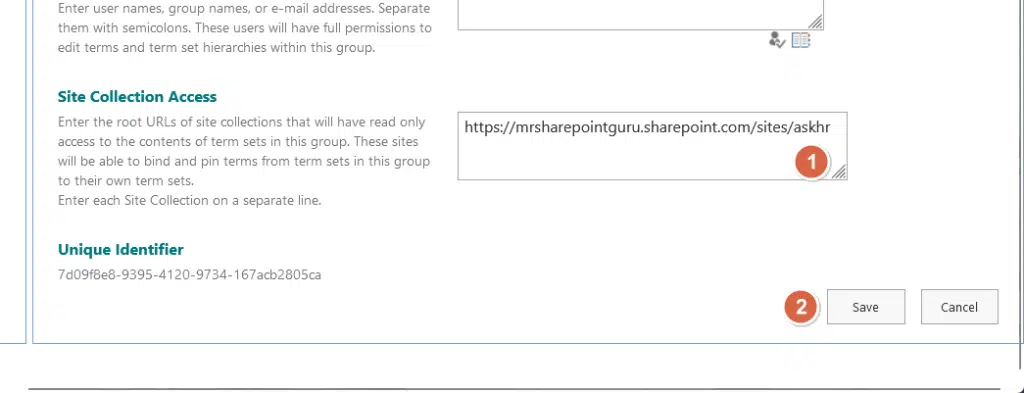
The next part is to go to the site collection access settings on the right screen.
All you have to do here is copy and paste the root URL of the site collection that you want to use the shared term set.
Then click save:
Related: How to Change the SharePoint Site URL (Rename Site Address)
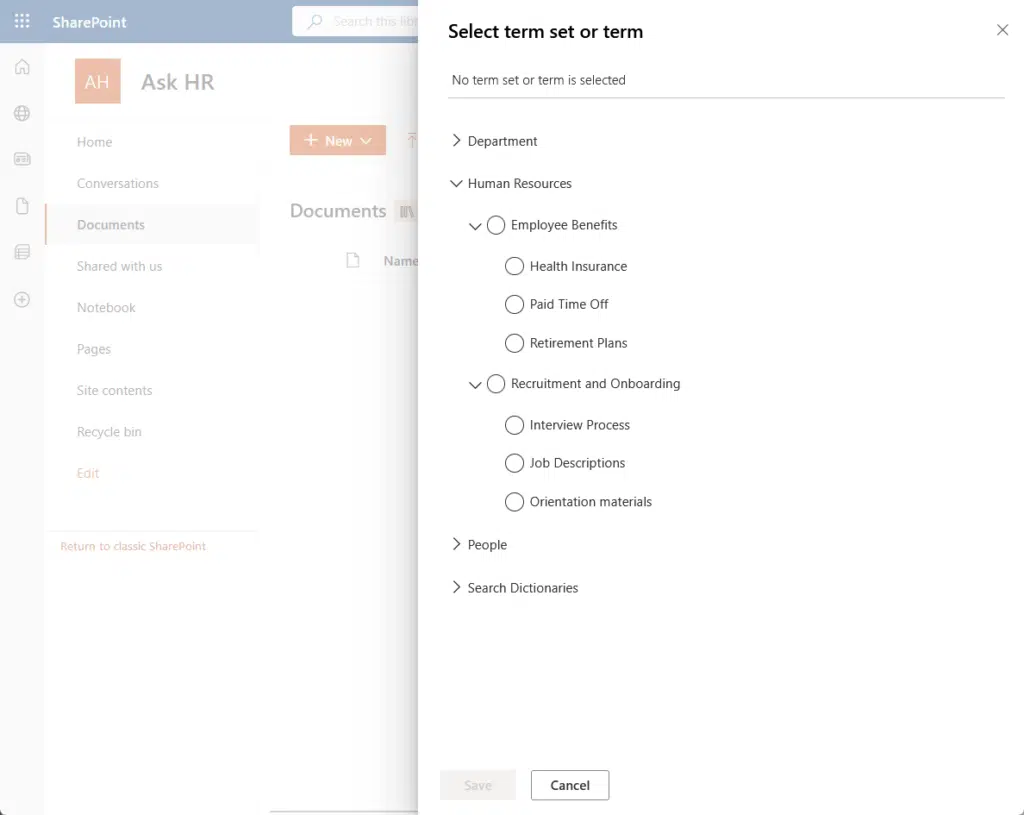
The only way to know if it worked is to try and create managed metadata columns in a list or library in SharePoint.
For example, on the site collection where I shared the term set, the human resources term set can be used:
Have questions about sharing term sets in SharePoint? Feel free to drop your questions in the comments below.
For more personalized assistance or any SharePoint-specific inquiries, don’t hesitate to reach out via the contact form available.


