
Last Updated on October 20, 2023
Need to delete a channel?
In this easy guide, I will show you how to properly delete a team channel, the difference between deleting different types of channels, and more.
Let’s get started.
Table of Contents:
Always Assess the Channel First
This is the first step you must take.
Before hitting that delete button, it’s important to gauge the importance of the channel you’re looking to remove.
You wouldn’t want to discover that you have lost essential data or upset team members with a hasty deletion.
Here’s how to thoughtfully approach this step:
1. Backup Important Data
Here are ways to identify important files and conversations in the channel:
- Scan through tabs: Microsoft Teams allows you to have various tabs for things like files, wikis, and third-party apps. Make sure you go through each of these tabs to see if there’s anything valuable.
- Read past conversations: It’s tedious, yes, but skim through the chat history. Are there any pinned messages or important discussions? Make note of them.
- Make a checklist: Create a checklist of these crucial files and discussions. This will serve as your guide for what needs to be saved.
Other users had instances where they thought a channel was just chit-chat and miscellaneous files, only to find an essential document buried in the file tab.
Don’t make the same mistake — always double-check!
Once you have taken note of those important data, you might want to back them up with any of these options:
- Download files: Simply click on the files and select ‘Download’ to save them to your local storage.
- Copy messages: For important messages, you can copy the text and paste it into a document. Save this document in a secure location.
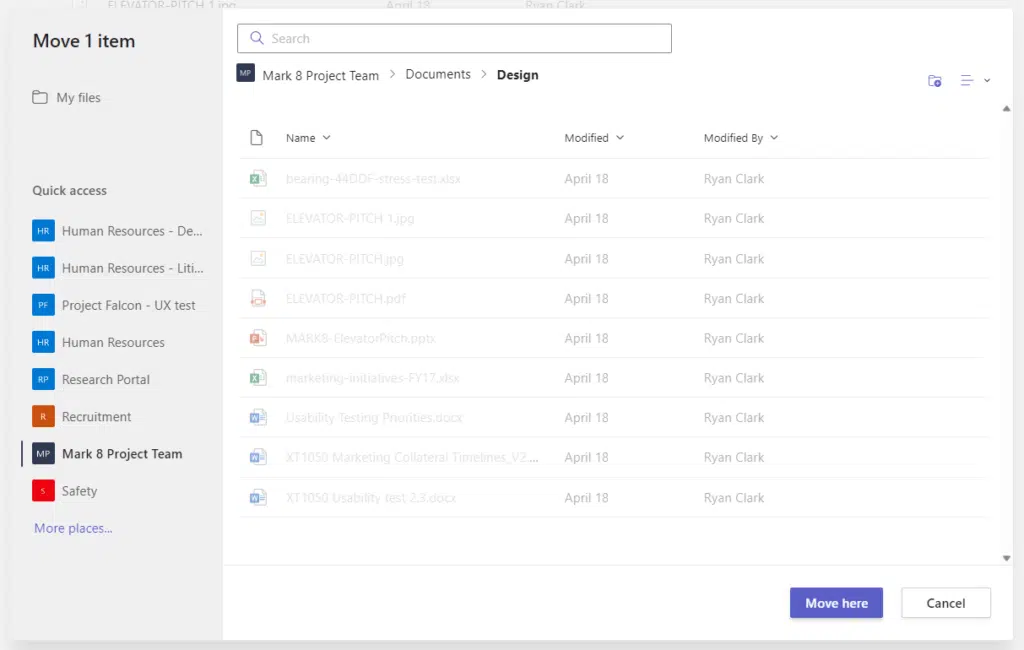
- Move to another channel: Use the move feature to shift important files to another existing or newly created channel.
For moving files:
- Go to the files tab of your channel
- Move the files from there
The steps are similar to how you would move files in SharePoint and OneDrive:
Related: OneDrive Deleted: How to Restore Someone’s OneDrive Account
2. Notify Team Members
It’s important to communicate to team members about your intention to delete the channel.
Here’s what you can do:
- Send a channel-wide message: Make an announcement in the channel stating your intent to delete it. Mention why it’s being deleted and what they should do next.
- Use @mentions for important alerts: Use @channel or @team to make sure everyone gets notified about the imminent deletion.
- Personal messages for key stakeholders: If specific members have a greater stake in the channel, consider sending them a direct message to make sure they are aware.
Trust me, nobody likes to discover that a channel they were using has suddenly vanished.
A simple heads-up goes a long way in maintaining team harmony.
Besides the intention to delete the channel, it might also help to provide a timeline for when deletion will happen:
- Specific time frame: Clearly state when the channel will be deleted. Whether it’s in 24 hours or a week, make it known.
- Reminder alerts: Send out reminder messages as the deletion time approaches. This will give team members ample time to back up their data or move their ongoing conversations.
3. Confirm Permissions
The last action is to make sure that you have admin rights or relevant permissions:
- Check role in the team: Check your name in the team list or check team settings to see your role. You need to be an admin or owner to delete a channel.
- Contact it or the team owner if necessary: If you’re not the admin and you believe the channel should be deleted, contact your IT department or the team owners to discuss the next steps.
If you have done all the things above, awesome!
You’ve assessed the channel’s importance, backed up vital data, informed your team, and confirmed your permissions.
Now you’re ready to proceed with the deletion process, confident that you’re making a well-considered decision.
Sign up for exclusive updates, tips, and strategies
How to Delete a Channel
Deleting a channel is straightforward.
There are two ways you can easily delete a channel:
Method 1: Directly from the team list
All you have to do here is:
- Hover your mouse over the target channel
- Click the three dots to see more options
- Click the delete channel button
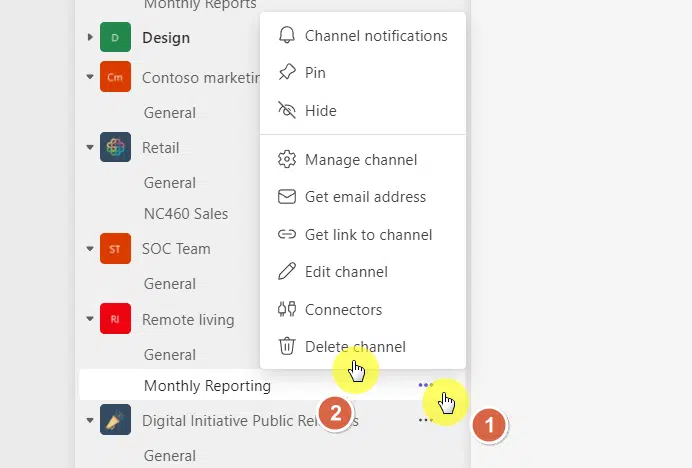
This is the fastest method to delete a channel from Microsoft Teams.
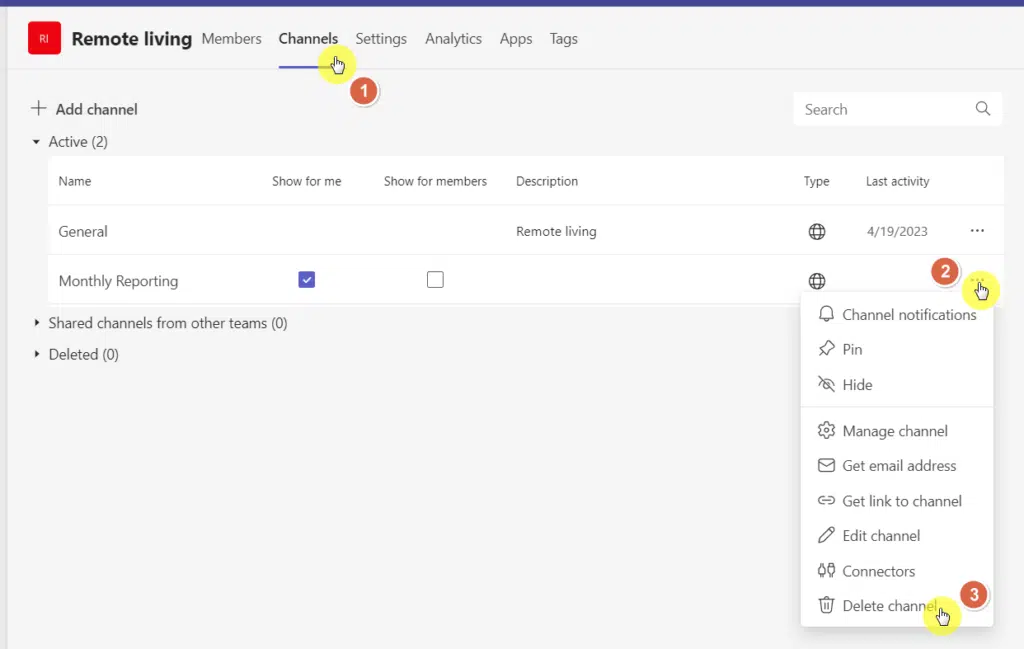
Method 2: From team management
The next one is from the channel management page and requires more steps.
From the team list:
- Hover over the team with the channel you want to delete
- Click manage team
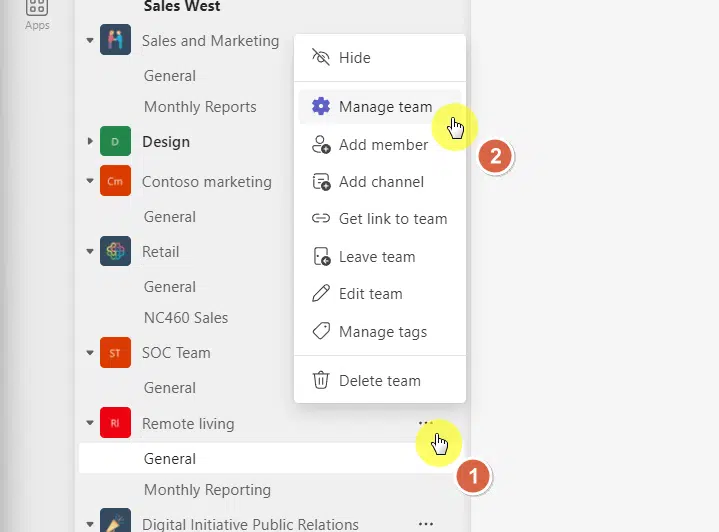
From there:
- Go to the channels tab
- Click the three dots of the target channel
- Click delete channel
Deleting a Public vs Private Channel
It’s important to understand that Microsoft Teams offers two different types of channels: standard and private.
You must know the difference because it directly impacts what happens to your files stored in SharePoint when you delete a channel.
To review:
- Standard channel: A standard channel is linked to a default library on a SharePoint site that’s connected to your Teams environment.
- Private channel: This creates an entirely separate SharePoint site where the channel’s documents are stored.
Related: Microsoft Teams Best Practices Guide: Focus and Management
Deleting a Standard Channel
When you delete a standard channel in Microsoft Teams, the channel itself gets deleted.
However, the folder containing any documents you’ve uploaded remains intact on the SharePoint site.
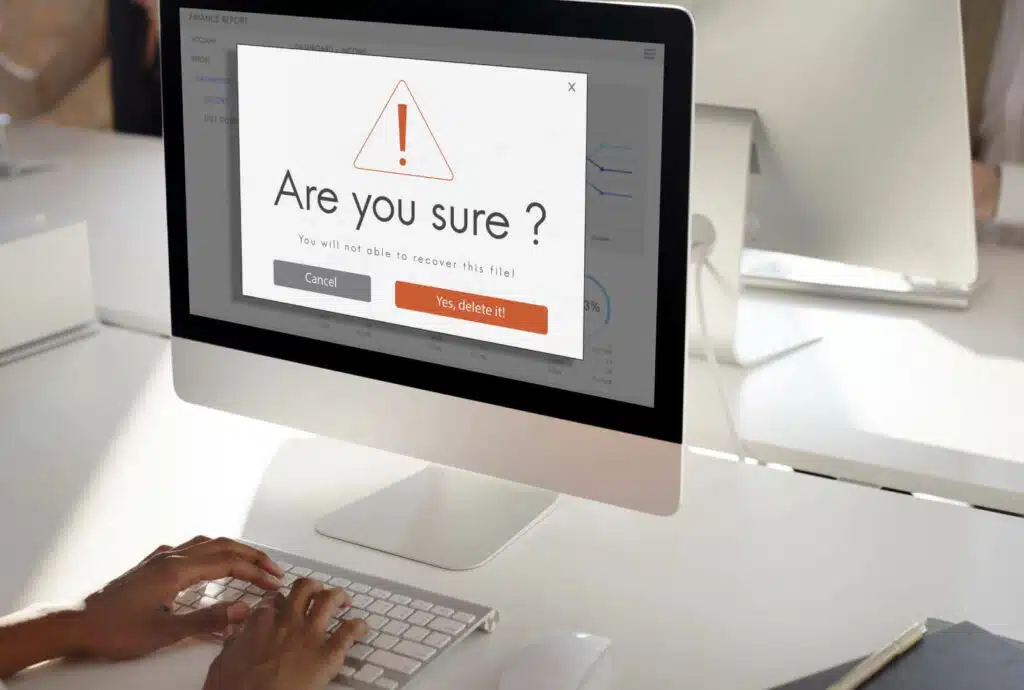
This is why you get this notification when you delete a standard channel:

This is crucial for anyone worrying about losing files — rest assured, your documents are still safe in SharePoint.
Deleting a Private Channel
Deleting a private channel is a bit more consequential:
- Deletes everything: It removes not only the channel but also the SharePoint site connected to it.
- Loss of documents: Any documents you had on that SharePoint site will be deleted as well.
This is the error you get when deleting a private channel:
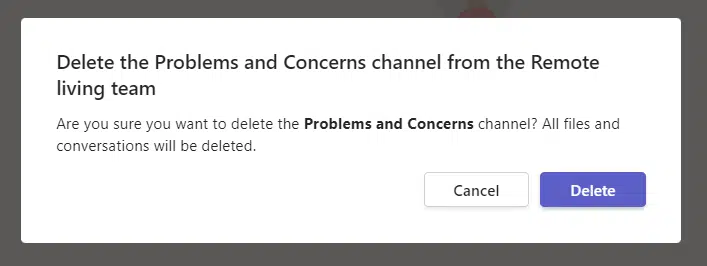
It’s like hitting a reset button — deleting the entire conversation history and files.
So, if you have essential files in a private channel, be extra cautious when hitting that delete option.
Troubleshooting: Recovering a Channel
Did you hit the delete button a bit too quickly?
Fortunately, you still have 30 days before the channel gets permanently deleted.
All deleted team channels will show up in the deleted section on the team management page.
It’s right on the same page where you can delete a channel:
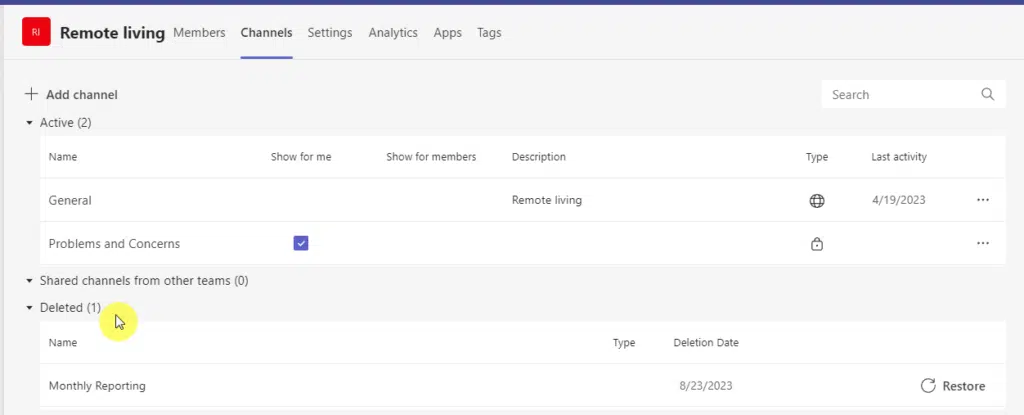
That’s right — simply click that restore button to restore the deleted channel.
Remember that you only have 30 days to restore channels that you deleted.
Do you have any questions about deleting a channel in Teams? If yes, feel free to drop a comment or two.
For business-related questions and concerns, please use the contact form on this page. I’ll get back to you asap.


