

Last Updated on November 17, 2023
Wondering how to connect your site to a group?
In this guide, you will learn the benefits of connecting to a Microsoft 365 group, how to do it with both modern and classic sites, as well as using PowerShell.
Let’s get started.
Table of Contents:
Why Connect to a Microsoft 365 Group
Microsoft 365 has evolved so much over the years and even thinned the line between digital and in-person workspace.
That’s why I’m more amazed than shocked when I learn that others don’t take advantage of it as much as they can.
Connecting an existing SharePoint site to a Microsoft 365 group is a great step toward streamlining productivity.
If you haven’t started yet, here are reasons why you might want to consider it:
1. Unified collaboration:
- Tired of switching between apps? Connecting offers seamless integration between SharePoint and other group-related services like Outlook, Planner, and Teams. It’s like merging all your workspaces into one, reducing the constant toggle.
2. Enhanced document management:
- Remember the time you couldn’t locate that crucial document? With a connected group, your team’s files are stored in a central SharePoint document library, making it easier for everyone to find and collaborate on documents.
3. Streamlined communications:
- If you’ve ever felt lost in the sea of emails and chats, this feature is a lifesaver. Group members receive notifications about the activity on the SharePoint site, ensuring everyone stays in the loop.
4. Increased engagement with modern site features:
- Want to stay ahead of the curve? Modern team sites come with visually appealing layouts and web parts. Once connected, you can leverage these features to engage your team better.
5. Automated access management:
- Gone are the days when you had to manually grant permissions. New members added to the Microsoft 365 Group automatically gain the necessary permissions to the SharePoint site.
Those I helped connect their existing site to a group witnessed a noticeable decrease in confusion regarding document locations and access permissions.
In their words:
It felt like everything was exactly where it needed to be, and the team could focus more on delivering results than navigating a digital maze.
Related: Microsoft 365 Group or SharePoint Team Site: Which to Create
Sign up for exclusive updates, tips, and strategies
What Are Microsoft 365 Groups
Basically, Microsoft 365 groups represent a cross-application membership service in Microsoft 365.
Instead of managing user permissions individually across various services like SharePoint, Outlook, Teams, Planner, and more…
Microsoft 365 groups allow you to define a set of users and grant them access to a collection of collaborative resources.
Benefits of Microsoft 365 groups:
- Unified collaboration: With Microsoft 365 groups, members have a shared workspace for conversations, files, and calendars. It simplifies cross-collaboration without the hassle of switching between apps.
- Dynamic membership: You can set up rules that automatically add or remove members based on user attributes. For example, you could have a group that automatically includes all members from a specific department.
- Enhanced security: Groups are built on Azure Active Directory, ensuring that data classification and access policies are strictly enforced.
- Streamlined administration: Instead of managing permissions for each app separately, administrators can manage them centrally for a group, saving time and reducing potential errors.
- Shared resources: Members of a Microsoft 365 group get a shared mailbox, calendar, document library, OneNote notebook, and planning workspace. This ensures all members can easily access the information they need without redundant communications.
- Integrated with Microsoft ecosystem: Microsoft 365 groups are seamlessly integrated into familiar apps like Outlook, SharePoint, and Teams. This ensures that users have a consistent experience across the various M365 apps.
- Flexible communication: Depending on the group’s purpose and membership, you can choose how to communicate — via email, chat, or even meetings. This ensures that the communication method fits the group’s needs.
Related: How to Create a Microsoft 365 Group: The Ultimate List
Unfortunately, this isn’t possible.
The standard is that a site can only be connected to one group. All existing groups will have a site of their own.
The reason for that is wherever you created the group (from the admin center, Teams, SharePoint, etc.), it will automatically create an associated SharePoint team site.
If this is too important for you, the workarounds available are:
- Recreation: Depending on the importance and the content of the existing SharePoint site and/or the Microsoft 365 Group, you might consider creating a new SharePoint site and then migrating content over, or creating a new Microsoft 365 Group and merging members and content.
- Custom solutions: Depending on your requirements, you might leverage the Microsoft Graph API or Power Automate to craft custom workflows or solutions. However, this would require technical expertise and a good understanding of both SharePoint and Microsoft 365 Groups.
In short, no, you won’t be able to connect a site to an existing group since that group already has its own site.
That’s why all the options for connecting a group will create a new group based on that site collection.
Related: SharePoint vs Office 365: Is SharePoint Part of Office 365?
Connecting to a Microsoft (Office) 365 Group
The question now is how to do the connection.
Fortunately, with the updates that the modern experience brings, the process is straightforward.
In fact, the process is the same whether you’re connecting modern team sites or classic ones.
Modern and Classic Site Templates
As you might know, there are two default types of modern sites:
- Team sites
- Communication sites
Of the two, only team sites can be connected to a group.
Related: SharePoint 101: Types of Sites in SharePoint Online
Recent updates though made it so that creating new team sites without a group has to be done in the SharePoint admin center.
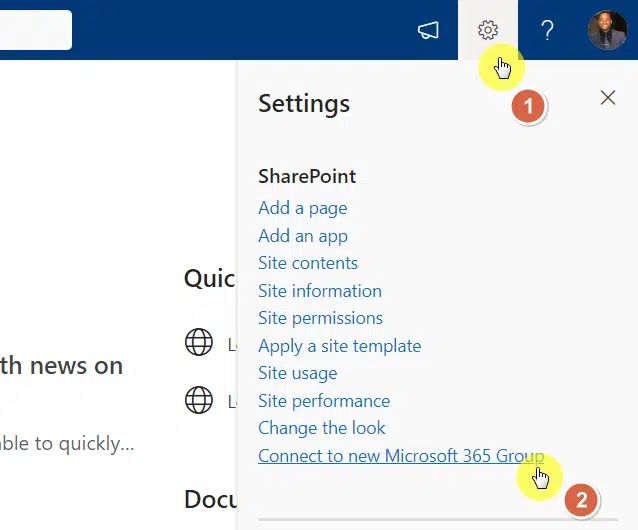
Now, navigate to the unconnected SharePoint Online team site and do the following:
- Click the gear icon in the upper-right corner
- Hit the connect to new Microsoft 365 group option
To answer your question, the same option can also be seen on a classic team site.
Here’s what I mean:
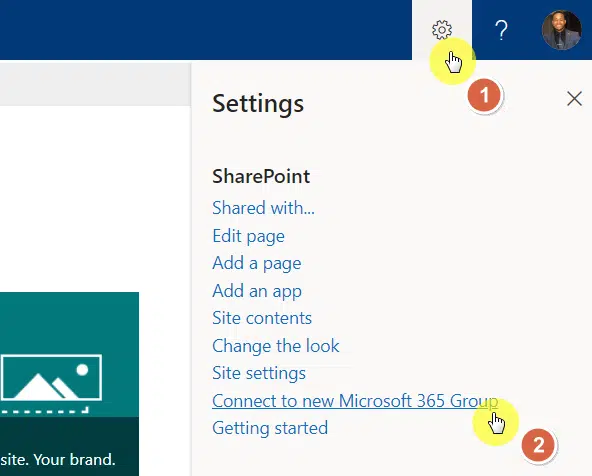
Note: The rest of the steps are the same for both classic and modern site collections.
This will open the right panel with the steps on how to associate the team site with a new group.
As you can see, the connection will create and connect:
- A shared mailbox and calendar
- Planner and other task management tools
- Microsoft Teams
Click the let’s get started button:

The next screen will allow you to change the details of the new Microsoft 365 group:
- Site name
- Group email address
- Privacy
The site name will also become the group name, which is why you have to reenter the information here.
If all is well, click the connect group button:

That’s it! This will now create different Microsoft 365 elements for that group.
By the way, the elements that get created depend on where the new group was created (check the article below).
Related: How to Create a Microsoft 365 Group: The Ultimate List
Using PowerShell Script
If you don’t like using the site-end interface, you can also use PowerShell and PnP PowerShell (credits here).
For PowerShell, copy the following script:
#Set Parameters
$AdminCenterURL="https://mrsharepoint-admin.sharepoint.com"
$SiteUrl = "https://mrsharepoint.sharepoint.com/sites/researchportal"
$GroupName = "Research Portal"
$GroupAlias = "ResearchPortal"

#Connect to SharePoint Online
Connect-SPOService -Url $AdminCenterURL -credential (Get-Credential)

#Connect Team Site to Group
Set-SPOSiteOffice365Group -Site $SiteURL -DisplayName $GroupName -Alias $GroupAlias
If you want to use PnP PowerShell, use the following script:
#Parameters
$AdminSiteURL = "https://mrsharepoint-admin.sharepoint.com"
$SiteURL = "https://mrsharepoint.sharepoint.com/sites/researchportal"
$GroupName = "Research Portal"
$GroupAlias = "ResearchPortal"

Try {
    #Connect to PnP Online
    Connect-PnPOnline -Url $AdminSiteURL -Interactive

    #Groupify the team site to a new Microsoft 365 group
    Add-PnPMicrosoft365GroupToSite -Url $SiteURL -Alias $GroupAlias -DisplayName $GroupName
}
Catch {
    write-host -f Red "Error:" $_.Exception.Message
}
What Happens to Site Permissions and Group Membership
You might start to wonder what changes the connection will have to site permissions and group membership.
Well, it’s a great question seeing that it’s important to ensure secure and efficient collaboration within your Microsoft 365 ecosystem.
Let’s dive deeper into how these elements behave, especially when connecting a SharePoint site to a Microsoft 365 Group.
Site permissions and group membership distinction:
While both site permissions and group memberships govern access, they are managed separately.
Group members will always have the green light to the team site.
However, the unique aspect here is that the team site can also be shared with individuals who haven’t been enlisted as group members.
Related: How to Share a SharePoint Site With Everyone (Tutorial)
Clarifying site and group permissions
Site collection permissions:
Here are the default permissions groups:
- Team site owners: Granted Full control, enabling them to manage all aspects of the site.
- Team site members: Have Edit permissions, allowing content addition, modification, or deletion.
- Team site visitors: Limited to Read permissions, meaning they can view content but not modify it.
A noteworthy point is the support for nested membership, like Azure Active Directory groups or Microsoft 365 Security Groups, within these groups.
Microsoft 365 group permissions:
Here are the group roles:
- Group Owners: Enjoy Full control over the group, mirroring the Team Site Owners’ capabilities.
- Group Members: Receive Edit permissions.
An essential distinction here is the lack of support for nested memberships, such as Azure Active Directory groups or Microsoft 365 Security Groups, in these roles.
When you initiate the inclusion of users in these roles, there’s an automatic reflection in the corresponding site collection permission groups:
- Group owners evolve into site owners
- Group members transition into site members
Related: SharePoint Permissions Explained: How Permission Levels Work
Delving into the connection dynamics
Connecting a group to an existing site:
- The site collection administrator linking the team site to a new Microsoft 365 Group gets a promotion — they become an owner of the group.
- SharePoint takes a proactive approach. It recommends users be populated in the group owners and group members based on the users of the current site. However, if the site permissions groups house security groups or Azure Active Directory groups, SharePoint hits a limitation. It can’t suggest group members derived from these groups’ constituents. In such cases, manual addition becomes necessary.
- Any newly specified group members are seamlessly integrated into the corresponding site collection permissions groups. Meaning, group owners find their place in the team site owners group, while group members are nested under the team site members group.
- Another layer of nuance is the impact at the site collection level. If your setup involves subsites and you have decided to break the permissions inheritance, your permissions architecture stays put. The permissions cascade downwards from the site collection as per your established model, incorporating the newly minted group owners and members.
- On deciding the privacy setting of the new group as public, an interesting shift happens. Everyone within your organization, barring external users, is conferred group member access rights.
Connecting an existing team site to a Microsoft 365 group isn’t just about creating a unified workspace.
It’s also about understanding the shifts in permissions and memberships, guaranteeing that collaboration happens securely and efficiently.
Everything clear with the steps? If you’re stuck or got some questions, feel free to leave a comment or two below.
For business-related questions and concerns, kindly use the contact form on this page. I’ll get back to you asap.


