

Last Updated on August 26, 2023
Need to invite a new guest user in your SharePoint tenant?
In this tutorial, you will learn about the guest user account in Azure AD, how to invite others, assign guest roles, and use cases for this feature.
Let’s get started.
Table of Contents:
Guest User Access in Azure AD
For starters, Azure Active Directory (Azure AD) gives you, as a user administrator, the ability to manage guest user access seamlessly.
A ‘guest user’ in the Azure AD context refers to any external user you invite to collaborate with your organization.
Here are the benefits of giving a guest user access:
- Azure AD’s guest user access feature allows you to extend your organization’s resources, such as apps within your Azure AD, and Microsoft 365 files, to people outside your organization.
- This not only streamlines collaboration but also ensures the safety and control of your resources.
- Your external users can use their own work, school, or social identities to access your shared resources, making it convenient and secure for everyone involved.
For instance, imagine working on a cross-organizational project where external partners need access to your Microsoft Teams channel.
Instead of creating a separate account, your partners can use their existing credentials to log into your shared resources.
That makes it hassle-free for both you and your partners.
Related: SharePoint’s External Sharing vs Azure AD B2B Collaboration
Sign up for exclusive updates, tips, and strategies
Inviting External Users to Azure AD
Inviting guests to Azure AD is a straightforward process.
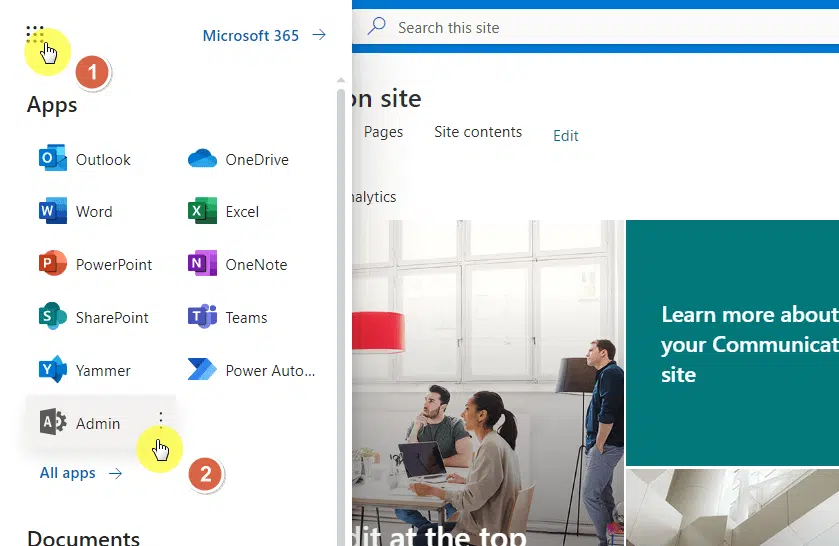
Step #1: Go to the Microsoft 365 admin center
First, you need to get to the Azure Active Directory through these steps:
- Start from any online page in your tenant or environment.
- Click the app drawer button in the upper-left corner.
- Click the admin button.
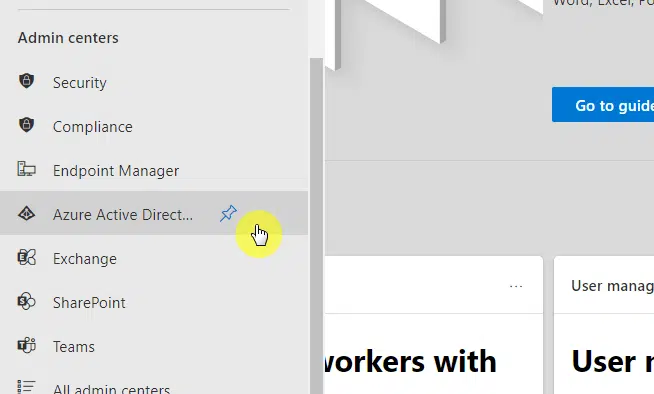
Step #2: Get to Microsoft Entra (Azure AD)
In the Microsoft 365 admin center:
- Expand the admin center options from the left panel.
- Select Azure Active Directory, Exchange, or Microsoft Entra.
Related: What Is Microsoft Entra: Secured Access in a Digital World
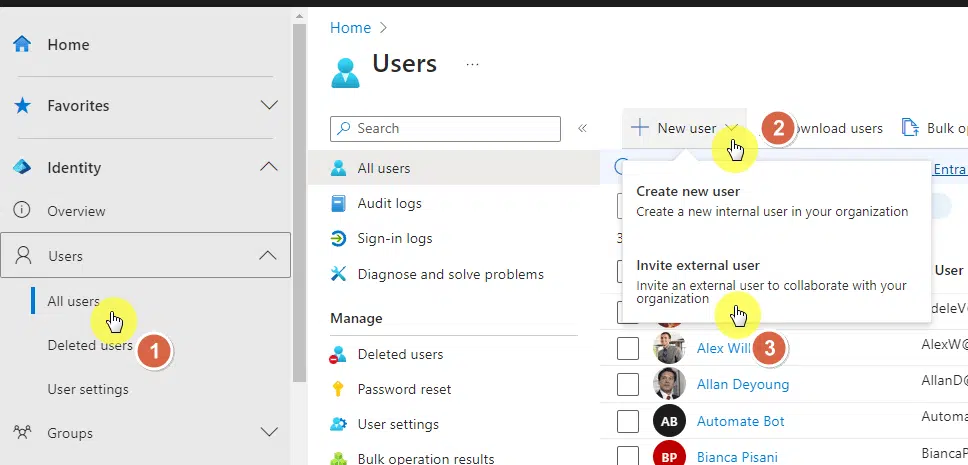
Step #3: Invite external user
In the Microsoft Entra admin center, do the following:
- Expand identity > users > all users
- Click the new user button
- Select invite external user
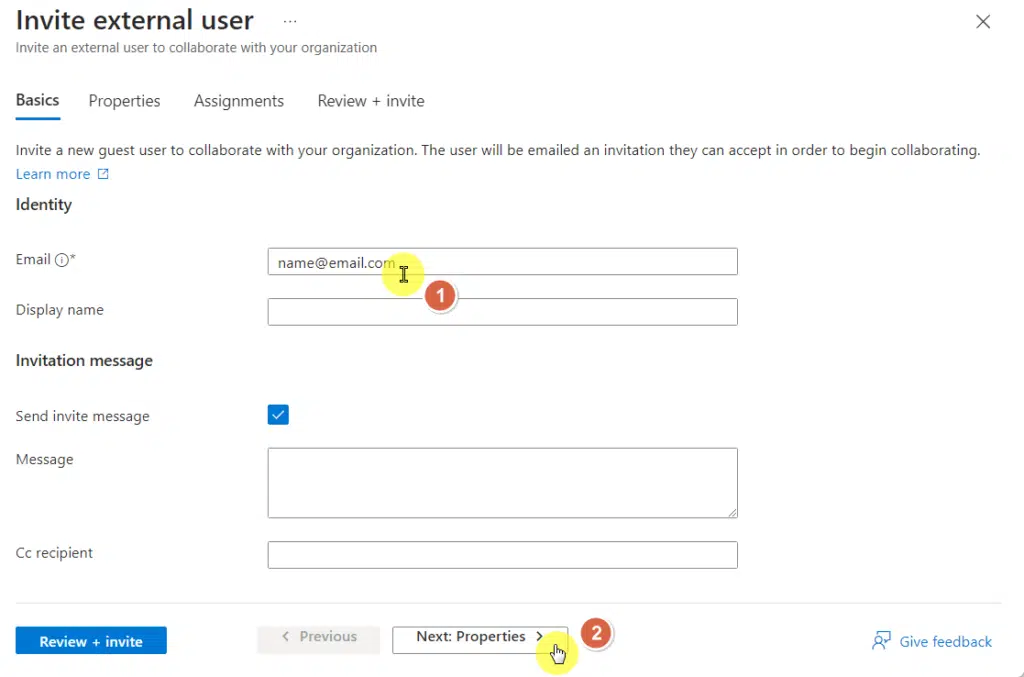
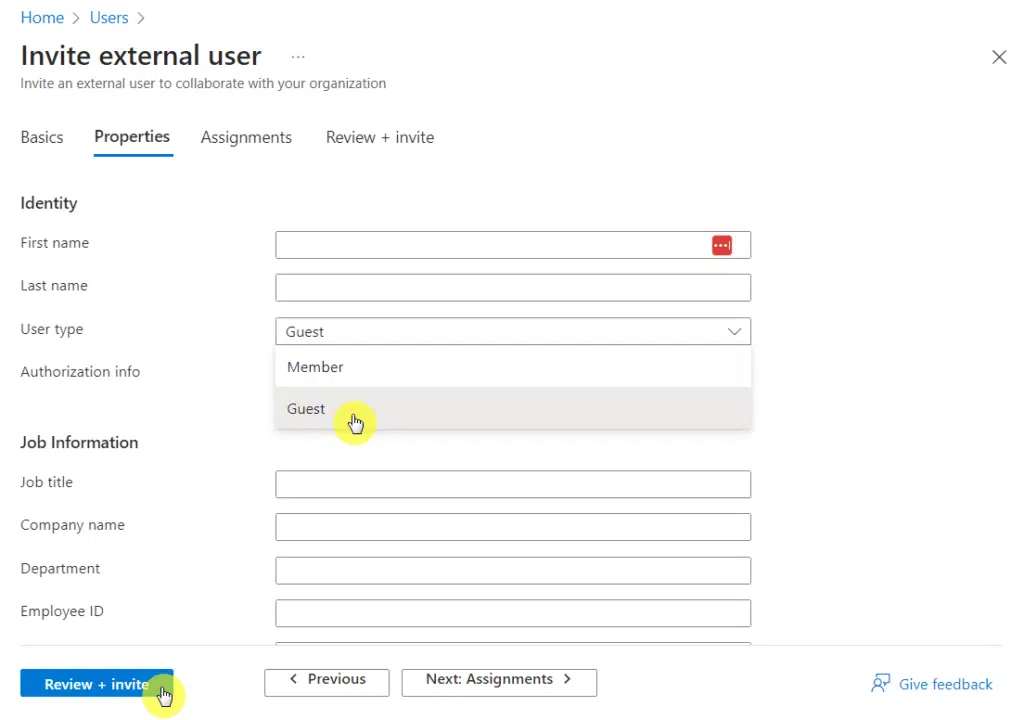
Step #4: Complete the required information
In the first part, you have to provide the basic identity of the user.
However, the only required field here is the email.
But you can also supply the following information:
- Display name
- Invitation message
Click the next: properties button:
The next screen, properties, is also optional.
You can enter here the following information:
- Complete identity (name, user type, etc.)
- Job information
- Contact information
- Parental controls
- Usage location
Note: The only thing I want to point out here is the user type — if the user is a guest, make sure to set this to guest.
Click the review + invite:
You can set the assignments if you want, which allows you to add a role and add the user to a group.
But you can proceed directly to review the invite.
If you’re satisfied, click the invite button:
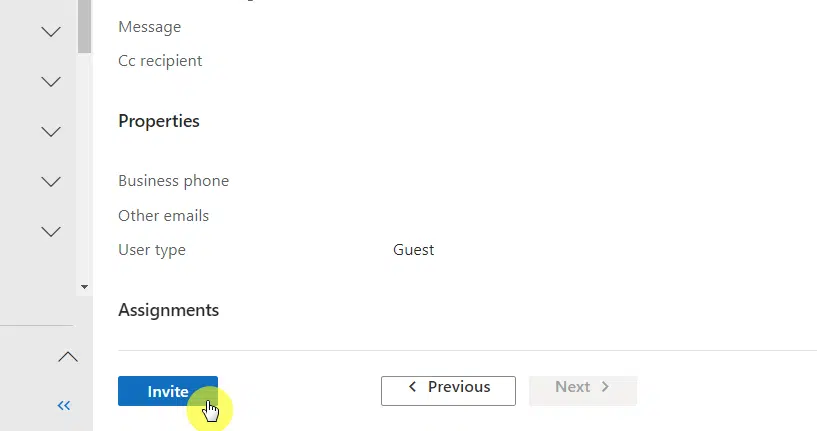
That’s it! Through this process, you create users as guests who will then receive an email inviting them to the tenant.
Managing Guest Users in Azure AD
The Azure portal provides you with a comprehensive set of tools to add guest users, manage, and remove them as necessary.
You have full control over what the guest user or member can access:
- You can assign them specific roles and permissions based on what they need for their work.
- You also have the power to revoke their access when their work is done or when circumstances change.
In the all users list, simply click on the member or guest you want to manage:
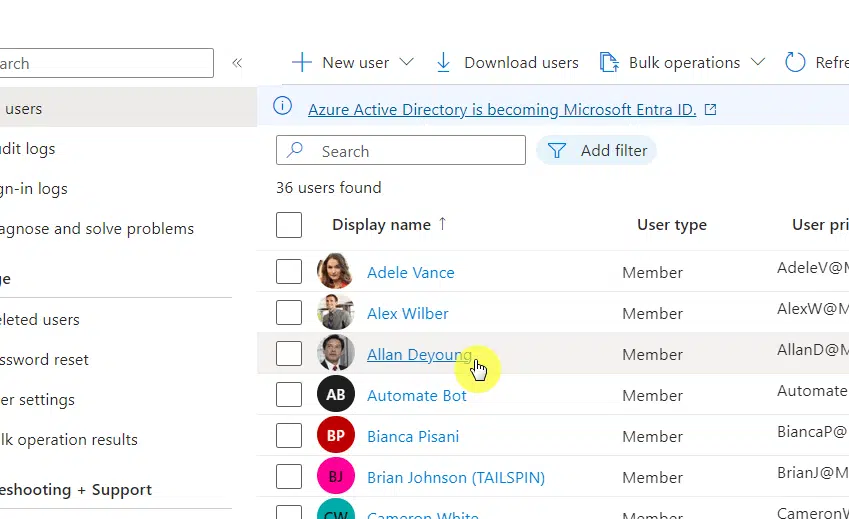
This will bring you to the overview page of the guest user, where you can manually delete the guest user’s profile, reset the password, etc.
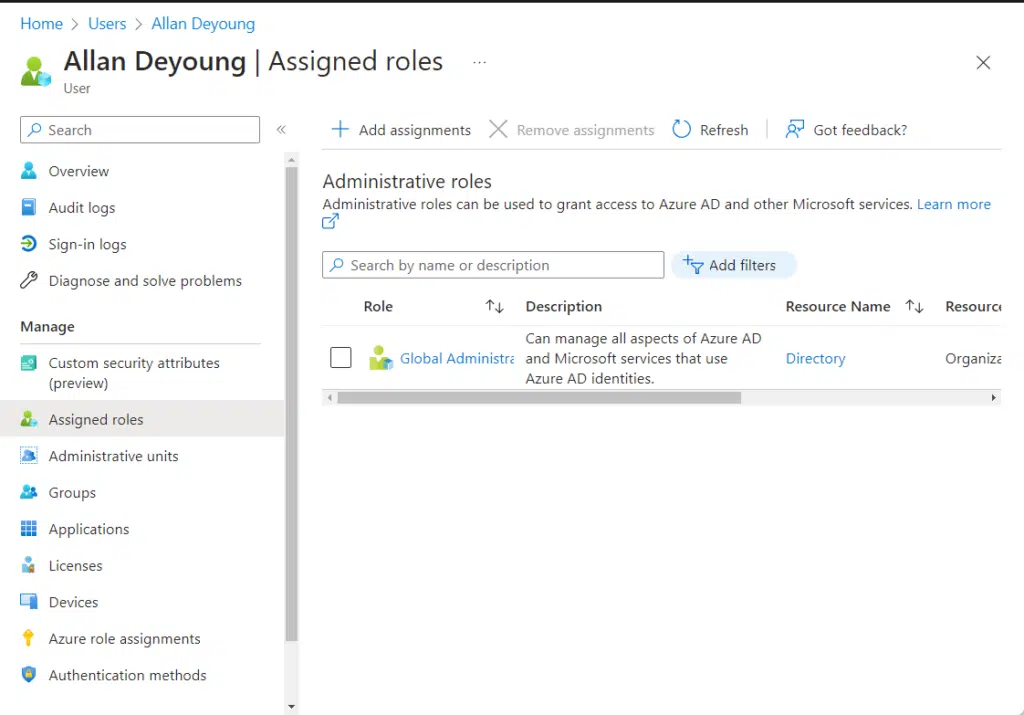
The manage section will let you manage specific roles, admin units, etc. of the guest user account or member.
For example, you can edit that user’s assigned roles, add assignments, or remove existing ones:
Remember that one time you had to manually delete user accounts after a project was completed?
With Azure AD, those days are gone. You can efficiently manage your guest users, knowing exactly who has access to what and for how long.
Azure AD’s comprehensive audit logs also let you track any changes made by guest users for accountability and transparency.
Use Cases of Guest User Access
The guest user access feature in Azure AD can come in handy in various scenarios.
Here are a few common use cases:
- Collaborative Projects: As I mentioned earlier, if you’re collaborating with external partners on a project, you can give them access to specific resources without creating new user accounts. This makes collaboration smoother and more secure.
- Temporary Assignments: If you’re hiring a consultant or contractor for a short-term assignment, guest user access is perfect. You can grant them temporary access to necessary resources and revoke it once the assignment is complete.
- Vendor Management: If you regularly interact with vendors who need access to specific applications or data in your organization, guest user access can make this process much more controlled and secure.
As you can see, guest user access in Azure AD provides a flexible, efficient, and secure solution for sharing your organization’s resources.
It caters to a variety of needs while ensuring the safety and control of your information.
Everything clear on how to invite an external user in Azure Active Directory? If not, feel free to drop your questions below.
For business-related concerns and messages, you can reach me through the contact form here. I’ll get back to you asap.


Is there any way to enforce the manager field in Guest account while sending invitation. So that we can leverage the access review for guest accounts periodically.
Can we add external users without adding them to Active Directory? It seems like in this process we are adding them in the Active Directory.