

Last Updated on November 16, 2023
Can you send files to SharePoint using email?
In this tutorial, I will show you a method you can use to send files to a modern SharePoint document library and how to set it up.
Let’s get started.
Table of Contents:
First things first…
I’m sorry to say that the modern experience in SharePoint Online doesn’t have an incoming email feature.
That doesn’t mean though that it’s impossible. It simply means you have to set it up yourself.
For this, you will need two things:
- Create a shared mailbox for the document library
- Create a new Microsoft flow for importing attachments
Sign up for exclusive updates, tips, and strategies
The first step here is to create the shared mailbox.
Note: You will need the proper licenses and permissions to do the steps below.
Step #1: Go to the Exchange admin center
For this, you need to get to the Microsoft 365 admin center first.
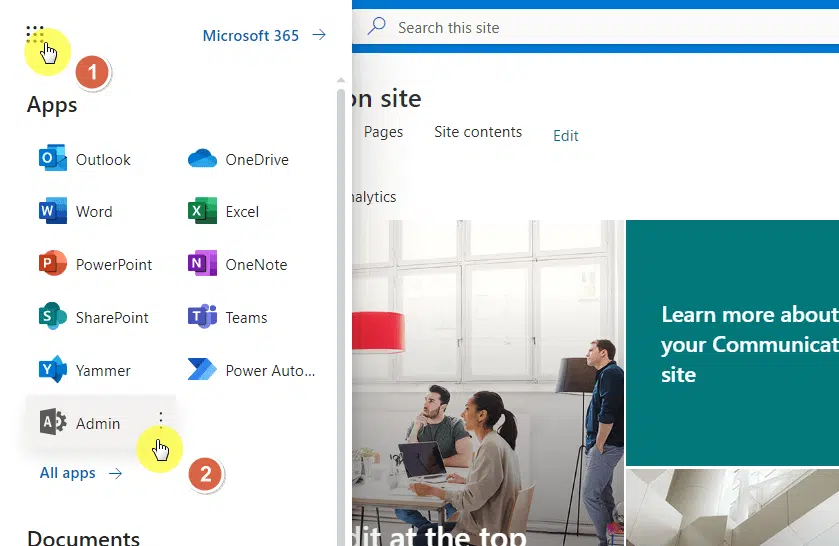
On any Microsoft 365 page, click the app drawer and select the admin button:
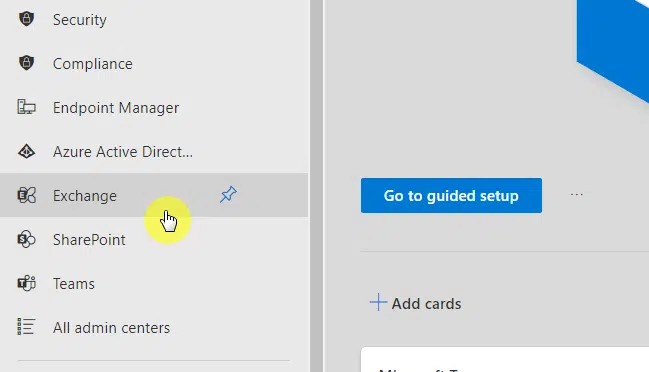
From there, expand the menu on the left panel.
Click the Exchange button:
Welcome to the Exchange admin center.
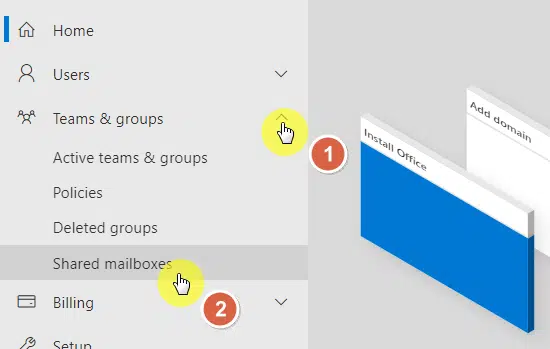
Expand the teams and groups menu on the left panel and click the shared mailboxes option:
Everything is straightforward from here.
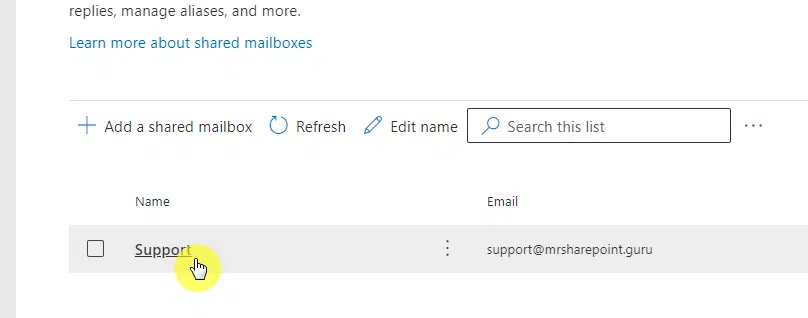
Click the add a shared mailbox button:
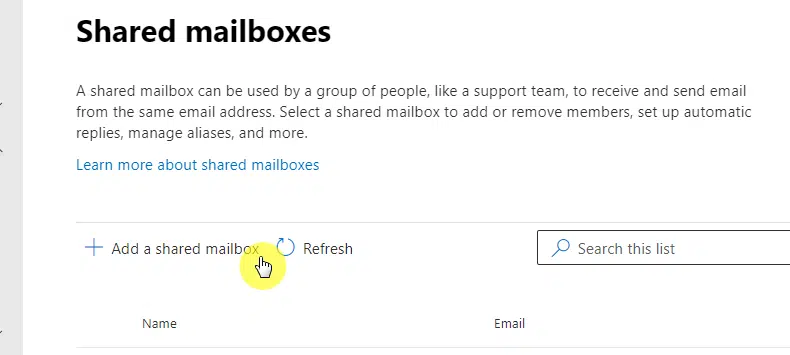
This will open a panel where you can add a shared mailbox.
Enter the name of the mailbox and Exchange will automatically fill out the email field (you can change it if you want).

Make sure that the email address is not in use, or you will see a red error telling you that the email address isn’t available.
Related: How to Add a Shared Mailbox in Outlook 365 (Easy Guide)
Step #3: Delegate the full access (optional)
If you’re a global admin, this isn’t necessary anymore. But you can check if you have full access to the mailbox.
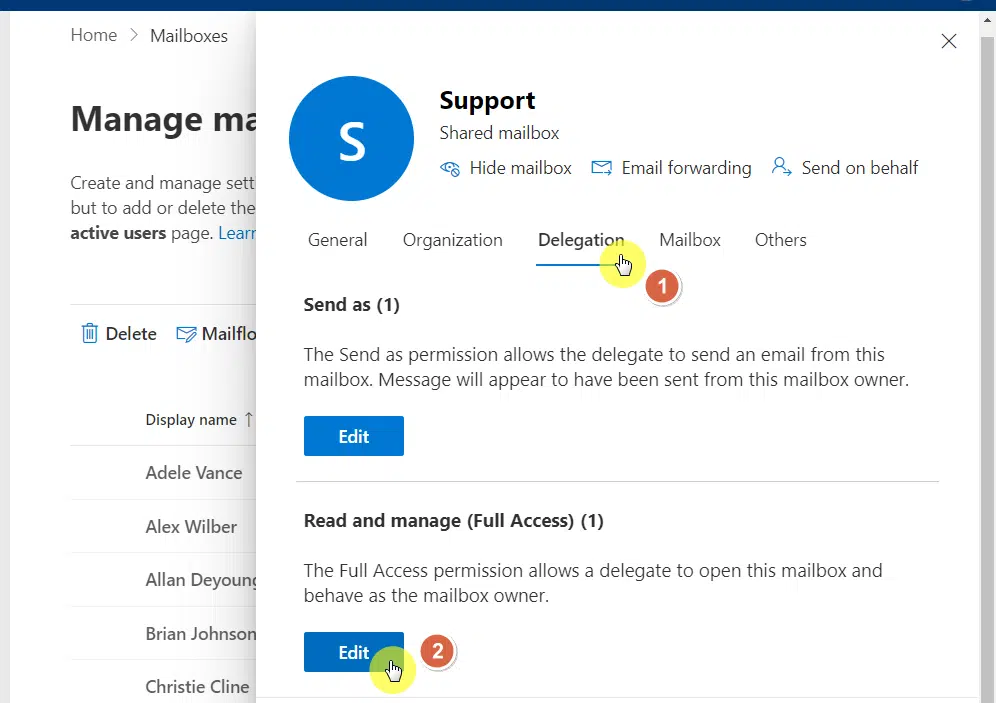
After creating a shared mailbox, it will now appear in the mailboxes list in Exchange — click on it:
A panel will open up with more info on the mailbox.
Go to the delegation tab and click the edit button on the read and manage section:
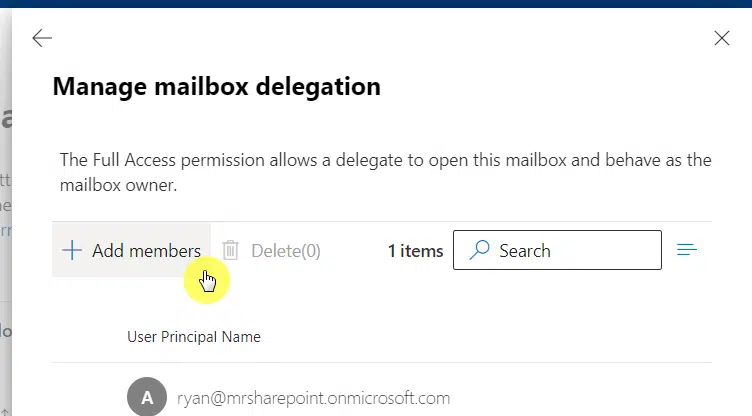
You will see here all the users will have full access permission to the mailbox.
If you didn’t see your name, you can add it by simply clicking the +add members button and adding yourself:
Related: SharePoint Online and Outlook Integration: How It Works
Step #4: Create a new automated cloud flow
The first three steps are for item #1 — creating a shared mailbox. Now it’s time for item #2, creating the Microsoft flow.
Get to Power Automate first:
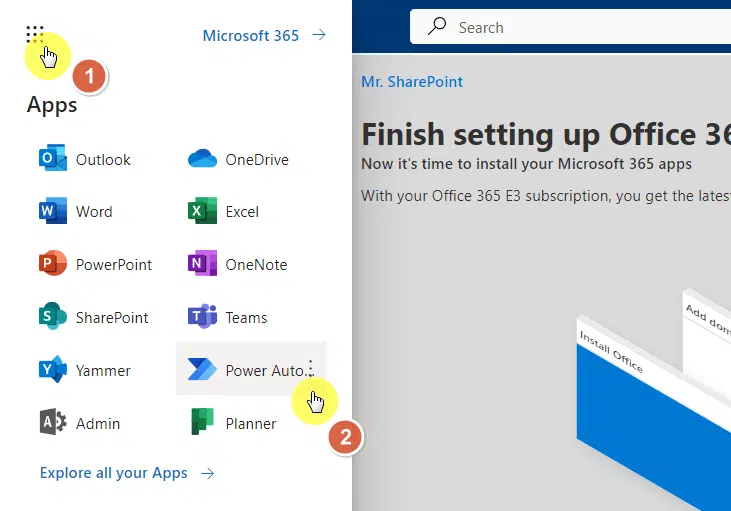
You can now create a Power Automate flow.
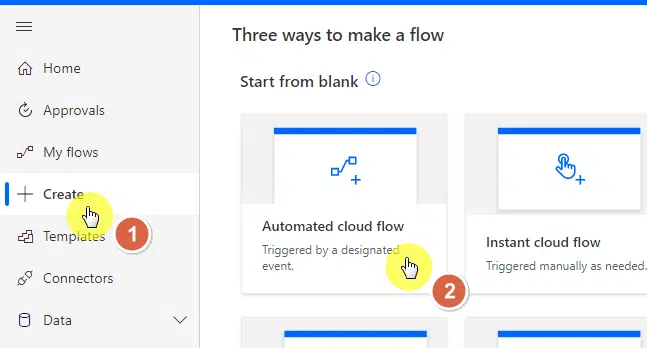
Click the create tab from the left panel and click the automated cloud flow button:
Step #5: Configure the Microsoft Flow
You have the option of giving the Microsoft flow a name, or you can let the system handle it.
The important part is searching for the trigger: when a new email arrives in a shared mailbox.
Click on it from the options and click the create button:

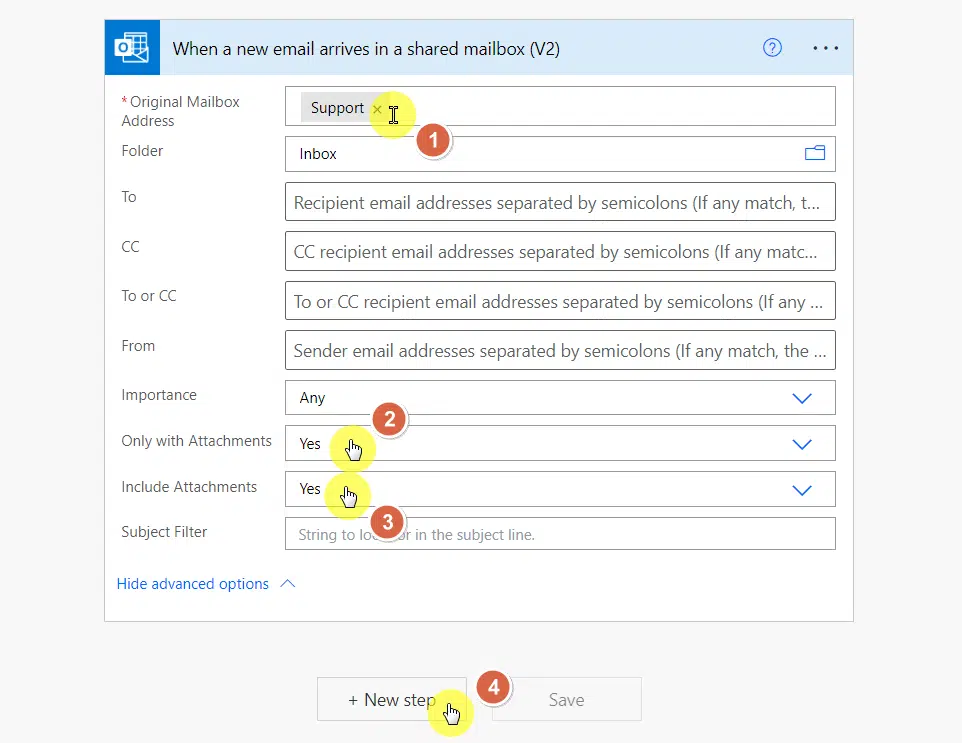
On the next page, show the advanced options of the trigger.
Do the following:
- Supply the original mailbox address (the newly created shared mailbox address)
- Select the folder path (can be the inbox)
- Select yes for the only with attachments
- Select yet for the include attachments
- Click the +new step button
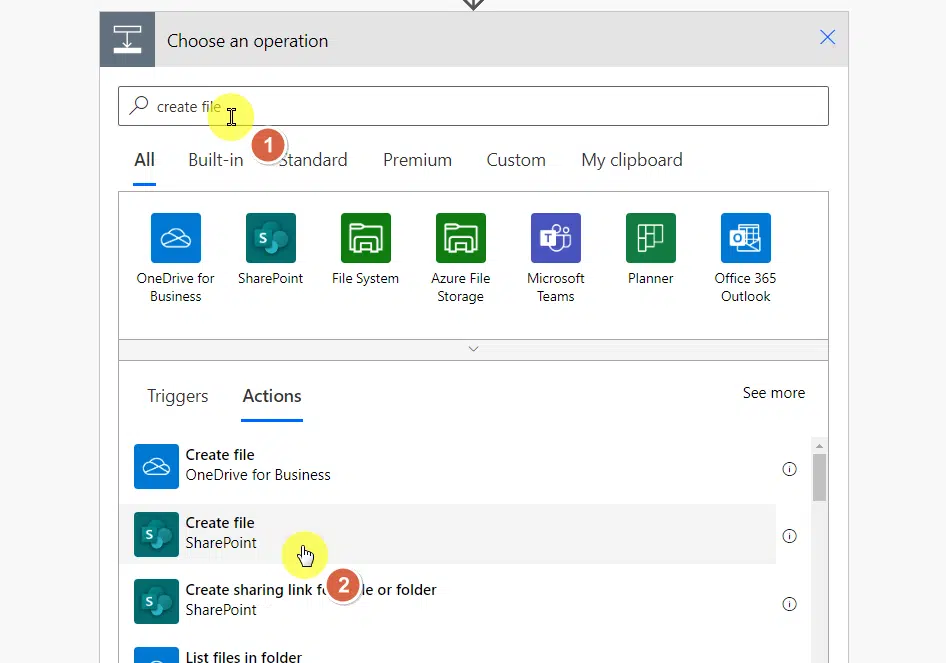
On the operation box, search for the create file operation.
Click on it from the actions section:
Don’t worry, we’re almost done now.
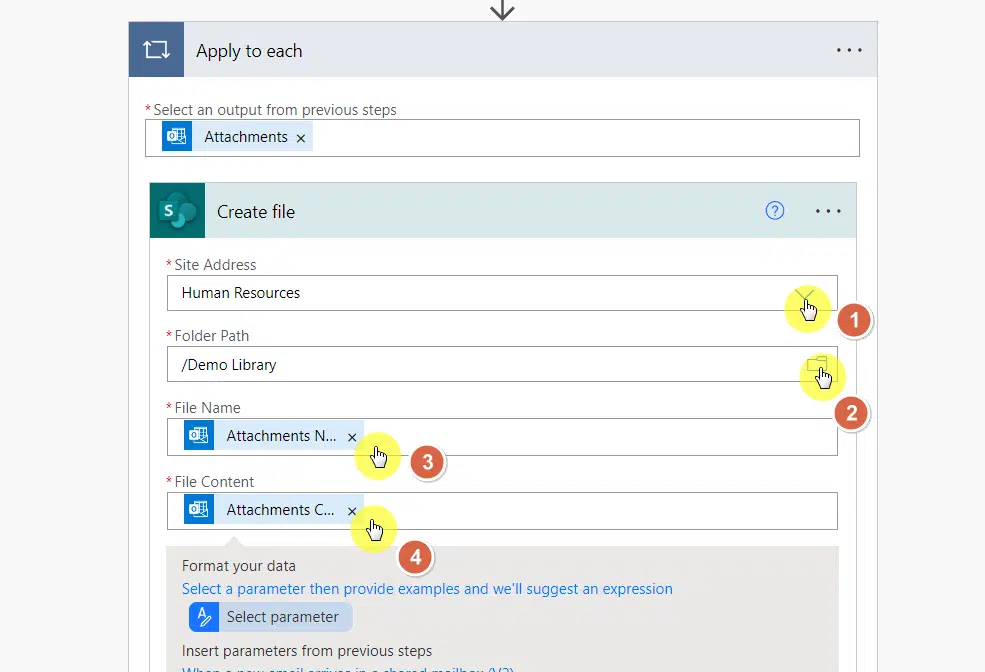
Complete the following:
- Site address (select the destination site)
- Folder path (select the SharePoint Online document library)
- File name (select attachments name from the parameters list)
- File content (select attachments content from the parameters list)
Note: After selecting the attachments name parameter, you may notice a new field above the box. Just ignore it.
After you finish setting up the box above, click the save button below that box.
Since the flow is an automated one, it will automatically run when the trigger is hit.
Related: How to Forward a Folder of Emails in Outlook (Using Rules)
Step #6: Test the flow
As with everything, it’s important that you test it out first to know if the flow worked properly or not.
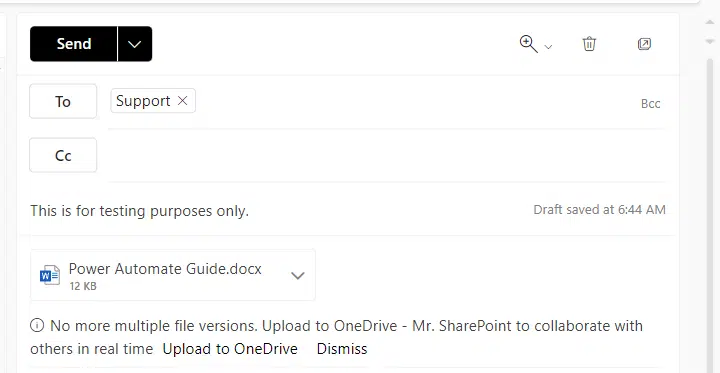
This is the mail content we’re sending:
Depending on how large the file is, you may have to wait for a few minutes.
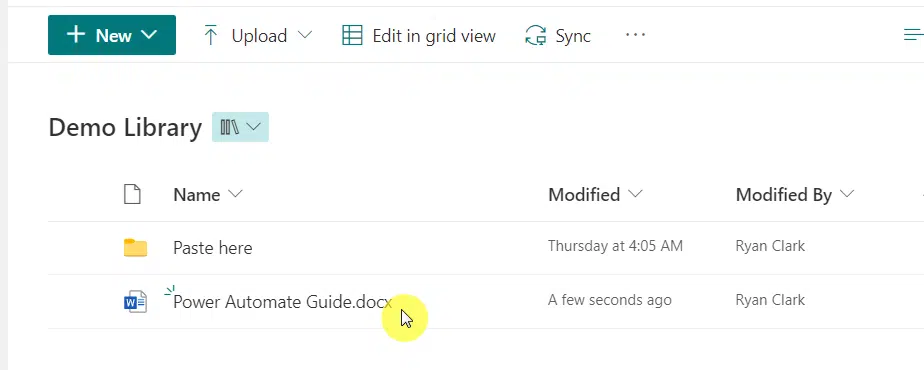
And boom, here is our test file on the SharePoint document library:
Related: Modern SharePoint Document Management System Guide Tutorial
Using email is only one way to send a document or a file to SharePoint Online.
In fact, I will say it’s one of the most tedious ones since there are several easier options.
Here are some of them:
- Through the SharePoint Online interface: This is the most common method. You can navigate to the specific document library in SharePoint Online and select the “Upload” button to choose a file from your computer to upload.
- Syncing with OneDrive: If you have the OneDrive sync client installed on your computer, you can sync your SharePoint Online libraries with a folder on your computer. Any files you add to this folder will automatically be uploaded to SharePoint Online.
- Using Microsoft Teams: If your SharePoint Online site is linked to a Microsoft Teams team, you can upload files directly from Teams. These files will then be accessible in both Teams and SharePoint Online.
- Using the SharePoint mobile app: If you have the SharePoint mobile app installed on your phone, you can use it to upload files directly to SharePoint Online.
- Using PowerShell or other scripting tools: If you’re comfortable with scripting and you need to upload many files at once or automate file uploads, you can use PowerShell or other scripting tools with the SharePoint Online Management Shell or the SharePoint Online Client Object Model.
Got lost along the way? If you’ve got questions, simply drop them in the comments.
For business inquiries and concerns, kindly fill out the form here and I’ll get back to you asap.


This looks fantastic. One question. What happens to files that are emailed with the exact same name? does it become filename(1).xlsx or overwrite the file with the same name? (The latter is what i would like for my use case)