

Last Updated on October 20, 2023
Thinking of using Microsoft Planner for your Agile project?
In this guide, I will share how you can use Microsoft Planner to manage Agile development processes, even for large and complex projects.
Let’s get started.
Table of Contents:
What is Microsoft Planner?
Microsoft Planner is a task management app that’s part of Microsoft 365.
At its core, it’s a visual way to organize teamwork where teams can create plans, each containing a number of tasks.
These tasks can then be assigned to different team members, with each task having its own due date, attachments, and comments.
If you’re familiar with Trello, this app basically works the same way, with Kanban project management features.
Related: What is Microsoft Planner? How to use it? (Beginner’s Guide)
Sign up for exclusive updates, tips, and strategies
How do Agile principles apply in Planner?
Planner might seem like a simple task management app, but it has the right features for various Agile principles.
Here are ways how Microsoft Planner can be used to implement Agile project management:
- Individuals and interactions over processes and tools: Microsoft Planner promotes collaboration with features that allow team members to work together on tasks, assign tasks, and share feedback via comments. The tool can be used to facilitate interaction and communication within the team, which is a key Agile principle.
- Working software over comprehensive documentation: While this principle is specifically about software development, it can be adapted to any project by focusing on delivering usable products or results instead of getting bogged down in extensive planning. Planner’s task-oriented approach helps teams focus on what needs to be done to move the project forward.
- Customer collaboration over contract negotiation: Agile places a strong emphasis on partnering with clients to comprehend their requirements and deliver worth. Although Planner doesn’t have a direct interaction feature with customers, it serves as an effective tool for logging customer feedback, suggestions, and requests in the form of tasks or comments, promoting continuous collaboration.
- Responding to change over following a plan: Agile teams need to be flexible and adapt to changes. Planner’s intuitive and visual interface makes it easy to move tasks around, re-prioritize work, and adjust plans as needed.
- Continuous delivery of value: Agile teams aim to deliver value to the customer on a regular basis. Planner’s features such as due dates, progress tracking, and labels can be used to manage and monitor the regular delivery of tasks or project increments.
- Face-to-face conversation: While Planner itself is not a communication tool, its integration with Microsoft Teams supports this Agile principle by making it easy to move from task management to team conversation.
- Sustainable development: Planner can help teams manage their workload effectively to avoid burnout, by providing a clear view of who’s doing what and helping to balance tasks across team members.
- Continuous improvement: Teams can use Planner to reflect on their work process, track improvements as tasks, and monitor the implementation and impact of those improvements.
On the other hand, Agile isn’t just about the tool. It’s about adopting a mindset and a set of practices.
Planner can certainly facilitate Agile project management. But it’s the people and processes that truly make a project Agile.
How to use Planner for Agile project management
Now let’s talk about the meat of this guide — how to use Planner to implement Agile principles in project management.
1. Setting up a project
The first thing you need to know is that a project is called a plan in Planner (well, I guess it’s in the name already).
Now, there are three ways you can create a plan:
- New plan button in the Planner app
- Create a Planner tab in Microsoft Teams (more on this later)
- Add a new plan in SharePoint Online (more on this later)
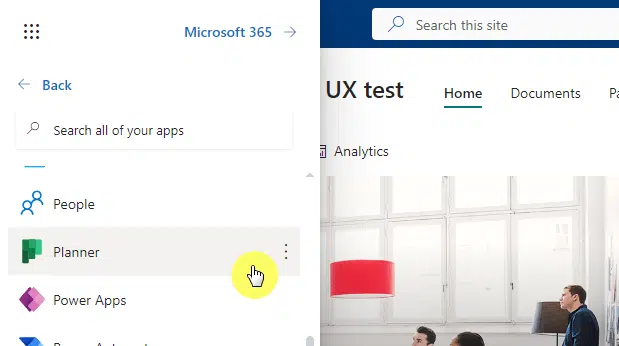
By the way, the URL for Planner is tasks.office.com.
However, you can also get there from any Microsoft 365 page through the app launcher and find the app from the list:
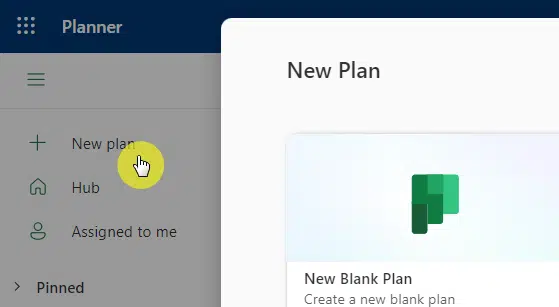
When you get to the Planner app, you will see all the plans that are already in your organization (that you have access to).
If you want to create a new plan here, click the +new plan button and select a template:
Related: How to Make a New Plan in Microsoft Planner (+No New Group)
2. Creating a backlog
A backlog is basically a list of tasks or work items that need to be completed but are not currently being worked on.
From the step above, if you opted to start from a template, then you will see sample tasks in sample columns.
Since we’re talking about backlogs here, to create a new item, click the +add task button under the to do column.
Write the task name and click the add task button again:
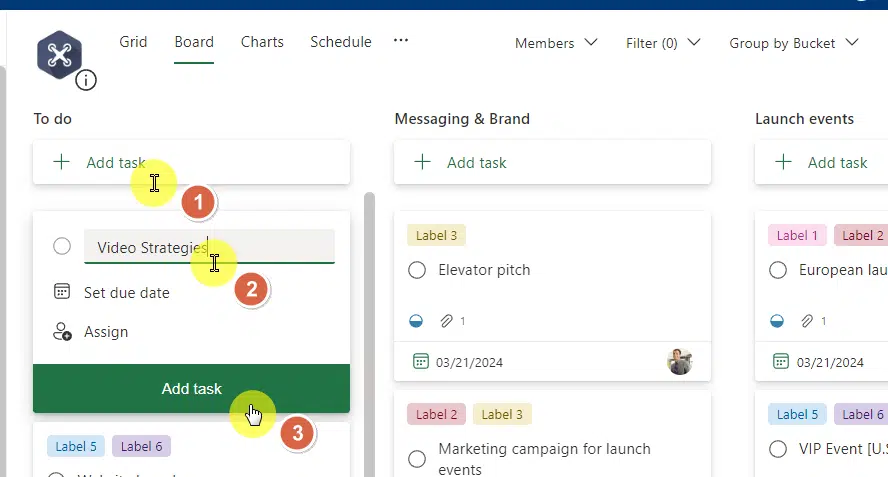
That will enter the new task in the queue for that column.
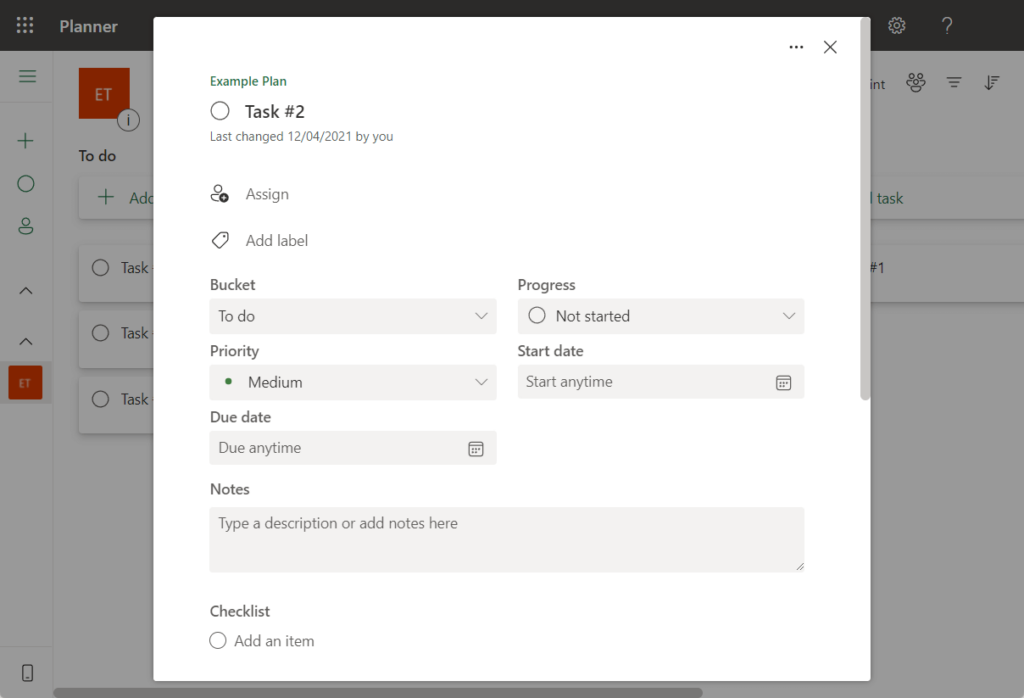
The next step is to give the task as many details as possible, including descriptions, checklists, attachments, and labels, if necessary.
Click on the newly added task and fill out the fields:
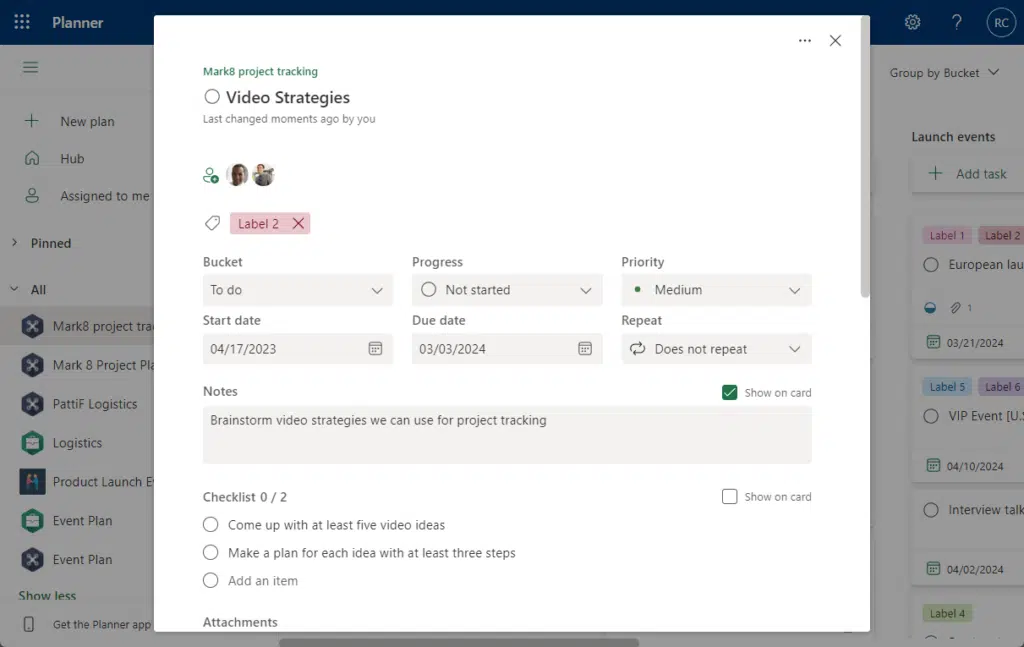
Microsoft Planner has a built-in feature that will allow you to put a prioritization tag on a bucket.
There are four levels:
- Low
- Medium
- Important
- Urgent
This step is part of the development or planning phase. Remember that your backlog isn’t a set-it-forget-it tool.
Rather, you must review this column regularly, with tasks added, removed, or reprioritized as necessary.
Related: Microsoft To Do vs Planner: The Better Tool (Differences)
3. Organizing tasks into sprints
Yes, Microsoft Planner doesn’t natively support sprints, a concept from Agile methodologies where work is divided into set time periods.
However, you can still organize your work into sprints with a little creativity — since you can virtually create as many buckets as you want.
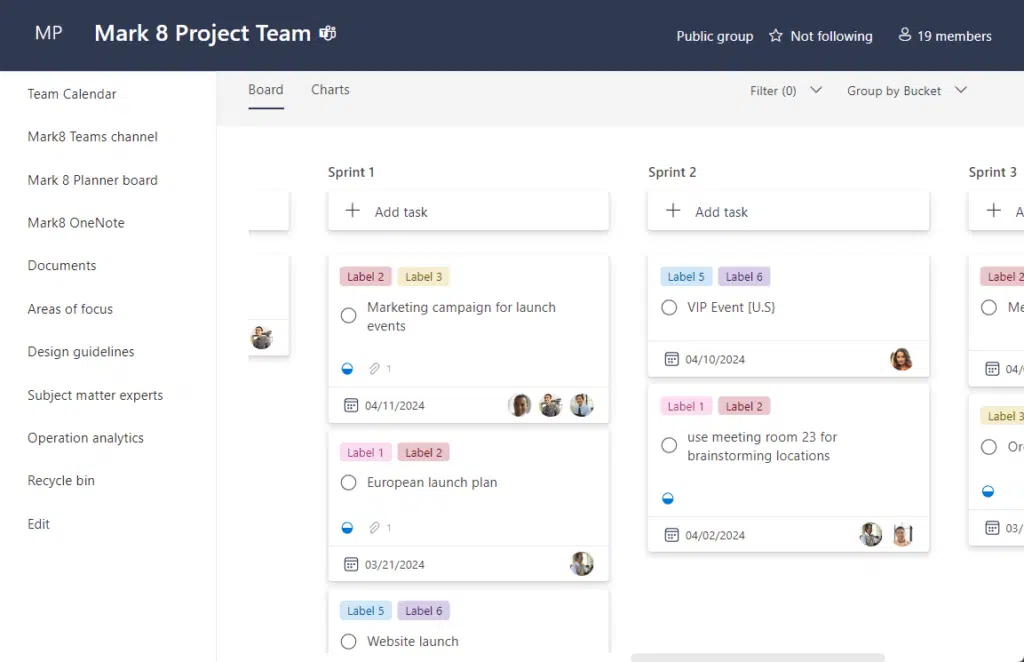
The first part is to create buckets for each sprint.
Go to the right-most end of the plan, hit the add new bucket button, and enter the bucket’s name:
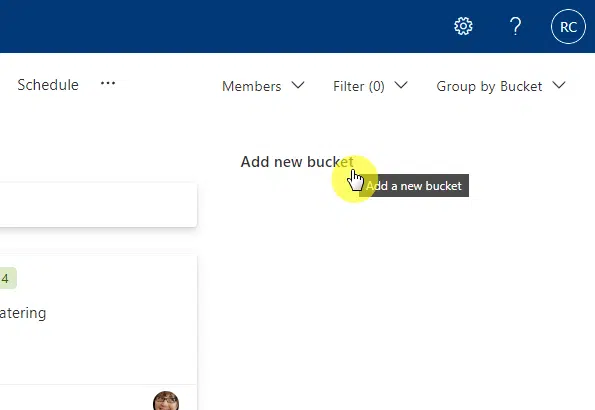
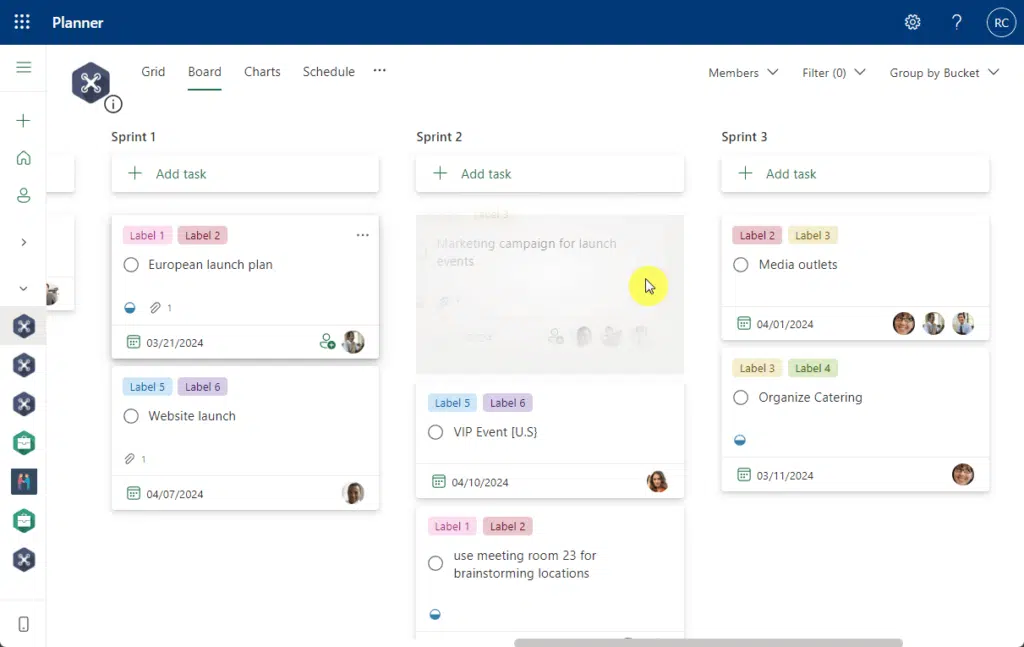
You can name these buckets “Sprint 1”, “Sprint 2”, etc., or use the dates of the sprints.
After setting up the buckets, you can begin moving tasks from your backlog into the right sprint bucket.
As the work progresses, each team member must change the task’s progress tag from in progress to complete.
At the end of each sprint:
- Review the Planner tasks that were completed and those that were not
- Unfinished tasks can be moved into the next sprint bucket or back into the backlog
4. Managing workloads
There are several things that the project manager and project members can use to manage the workloads.
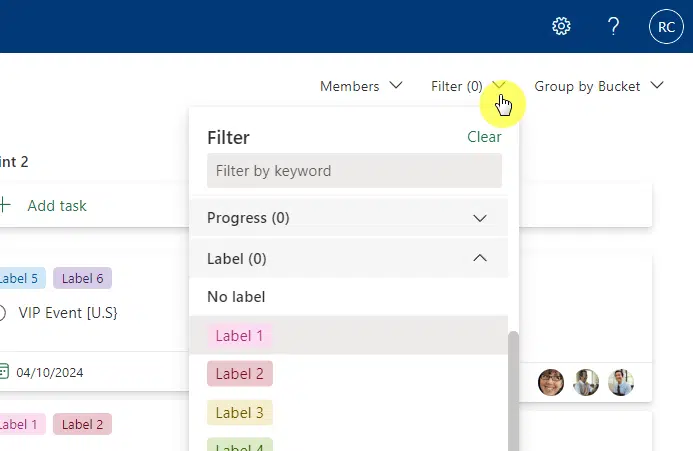
For one, you can filter out the tasks by labels, progress, or even assignment (especially helpful for project managers).
There is a filter button in the upper-right corner that will allow you to filter the tasks (you can even use a keyword).
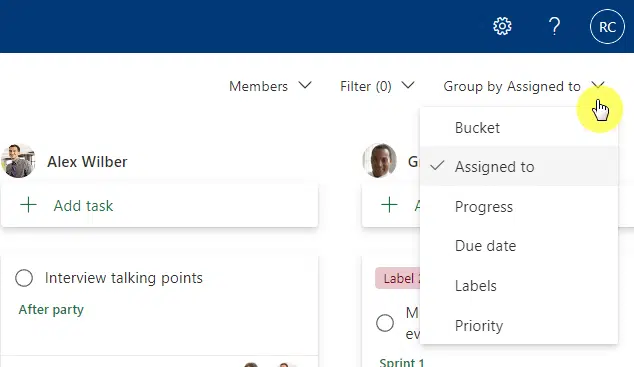
Another nice feature you can take advantage of is the fact that you can group the tasks based on their tags:
- Bucket (default)
- Assigned to
- Progress
- Due date
- Labels
- Priority
The group by button is beside the filter button on the upper-right corner of the page:
There is also a project chart available so you can have a quick glance at the user stories in different buckets.
It provides information on the overall status of the project, priority, tasks, and started/not started tasks in a bucket and per team member.
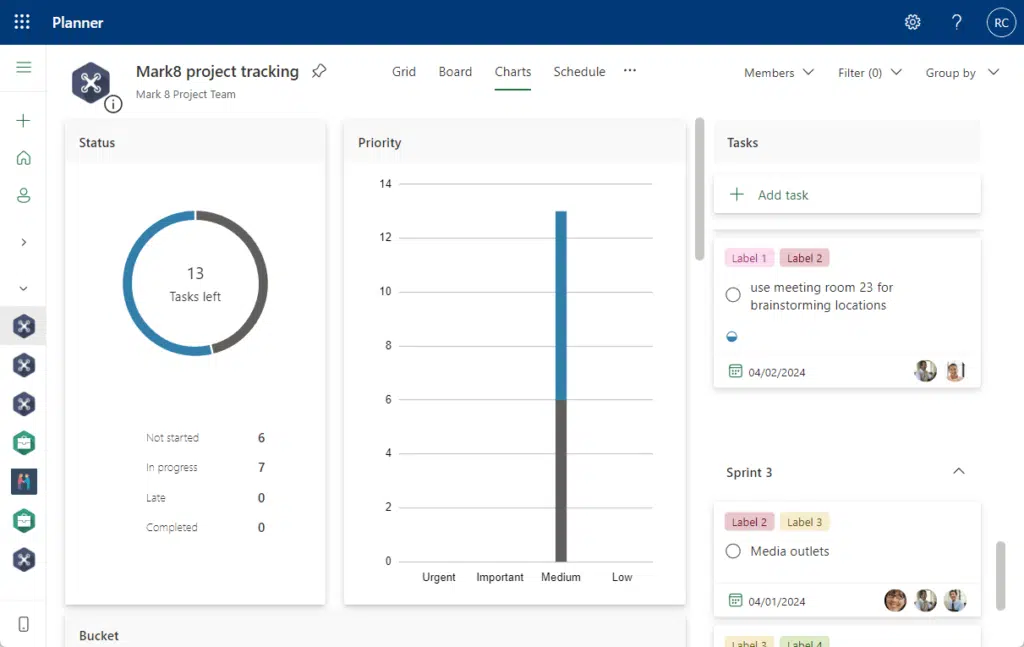
Besides that, you can also view the project in two other modes:
- Grid (looks similar to a list view)
- Schedule (the calendar view)
Related: Microsoft Planner Best Practices: Boost Productivity
How does Agile differ from traditional project management methodologies?
Agile project management is often contrasted with traditional project management methodologies.
Here is a quick comparison table of the two:
| Aspect | Agile Project Management | Traditional Project Management |
|---|---|---|
| Planning | Emphasizes adaptive planning and allows for changes. | Emphasizes comprehensive upfront planning and follows a predetermined plan. |
| Delivery | Delivers work in small, usable increments regularly. | Delivers the whole project at once at the end of the project lifecycle. |
| Roles & Responsibilities | Roles are more fluid, team is self-organizing and everyone collaborates on most tasks. | Roles and responsibilities are clearly defined and tend to be more rigid. |
| Customer Involvement | High customer involvement throughout the project, with regular feedback and adjustments. | Customer involvement is usually limited to the beginning (requirements gathering) and end (UAT). |
| Change Management | Welcomes changes and adapts to them even late in development to maximize customer value. | Tries to limit changes, which usually require formal change requests and can be seen as a problem. |
| Work Style | Works in short iterations or sprints, with regular reflection and adjustment. | Follows a linear sequence of phases (e.g., initiation, planning, executing, controlling, closing). |
| Performance Measurement | Value delivered, customer satisfaction, and adaptability are key measures. | Emphasizes conformance to the project plan, such as staying on schedule and under budget. |
| Documentation | Values working software over comprehensive documentation. Documentation is as necessary. | Often requires comprehensive documentation throughout the project lifecycle. |
In practice though, the specifics can vary greatly depending on the project, the organization, the specific methodology used, and other factors.
Related: Exploring Lifecycle Management Tools in Microsoft Teams
Use Microsoft Planner within Microsoft Teams
Microsoft Planner is fully integrated with Microsoft Teams, so you can use it directly within Teams to manage tasks.
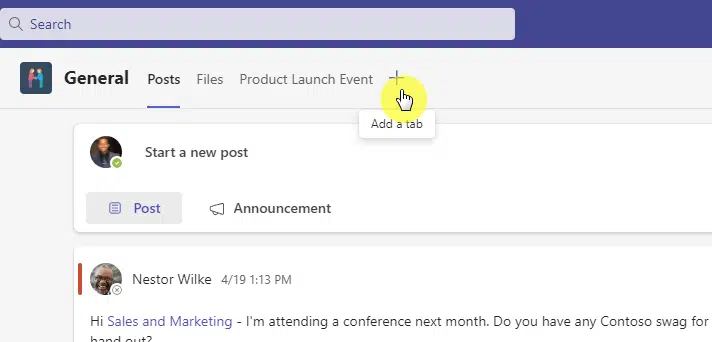
On Teams, navigate towards the correct team and channel where you can add the Planner as a tab.
Click the + button in the tab bar:
Related: The Best Project Management Apps for Microsoft Teams
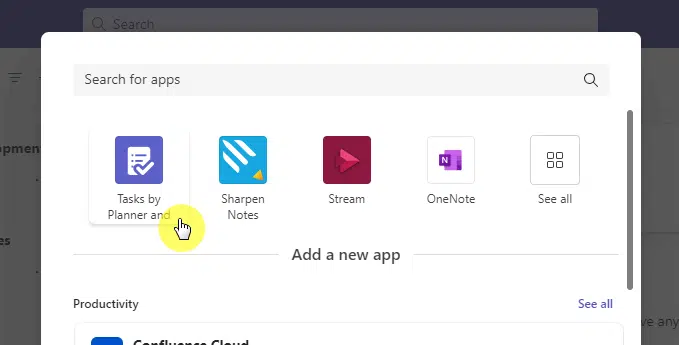
This will open a window where you can search and add apps.
From here, all you have to do is click the Tasks by Planner app or search for it if it’s not showing right away:
Related: Microsoft Teams Best Practices Guide: Focus and Management
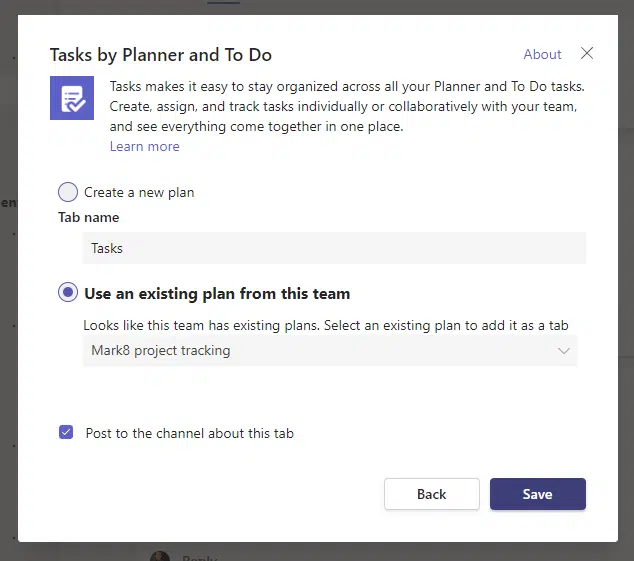
From there, you can create a new plan or use an existing plan from the team.
Hit the save button and you’re good to go:
This is a good way to change the way your team works and communicates about tasks.
Since Teams is integrated with the entire Microsoft 365 suite, you can easily link or attach files from the main office apps to your tasks.
Similar to Teams, Planner is integrated with SharePoint Online so you can use its task management capabilities directly in SharePoint.
The only requirement here is for the site to be a team site that’s associated with a Microsoft 365 group.
Related: Types of Groups in Microsoft 365: Comparing Groups
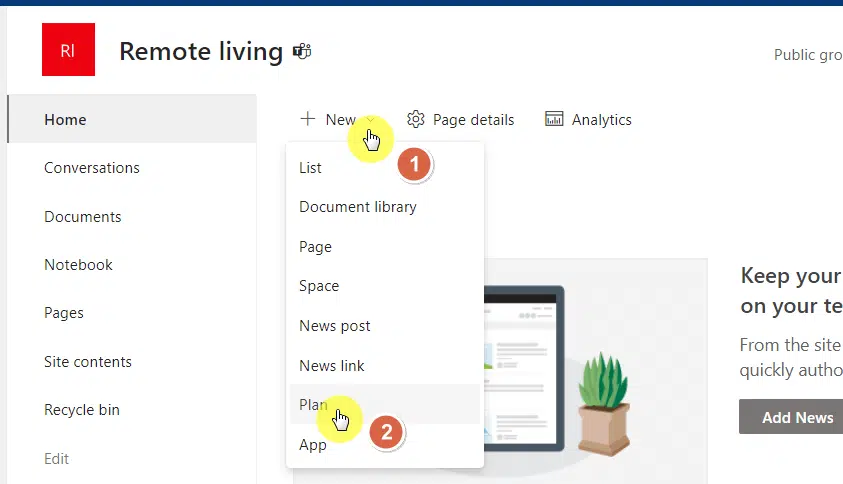
Inside the site, click the new button on the home page and click the plan option:
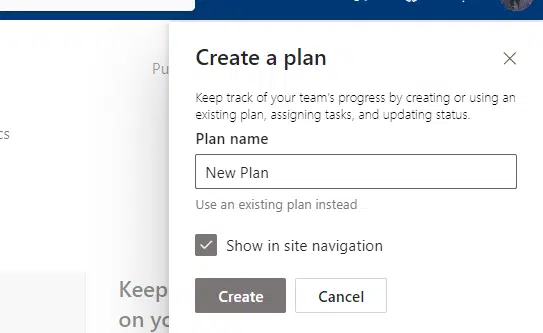
This will open the right panel and give you two choices:
- Create a new plan
- Use an existing plan
Through that, you will be able to use Planner natively right inside the SharePoint site.
As an example, here is the plan I showed you in the examples, now displayed and usable within SharePoint Online:
Is everything clear with using Planner for Agile project management? If not, kindly drop your questions below.
For business inquiries and concerns, send me a message using the form here and I’ll get back to you asap.


Hello, amazing author! Your article on “How to Use Microsoft Planner for Agile Project Management” is a true gem for anyone looking to leverage Microsoft Planner for their projects. Your step-by-step guide and practical tips make it incredibly easy to understand and implement Agile project management within the Planner tool. I loved how you emphasized the flexibility and adaptability of Microsoft Planner for Agile workflows. Your explanation of creating buckets for sprints, using labels for task categorization, and the power of due dates and checklists showcases the versatility of this tool. The real-life examples you provided brought the concepts to… Read more »
Do you have a recommended or suggested Agile Project template to be used? Not MS Project?