
Last Updated on August 26, 2023
Are you experiencing some latest Windows update problems?
In this guide, I will show you how to fix Windows update errors, especially Windows 11, and some advanced methods you can do.
Let’s get started.
Table of Contents:
What are the possible reasons for the update problem?
There can be several reasons why a Windows 11 update might fail or encounter problems with the latest Windows update.
Here are some of the most common reasons:
1. Incompatible hardware
Windows 11 has specific hardware requirements that must be met in order for the operating system to function properly.
These requirements include the following:
- Processor: 1 gigahertz or faster – with 2 or more cores on a compatible 64-bit processor
- RAM: 4 gigabytes
- Storage: 64 GB or more
- System firmware: UEFI, Secure Boot capable
- TPM: Trusted Platform Module version 2.0
- Graphics card: Compatible with DirectX 12 or later with WDDM 2.0 driver
- Display: High definition (720p) greater than 9″ diagonally
- Internet connection and Microsoft account
If your computer’s hardware does not meet these requirements, you may encounter problems when updating to Windows 11.
2. Corrupted system files
System files are important components of the Windows operating system.
If any of those files become corrupted or missing, it can cause issues with the update process.
This can happen due to any of the following reasons:
- Malware infections
- Hard disk errors
- Other system issues
3. Third-party software conflicts
Sometimes, third-party software or drivers on your computer can conflict with the Windows 11 update process.
Compatibility issues and outdated drivers or software can potentially cause conflicts.
In fact, Microsoft keeps a list of known issues related to Windows 11 like:
- Red Dead Redemption 2
- Third-party UI customization apps
- BitLocker Recovery
4. Network connectivity issues
In order to download and install updates, your computer needs to be connected to the internet.
If there are problems with your network connection or if your computer is unable to connect to the Windows update servers, the update process may fail.
You must also check for intermittent issues, as it’s likely the cause (it’s a little obvious if you’re actually offline).
Sign up for exclusive updates, tips, and strategies
How to fix the update problem in Windows 11
If you are experiencing problems with Windows updates, there are several steps you can take to fix the issue.
The good news here is that since the update problem is one of the known issues with Windows 11, there are a lot of fixes users already tried.
Here are some basic troubleshooting steps you can follow:
1. Check for updates
This might seem a little contradictory to our topic.
However, it’s possible that you weren’t able to actually download the entirety of the update due to connection problems.
Right-click on the Windows start button > settings option:
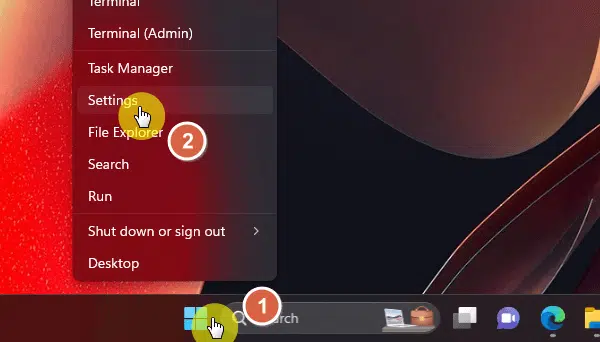
That will open a new window with your system settings.
Go to the Windows update tab:
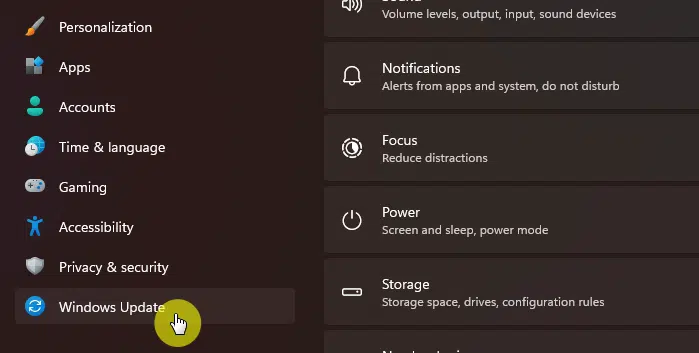
New Windows update packages that you can install will show up here.
Click the install all button to install them all or the install button for specific update packages:

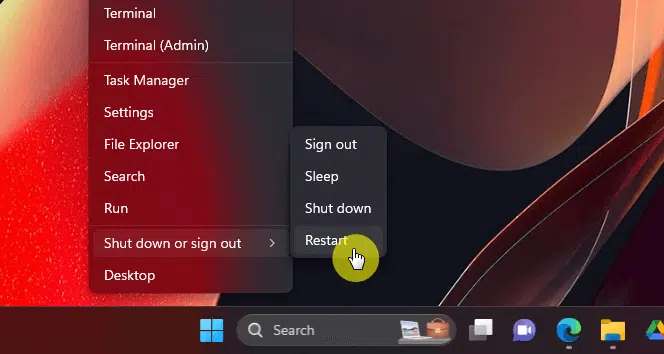
2. Restart the system
Sometimes a simple restart can fix update issues.
Try restarting your computer. Then, attempt to install the update again.
There are many updates that will require you to restart the computer for it to finish the installation.
3. Run the Windows Update troubleshooter
Windows 11 has a built-in troubleshooter that can help diagnose and fix problems with the update process.
To run the troubleshooter, go back to system settings > system > troubleshoot:
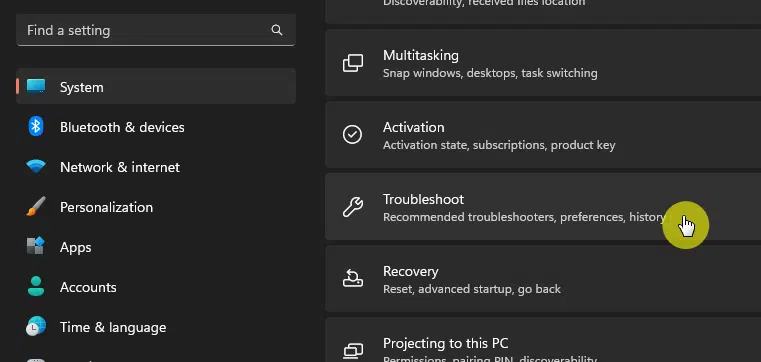
You will then see various troubleshooting options.
Click the other troubleshooters option:
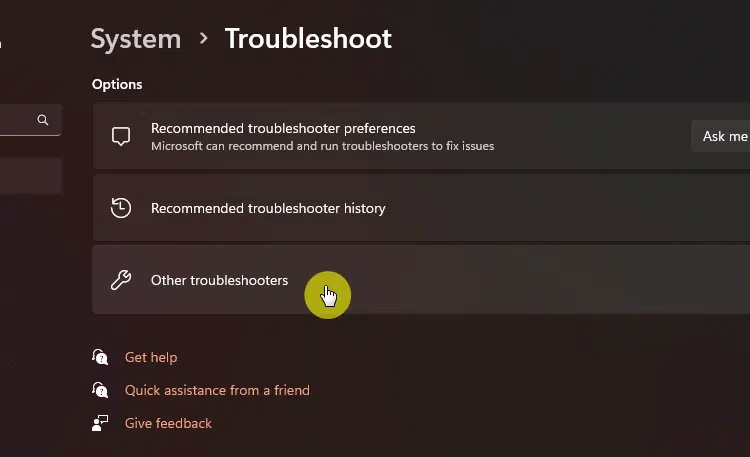
The next page will contain all the troubleshooting tools Windows has.
Click the run button for Windows update:
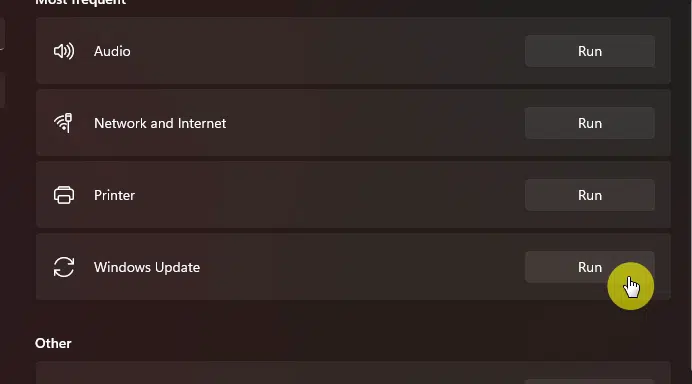
The troubleshooter tool will then try and detect any update issues.
If it found issues, it will apply fixes to your system and inform you.
4. Remove third-party software
If you have any third-party software or drivers installed on your computer:
- Try removing them temporarily to see if the update will install without them.
- You can reinstall them later after the update is complete.
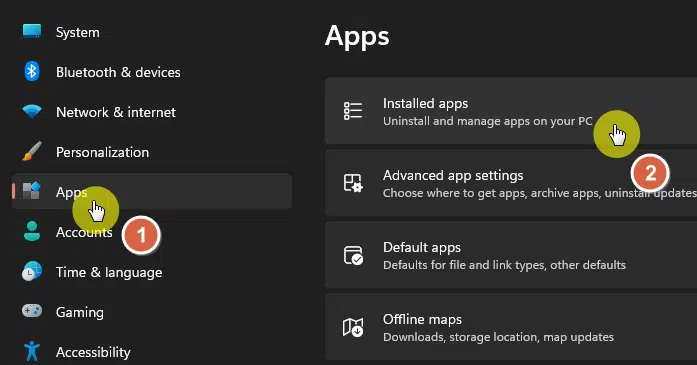
To see the apps you currently have in the system, go back to the system settings window.
Then, go to apps > installed apps:
Find the apps you need to uninstall.
Click the three dots for that app > uninstall option:
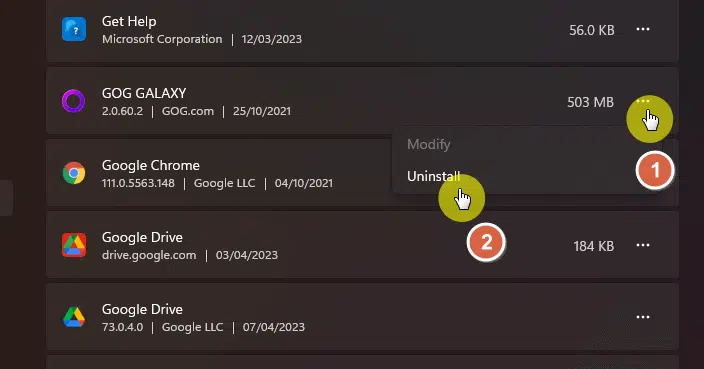
If the third-party software has its own uninstaller, use that instead.
This can help ensure that all components of the software are properly removed from your system.
After that, do the following steps:
- Restart computer to ensure all related processes have been stopped
- Check for updates again
5. Free up storage space
Make sure that you have enough free space on your hard drive or SSD to download and install the update.
There are a few ways you can do that:
- Uninstall unused programs/apps
- Delete temporary files
- Clear the recycle bin
- Move files to an external hard drive
- Delete duplicate files
- Disable hibernation
- Disable system restore points
I have covered earlier how to uninstall apps. Simply follow it for unused programs in your system.
Temporary files are files created by various programs and processes on your computer for various purposes.
They are designed to be used for a specific period of time and then discarded automatically, so you can go ahead and do it yourself.
Go back to the system settings window and navigate to the system tab > storage option:
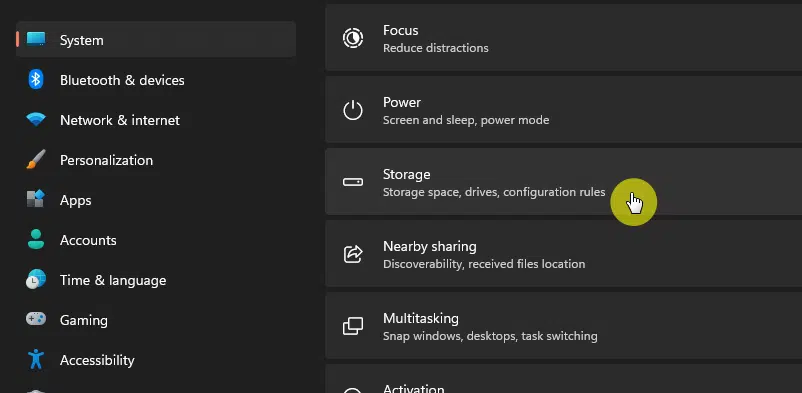
The next page will show the different storage categories in your system.
Click the temporary files option:
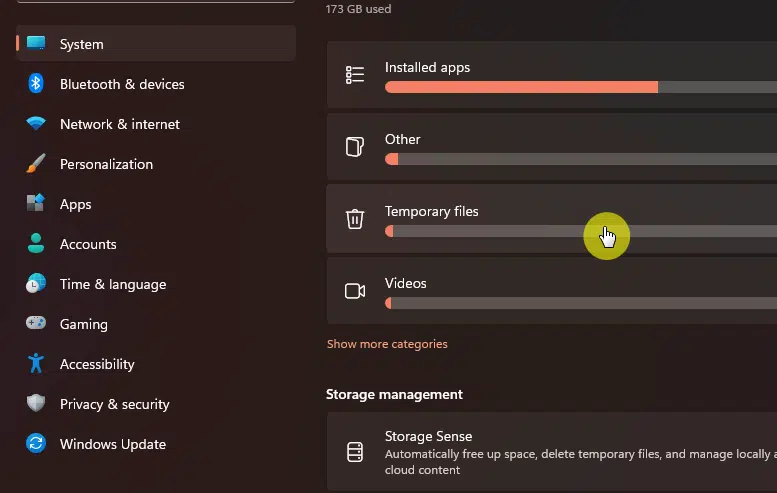
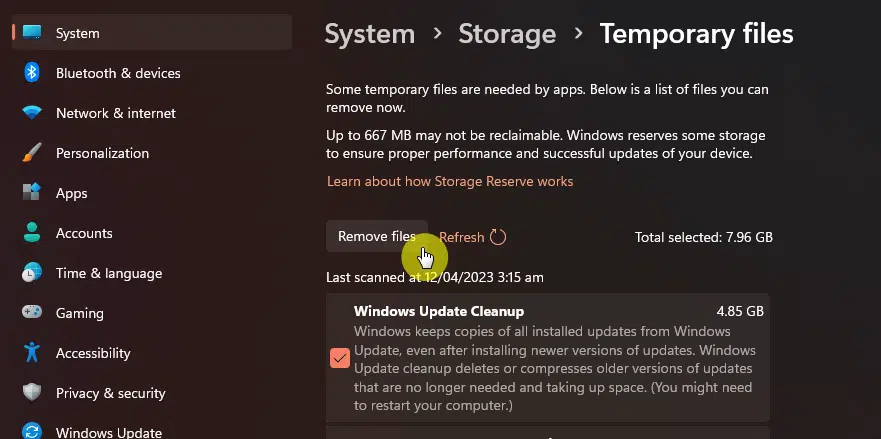
The window will then show you a list of files that you can safely remove now.
Click the remove files button to do it:
For finding duplicate files, you may have to use other tools like Duplicate Cleaner or CCleaner as there is no built-in tool for this.
Hibernation files can take up a lot of space on your hard drive.
To disable hibernation, open a command prompt as an administrator and type the following command.
powercfg.exe /hibernate offPress enter after that.
System restore points can also take up a lot of space on your hard drive.
To disable system restore points, open the system settings once again and navigate to the system tab > about:
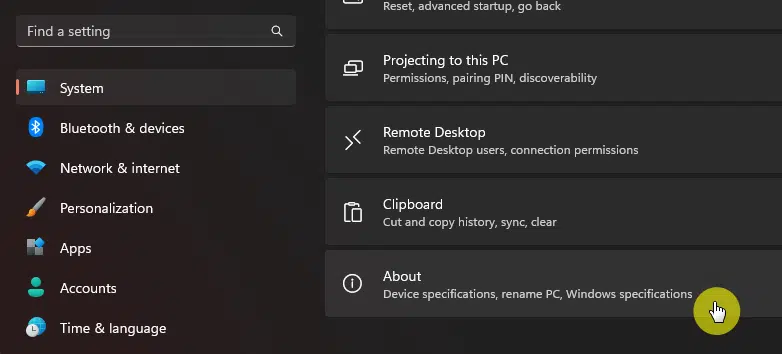
This tab will show you your device and Windows specification.
Click system protection in the related links of device specifications:
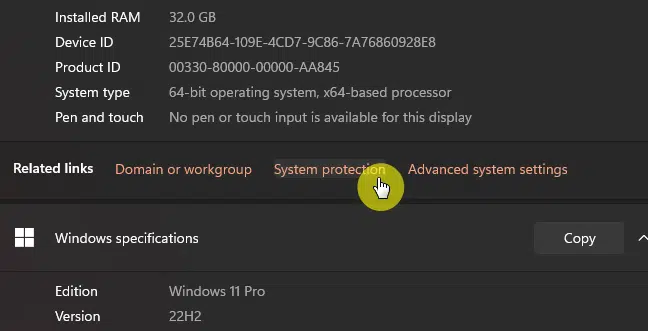
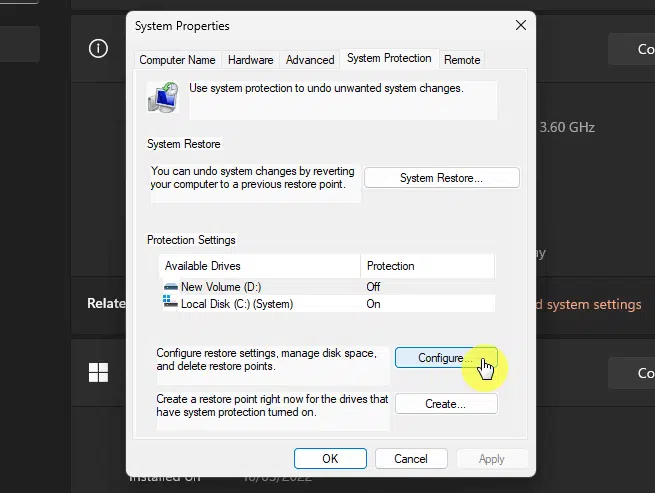
That will open the system properties window.
Click the configure button near the bottom:
Another window will appear.
From there, you can either delete all the restore points from the drive and/or disable the feature entirely.
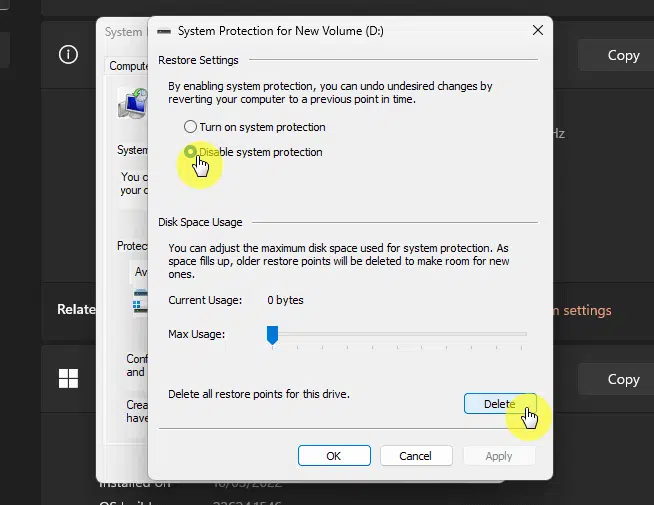
Don’t forget to click the OK button once you’re done.
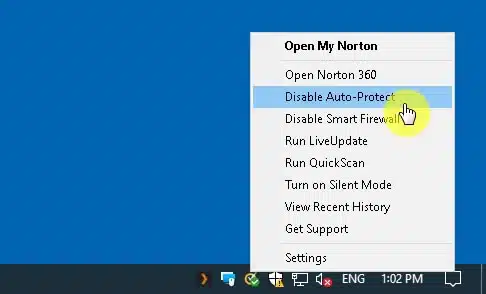
6. Disable third-party security software
Antivirus software is designed to protect your computer from malware and other security threats.
Unfortunately, it can sometimes interfere with Windows updates if it detects a potential threat or blocks the installation of some update files.
For this, you can temporarily disable the software to see if it resolves the issue.
You can usually do this by
- Right-clicking on the antivirus software icon in the system tray
- Selecting disable or pause protection
If disabling the antivirus software allows the Windows update to proceed successfully, you can either:
- Keep the software disabled during the update process
- Look for an update or patch from the antivirus software vendor that addresses the compatibility issue
Alternatively, you can consider switching to Windows Defender, which is the built-in Windows security software.
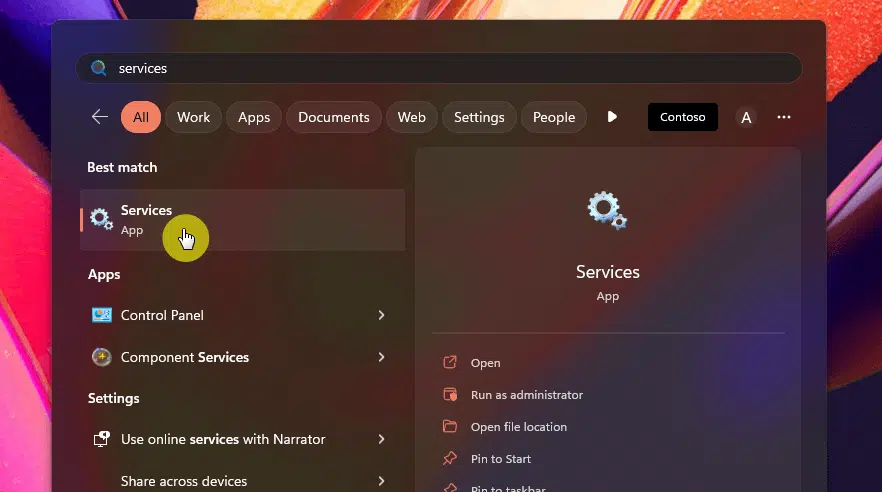
7. Make sure the Windows Update Service is running
The Windows Update Service is a component of the Windows operating system that is responsible for managing the download and installation of updates.
It is a background service that runs automatically on your computer, and it periodically checks for new updates from the Windows server.
Search and click for services in your taskbar:
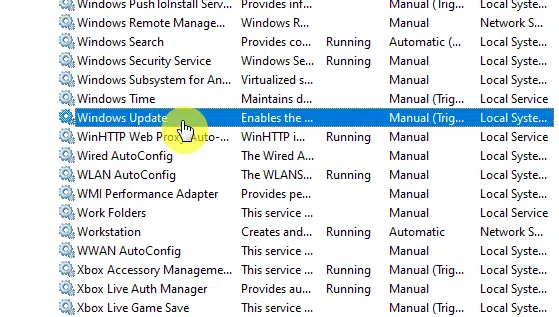
Scroll through the bottom until you see the Windows Update app.
Double-click it to open the app:
If the service stopped running, click the start button.
Change the startup type too to automatic:
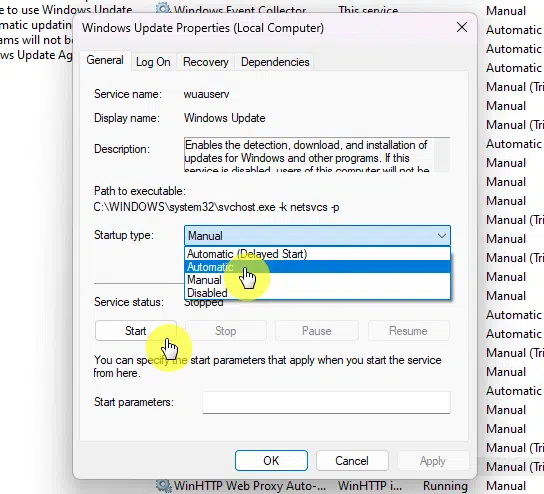
Click the apply and ok buttons to save the options.
Later on, I will show you a more advanced method of resetting Windows update components.
Advanced fixes for the update problem in Windows 11
If basic troubleshooting steps have failed to resolve the update problem, there are more advanced fixes that you can try to overcome the Windows 11 update failure.
Here they are:
1. Reset Windows Update components
There may have been some corrupted system files or damaged files that are causing the Windows update error.
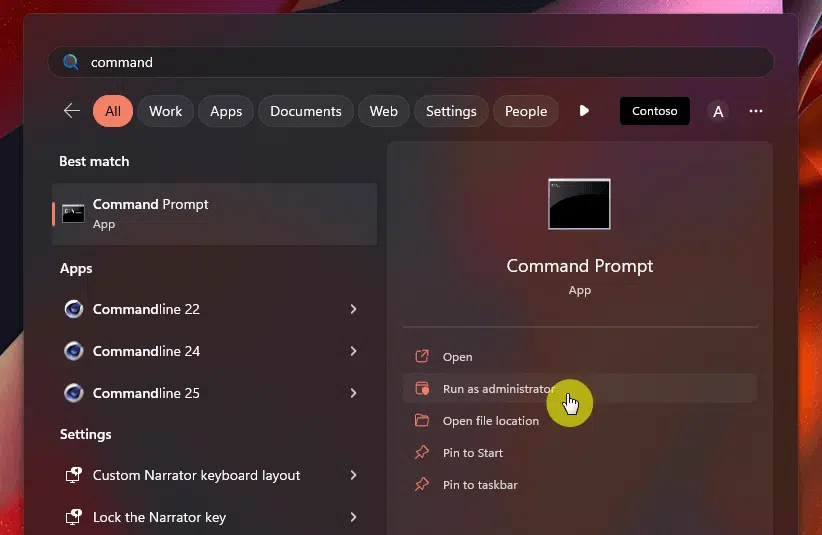
Search for the command prompt in the taskbar > run as administrator:
The next step here is to stop the update services.
Type the following commands one by one and press enter on your keyboard after each one:
net stop wuauserv
net stop cryptSvc
net stop bits
net stop msiserver
The next step is to rename certain folders.
Type the following commands again and press enter on your keyboard after each one:
ren C:\Windows\SoftwareDistribution SoftwareDistribution.old
ren C:\Windows\System32\catroot2 Catroot2.old
Now that you have renamed those folders, it’s time to start the update services again.
Type these commands individually and press enter:
net start wuauserv
net start cryptSvc
net start bits
net start msiserver
Exit the command prompt and restart your computer.
After completing these steps, Windows should automatically recreate the SoftwareDistribution and Catroot2 folders.
If the update went through this time without any problems, then the files on those folders might have been corrupted or damaged.
2. Use the System File Checker (SFC)
On the topic of damaged or corrupted system files, there is a tool for it.
The SFC is a built-in tool that can scan and repair those corrupted system files and help resolve the update issues.
Open the command prompt once again and run it as an administrator:
Enter the following command and press enter on your keyboard:
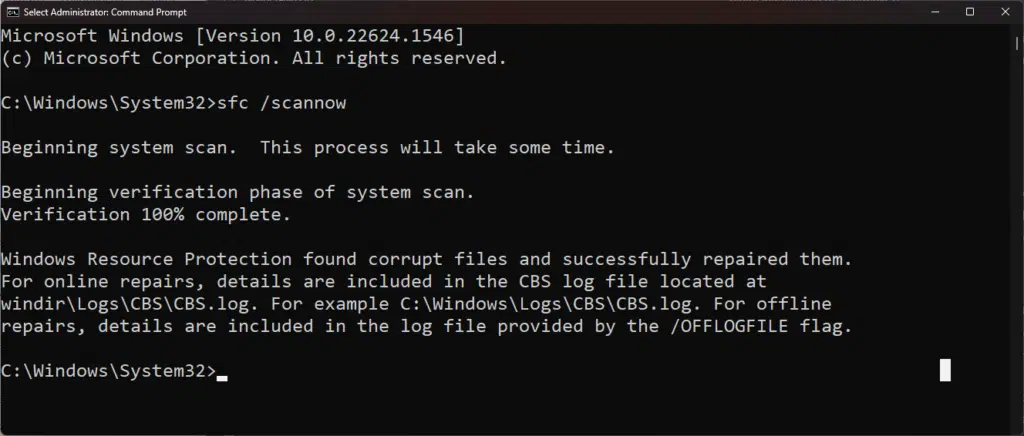
sfc /scannowWait for the scan to complete.
It may take some time to finish, depending on the size and complexity of your system.
If there are corrupted files, you will see them in the command prompt, and if the tool was able to repair any of them:
Restart your computer and attempt to do the update once again.
If the update went through successfully, then the corrupted files detected likely caused the Windows update errors.
3. Perform a clean bot
I explained earlier that other software, like third-party antivirus software, might be causing the problems in installing updates.
There is actually a way to easily disable all non-Microsoft services and startup programs quite easily.
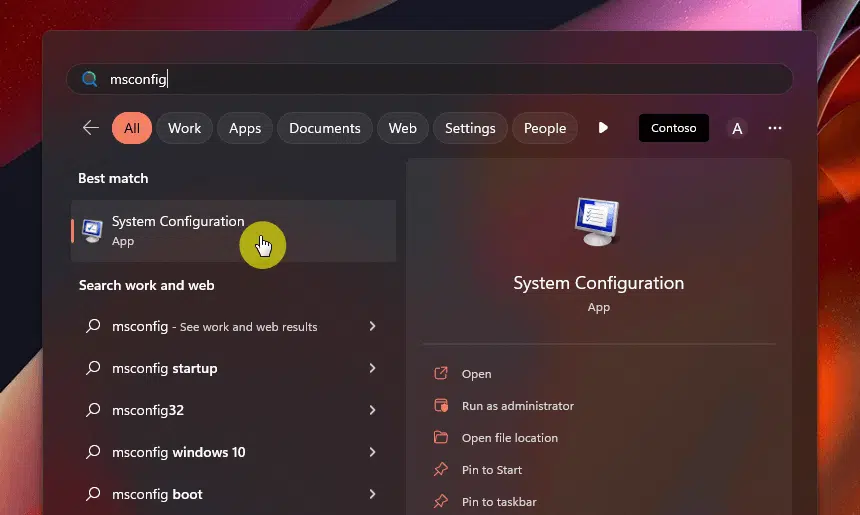
Search for msconfig in your taskbar and open the app:
Now, go to the services tab and click the following buttons:
- Hide all Microsoft services
- Disable all

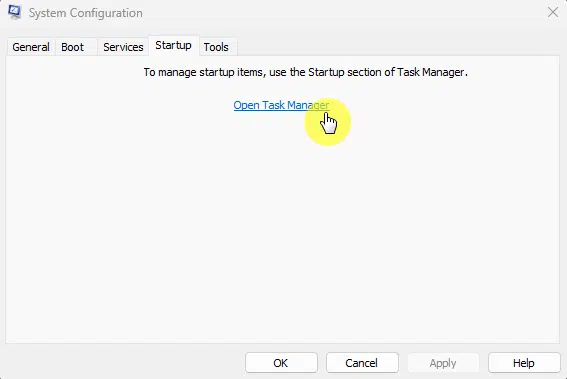
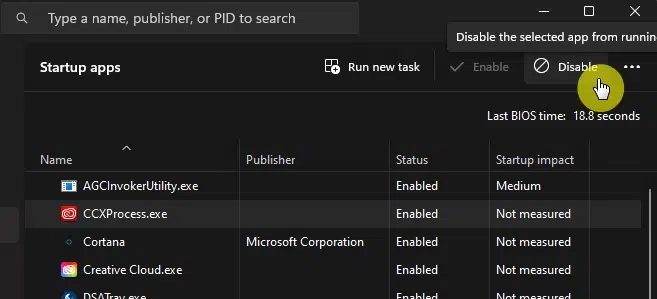
Then, go to the startup tab and click the open task manager button.
You can also open task manager on your own and go to the startup tab.
The next window will show you the different startup apps.
You can select each one of them and click the disable button at the top bar:
Close the task manager and the system configuration app.
Restart the computer and attempt the Windows 11 update process once again.
If the Windows 11 update process is successful after performing a clean boot, it may indicate that a third-party program or service is interfering with the update process.
All you have to do from here is to enable the services and startup apps after the Windows update has been completed.
Last resort: Reset Windows 11
I do hope that any of the methods I explained earlier work. Windows 11 updates are important to keep your unit secured and fresh.
If nothing really worked, I suggest you use the Reset this PC tool, which you can search in the taskbar.
It will reset the platform to factory or default settings and remove all the software packages that didn’t come from the factory.
Do you have questions or additions to the methods I shared above? If yes, feel free to comment with your thoughts below.
If you need more help, kindly reach out using the contact page’s form and I’ll get back to you asap.


Great article. Thanks, Ryan!