

Last Updated on August 26, 2023
Need to create an alert for your list?
In this guide, I will show you a few options that will enable you to receive email alerts based on items changed, rules, or a reminder.
Let’s get started.
Table of Contents:
There are lists where you want to be updated as soon as changes are made.
Fortunately, this is quite easy to do in a list in SharePoint Online. You can even send emails to other users as well.
Note: The options I listed here are also applicable in a document library. More info on list vs library: SharePoint List vs Library.
Here are your options:
1. Alert me when items change
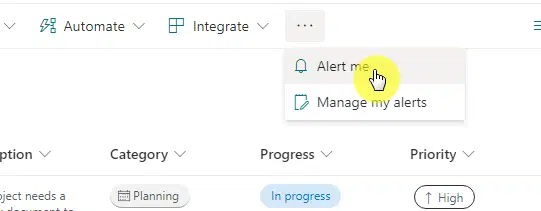
Navigate to the target list on the SharePoint site.
Click the three dots on the command bar > alert me button:
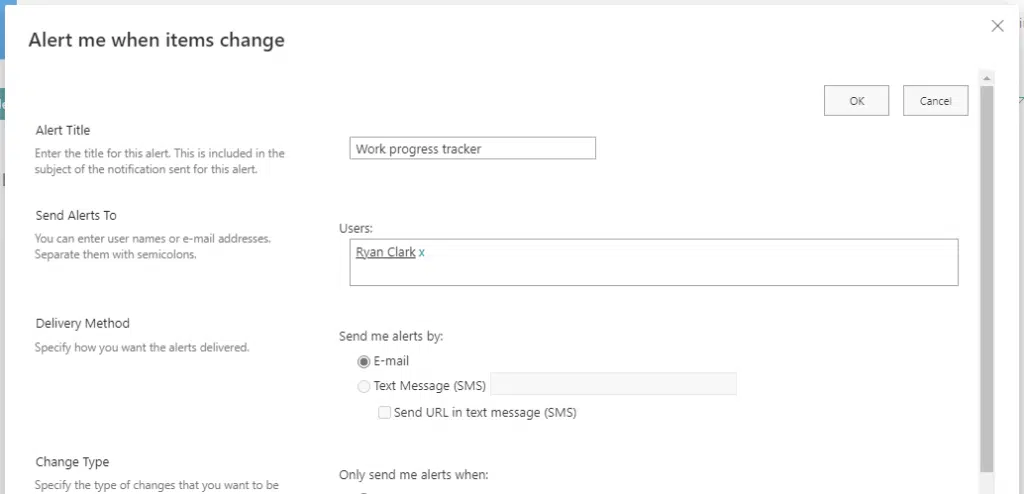
There are a few settings and options you can configure from the window:
- Alert title
- Send alerts to – The recipients of the alert
- Delivery method – Alerts can also be sent in text messages
- Change type – The trigger for the alert
- Send alerts for these changes – The criteria for the alert
- When to send alerts – Frequency of the alert
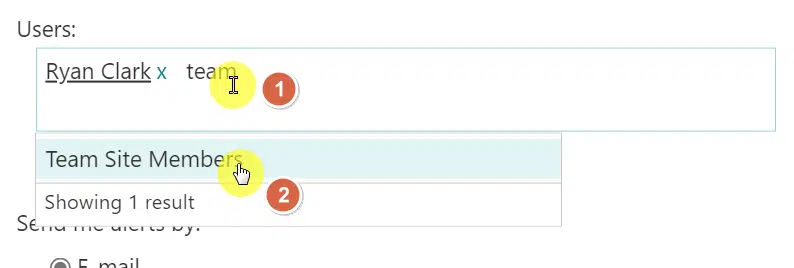
One thing to know here is that you can actually enter a SharePoint group in the recipients.
Simply type the name of that SharePoint group, press enter, and select from the list of options:
The triggers that will send an email notification to the recipients are the following:
- All changes
- New items are added
- Existing items are modified
- Items are deleted
They are then filtered out by the criteria indicated — which is about who made the changes.
When you’re done tweaking the settings, hit the ok button.
2. Create a rule
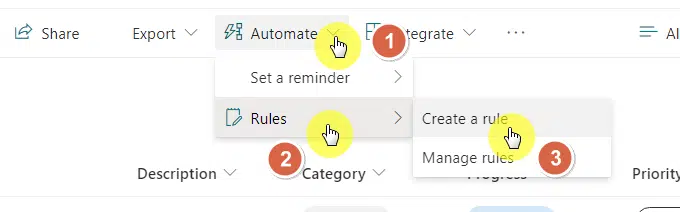
Another method you can try is creating a rule.
From the command bar, click rules > create a rule button:
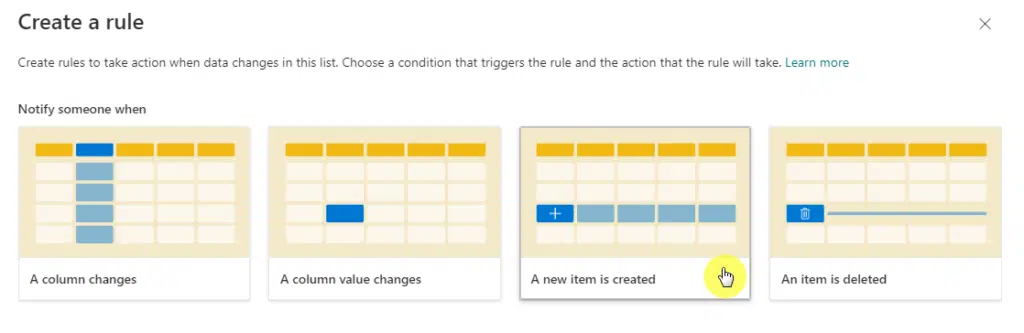
A window will then open with the conditions that will trigger the rule:
- A column changes
- A column value changes
- A new list item is created
- An item is deleted
Choose a condition to proceed:
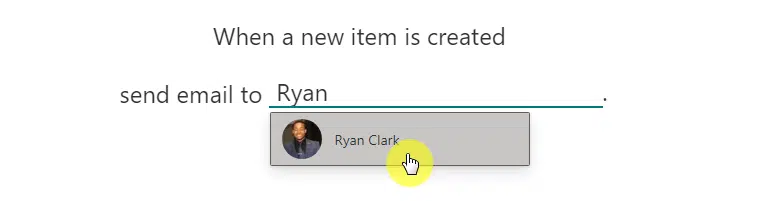
The next page will show a field that says “send email to…”
Enter the name or the email address of the recipient — groups can’t be used here.
Select the user and click the create button:
The next page will automatically show the rules available, which are enabled by default according to the condition you set.
You can turn it off if you want to disable it.
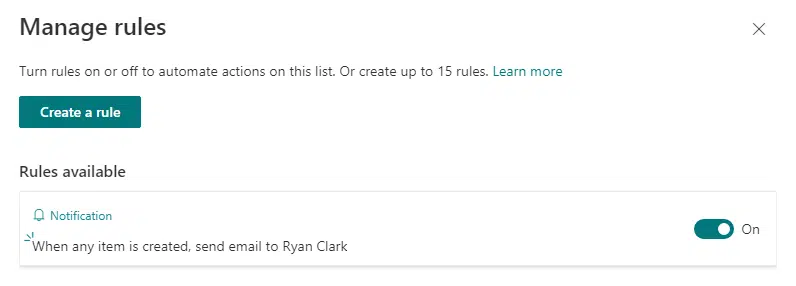
You can also create a new rule from there if you want through the create a rule button.
3. Set a reminder
Another convenient method that works with SharePoint lists and document libraries is creating a reminder.
Unfortunately, this only works (the option only appears) if you have date columns in the SharePoint list or library.
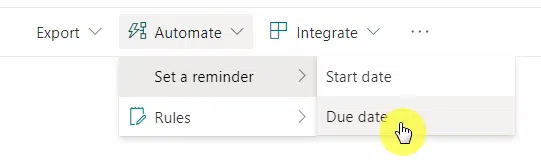
The example I used has columns. You can see under automate > set a reminder button the columns starting points.
Select which one to use:
A right panel will then appear where you can review the access needed.
Hit the continue button below the panel to proceed:
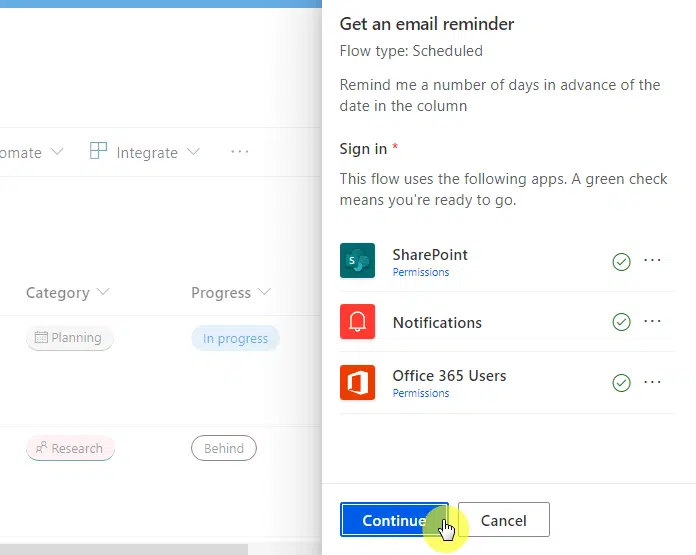
Note: This process creates a new scheduled flow. More about flows here: How to Streamline Business Processes With Power Automate.
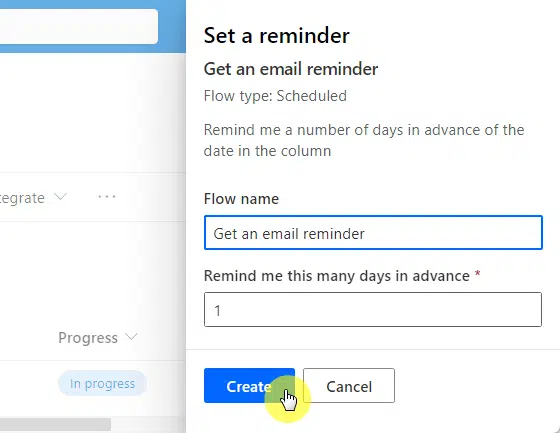
The next page will allow you to configure the flow further with the name and how many days in advance the reminder will come.
Click the create button when you’re done:
Sign up for exclusive updates, tips, and strategies
Keep yourself updated with email alerts
As SharePoint continues to improve, there may be a lot of new ways that will enable you to set up list alerts.
The options I wrote here are easy and convenient to make as they won’t require you to go into the list or site settings.
So were you able to create the email alert you needed? If not, let me know the problem in the comments.
For business inquiries, kindly send a message using this page’s contact form, and I’ll get back to you.


