

Last Updated on June 29, 2023
Feeling overwhelmed with Microsoft Bookings?
In this tutorial, I will discuss everything on how to use Microsoft Bookings including how to configure the settings.
Let’s get started.
Table of Contents:
What is Microsoft Bookings?
Are you familiar with apps or tools where people can book a meeting with you? That’s what this app is all about.
Microsoft Bookings is a tool that clients and customers can use to schedule meetings with you quite easily.
Microsoft Bookings has two primary components:
- The front-end booking page where people can schedule appointments. it can be shared using a link, through social media, or even embedded on a site.
- The back-end web-based app where you (owners and admin) can configure meeting details including the time of availability, staff schedules, etc.
Note: If you’re looking for calendar options in Microsoft 365, check out this article: Calendar Options in SharePoint and Microsoft 365.
Sign up for exclusive updates, tips, and strategies
What are the features of Microsoft Bookings?
Booking apps are more or less similar — Microsoft Bookings is no exception.
Here are some of the features you can expect from the app:
- The ability to assign staff members with the appropriate permissions to do their responsibilities.
- The booking page can also be customized according to your branding — complete with logo and brand colors.
- Mobile responsiveness so the booking page will still look good even when viewed on a mobile device.
- Built-in client/customer database that will save the information of those who booked an appointment with you.
If you’re concerned about information security, information is stored in Microsoft Exchange as a booking calendar is a mailbox in Exchange Online.
Microsoft also confirmed that Bookings is in compliance with standards like ISO, FISMA, SOC, and SEC.
Related: How to Add a Shared Mailbox in Outlook 365 (Easy Guide)
What are the advantages of Microsoft Bookings?
If your organization is using apps from Microsoft, then it makes sense to take advantage of this booking app.
Besides that point, here are some advantages:
1. Real-time appointment availability
Since the app is cloud-based, all appointment bookings are updated in real-time.
This is vital since people who want to book a meeting with you can see an updated calendar and schedule of your availability.
Because the calendar updates in real-time, double-booking can’t happen (which happens on other apps when someone snags a schedule from another user).
2. Smooth website integration
If you don’t want to do extra work, you can make use of the app’s stand-alone bookings page and share it publicly.
But in case you want to integrate the tool into your website, you can simply embed the app so it looks like a natural part of your website.
Even if you embed the app into a website, you can still add custom fields and the embedded app will reflect the changes.
3. Automatic notifications and confirmations
The app wouldn’t be as useful as it is if it doesn’t send automated notifications to you.
MS Bookings can save you a lot of time by automatically sending email reminders and confirmations so you don’t have to manually check your calendar all the time.
These notifications can help reduce repetitive scheduling tasks on your end.
Note: For a comparison of Bookings and Bookings with me, read this article: Explained: Microsoft Bookings vs Bookings With Me (Better?)
How to create a Microsoft Bookings calendar
The first step here is to navigate to the Microsoft Bookings app.
If you’re on Microsoft 365 or SharePoint Online, follow these steps:
- Click the app launcher
- Hit the bookings icon
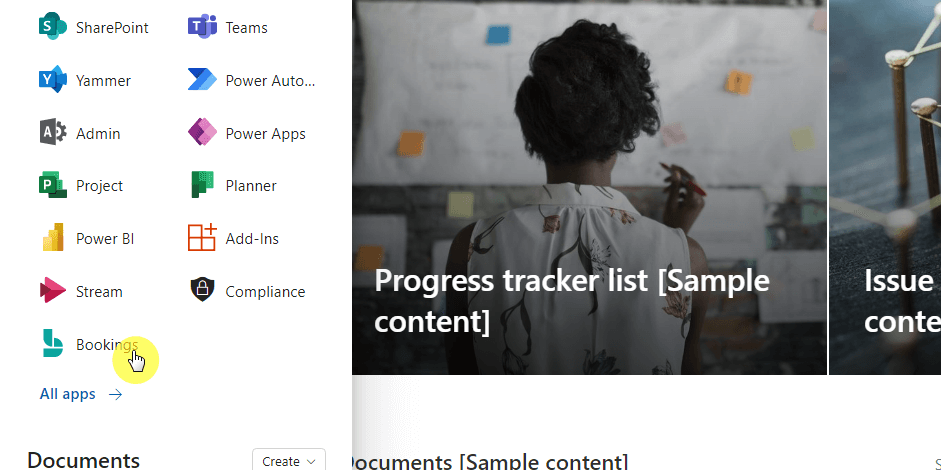
If you can’t find the icon right away, you need to click the all apps button first and then find the Bookings icon from there.
In the Bookings app, you will see a similar screen in the image below if this was your first time going into the app.
Step #2: Create a new Booking calendar
To get started, click the create new calendar button:

On the next screen, you will have to enter a name for the calendar.
This is important since the calendar name will also be the email address for the booking invites and will be a part of the booking page link.
The safest route here is to simply use your business name:

Other settings you can include/change:
- Your own company logo
- Business type
- Business hours (days and hours)
The business type you enter here will be one of the services shown in your calendar. You can customize this later on.
Once you’re done setting all of them, kindly click the next button to proceed.
Step #3: Invite staff members to the calendar
The next page is where you can add staff members to the calendar.
Simply use the field provided to search for a name and then select that user to add to your calendar.
Once you do, that user will appear as a guest on the list:
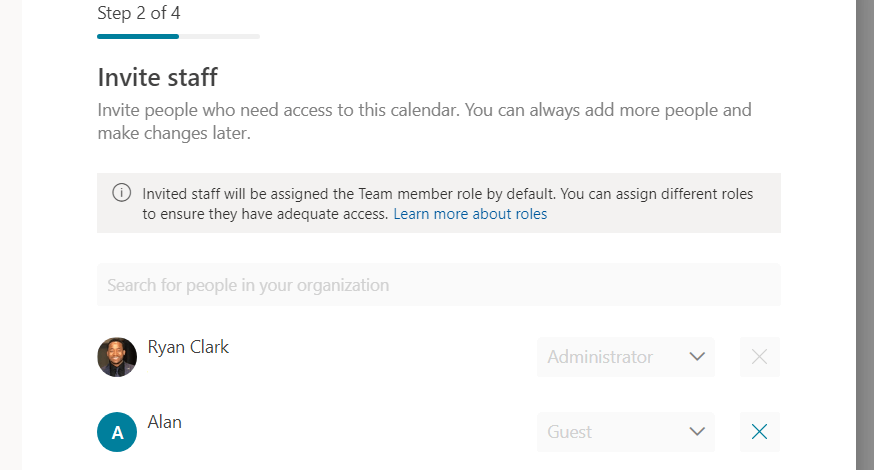
The people you add here will automatically become team members by default. Later on, I’ll show you how to easily change the access.
Once you’re done here, kindly click the next button once again.
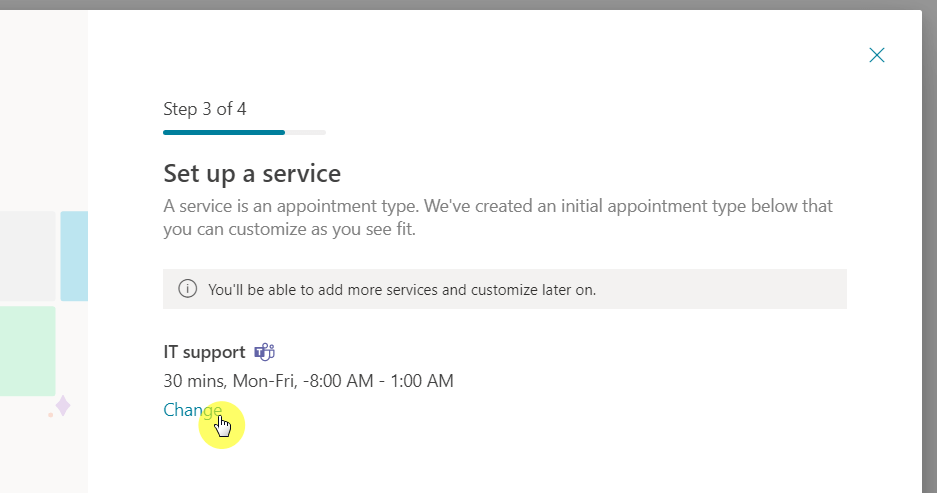
Step #4: Finish the new Bookings calendar
The next part is where you can add a service.
However, as I explained earlier, the business type you entered in step #2 will also be one of the services shown.
If you want to change this, click the change button below the service:
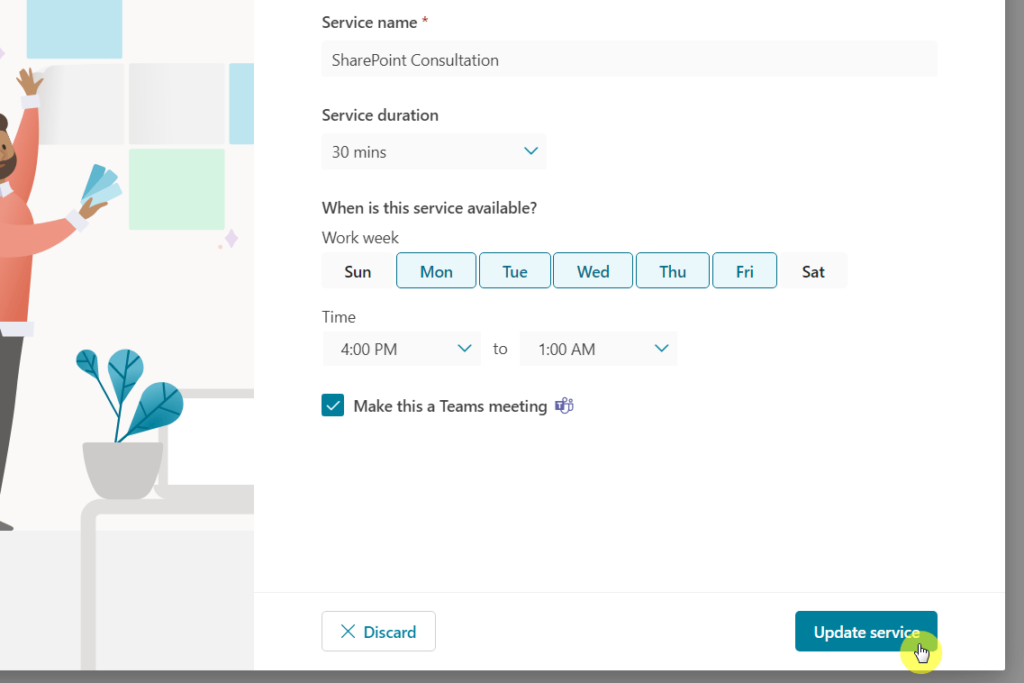
On the next page, you can update the following:
- Service name
- Appointment duration
- Appointment schedule
- Make the meeting in Teams
Once you’re done, simply click the update service button:
The button will take you to the earlier page — but now with the update service. Click the next button to proceed to the last page.
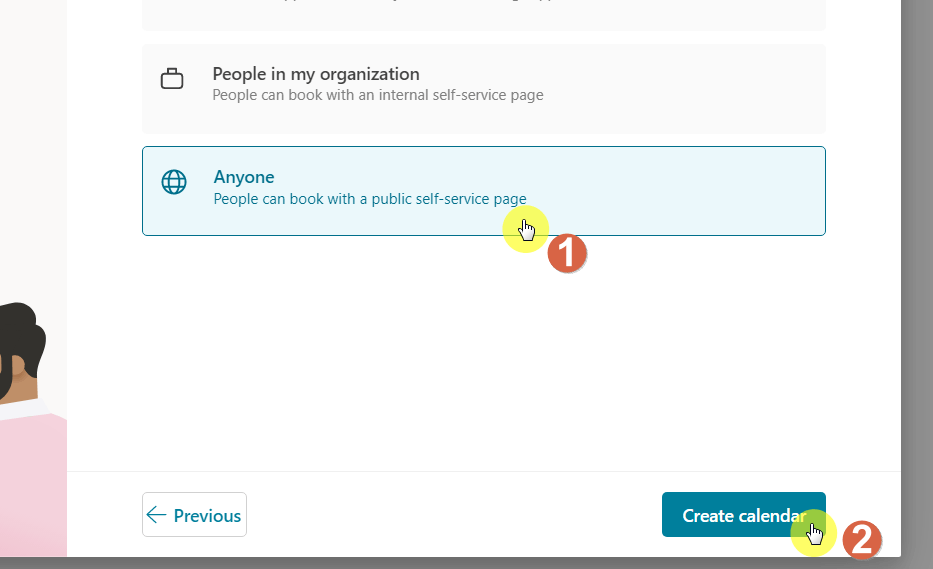
The next part is where you can customize who can book appointments with you (the default is for organization members only).
Select which you prefer and click the create calendar button:
The system will inform you that it’s currently setting up your calendar and will be ready in less than a minute.
Once you’re done, the browser will redirect you to the Bookings app with your calendar in it (using the new Bookings interface).
How to configure the settings on Microsoft Bookings
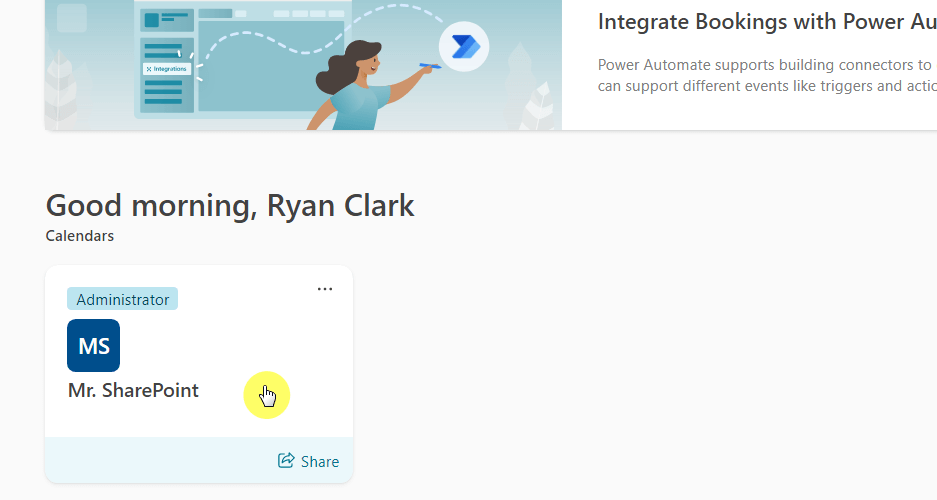
The home screen in the app will now change, showing instead the Bookings calendars that you have.
If you want to configure its settings, you need to open the calendar first by clicking on it:
Calendar
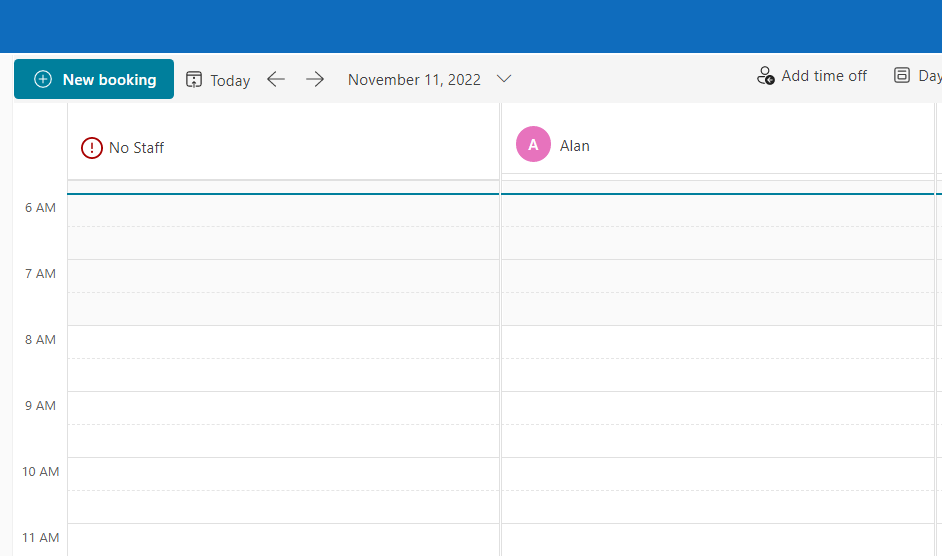
The first screen will show you the Booking calendar:
If you want to create a new booking manually (where you input the meeting details and customer information yourself), click the new booking button above the calendar.
You will see this window show up:
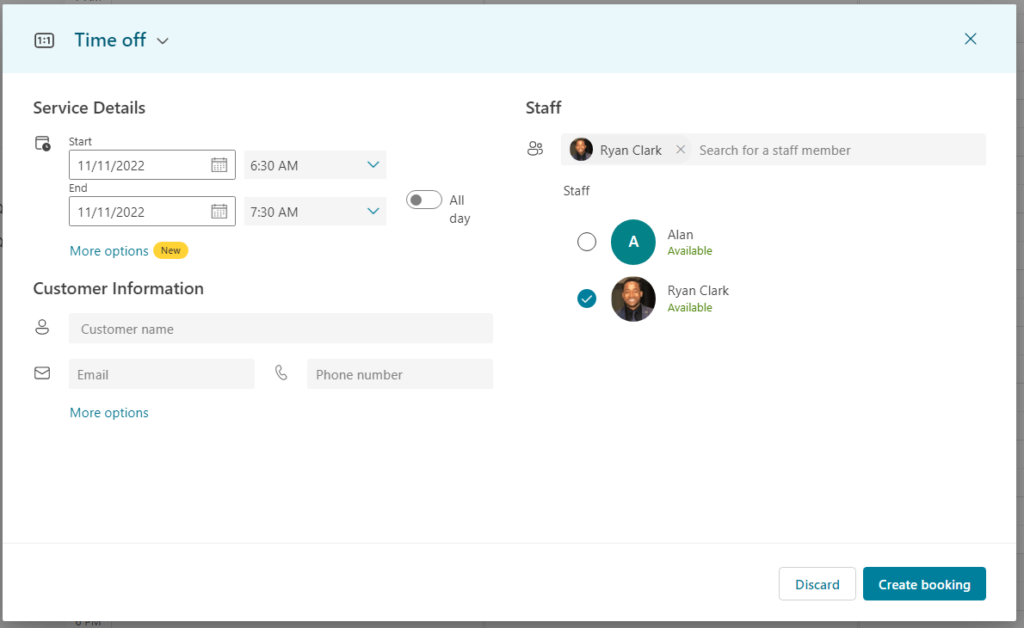
Here are the following details you need to provide on this page:
- The appointment time (service details)
- Customer information
- Staff who will attend the meeting
If you expand the options for the service details, you will be able to specify the service location, price, email reminder, follow-up email, and some notes.
Expanding the options for customer information will allow you to provide the customer’s address, send a meeting invite to the customer, and a few self-explanatory options.
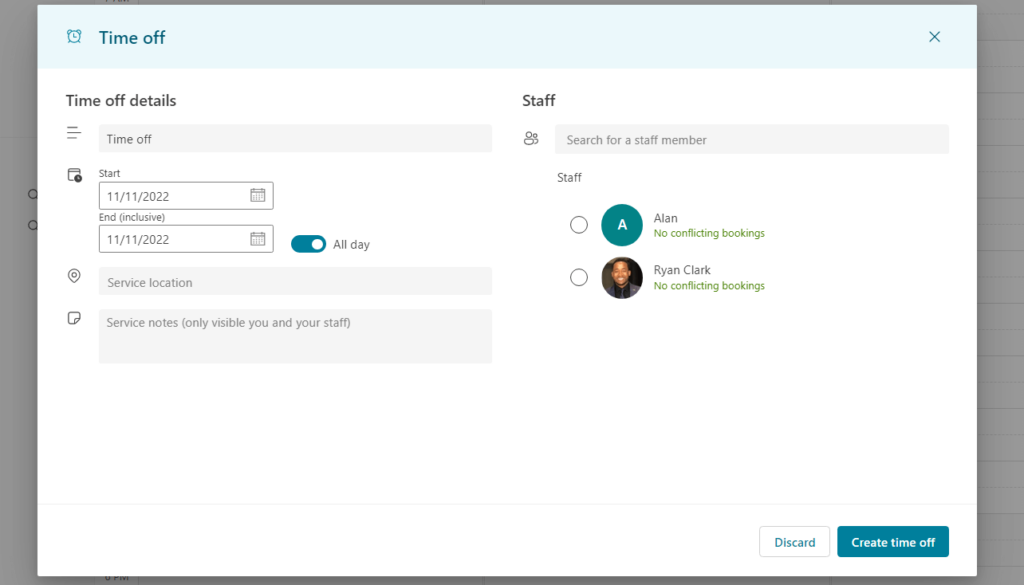
In line with the new booking button, there is also a button to add time off. This will open a similar-looking window:
Booking page
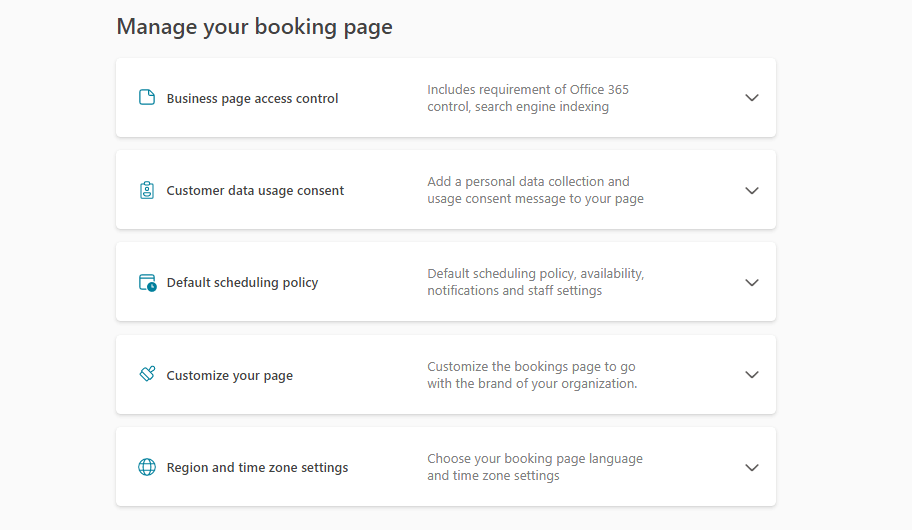
The next option in the panel is the Booking page where you can configure various settings:
- Business page access control
- Customer data usage consent
- Default scheduling policy
- Customize your page
- Region and time zone settings
The business page access control basically allows you to:
- Disable direct search engine indexing of your booking page
- Require a one-time password for customers/clients to create bookings
Under the customer data usage content, you can basically show personal data collection and usage terms to the person creating a booking with you.
If you want to configure the email notifications, go to the default scheduling policy settings. You will be able to change the following settings here:
- Time increments (30 minutes by default)
- Minimum (24 hours by default) and maximum (1 year by default) lead time
- Email notifications
- Staff control (customers can choose the staff to book with)
- Availability (determine the book-ability of the business)
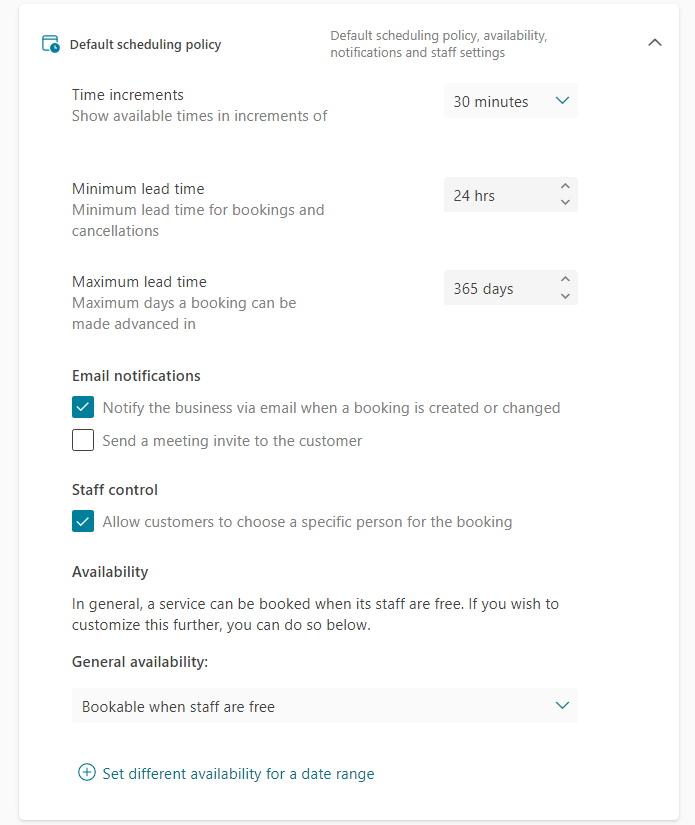
In the email notifications, you can set up the system to automatically send an email to you when someone booked your service and whether or not to send an invite to the customer.
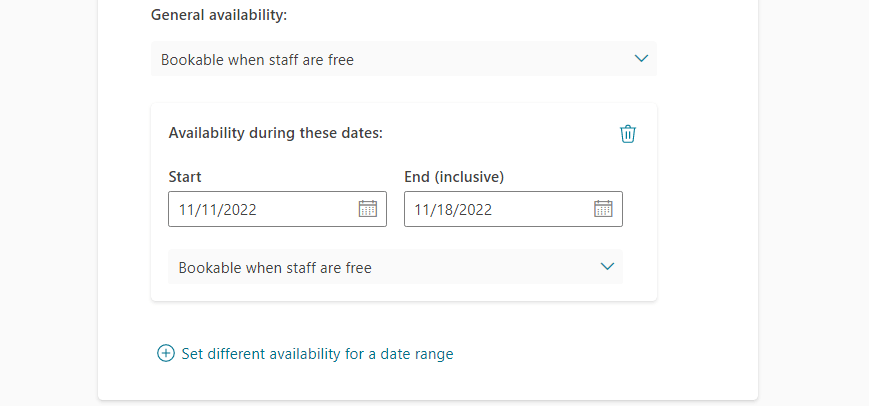
For general availability, you can also create various availability for a date range — perfect for holidays and vacations.
For branding your Bookings page, you can go to the customize your page settings:
- Page template
- Color theme
- Set custom color to the booking page
- Display the business logo on the booking page
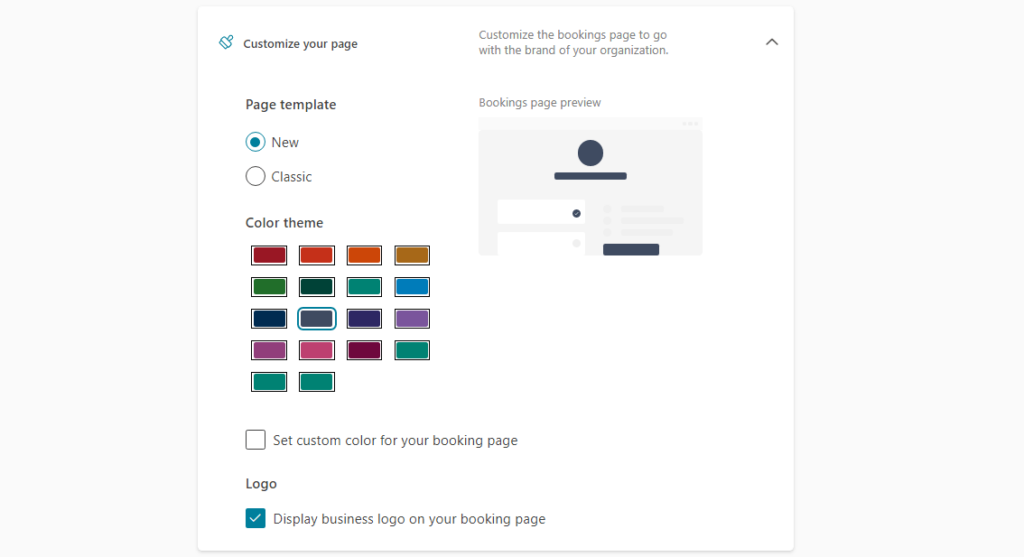
The region and time zone settings will allow you to change the language of the booking page as well as the current time zone.
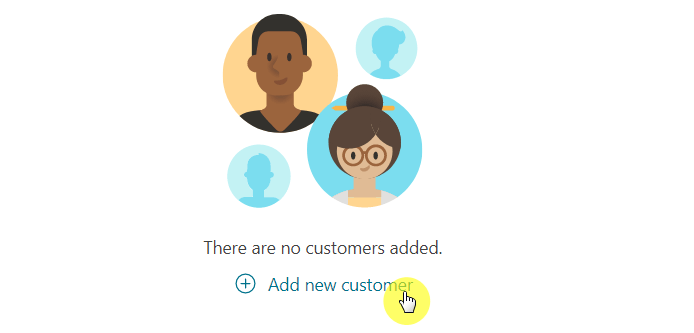
Customers
The people who booked a meeting with you will have their information saved on this page. If it’s your first time using it, you will see a page similar to the image below.
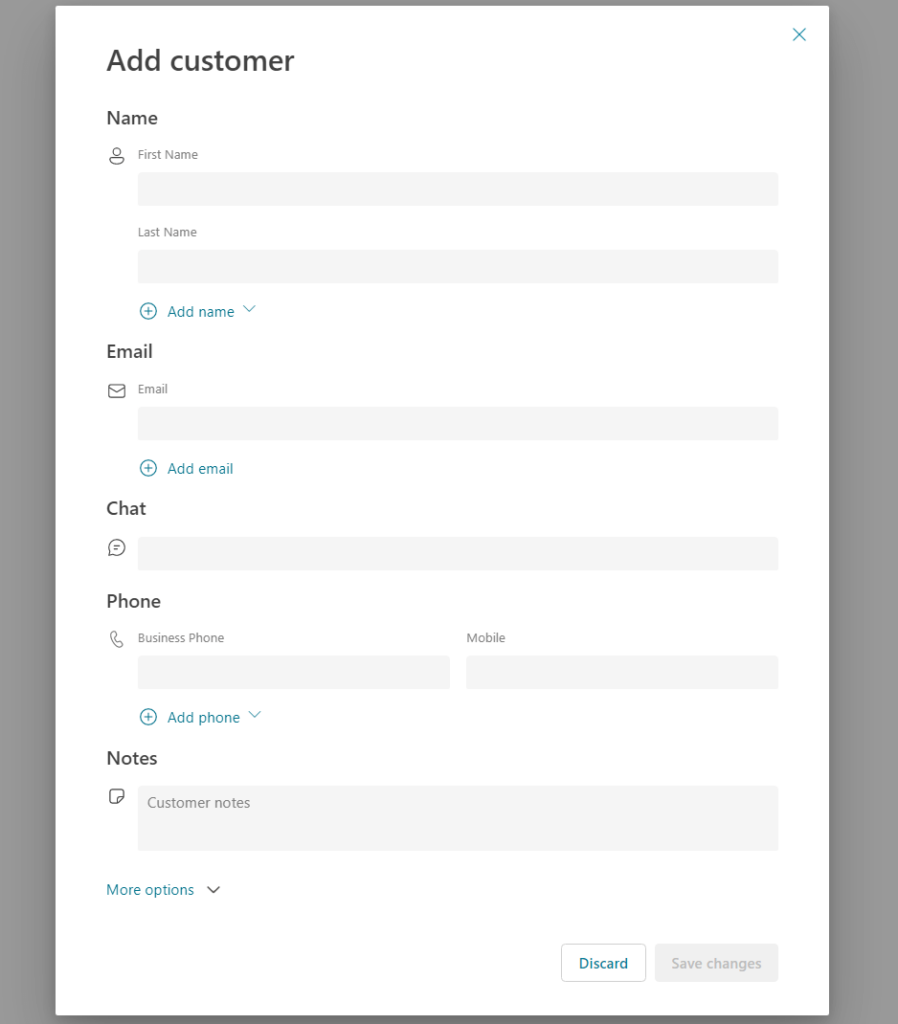
To manually enter a new customer, click the add a new customer button:
The next part is to manually enter the customer information.
Click the save changes button once you’re done:
You should then see the new customer on the list. You will be able to edit his/her information as well as book an appointment.
This is a great feature in Microsoft Bookings since this means you can manually set and manage appointments with a client on your end.
Staff
On the staff settings page, you will be able to see all the staff members and their information (contact, availability, etc.).
This is what you will see on the screen:
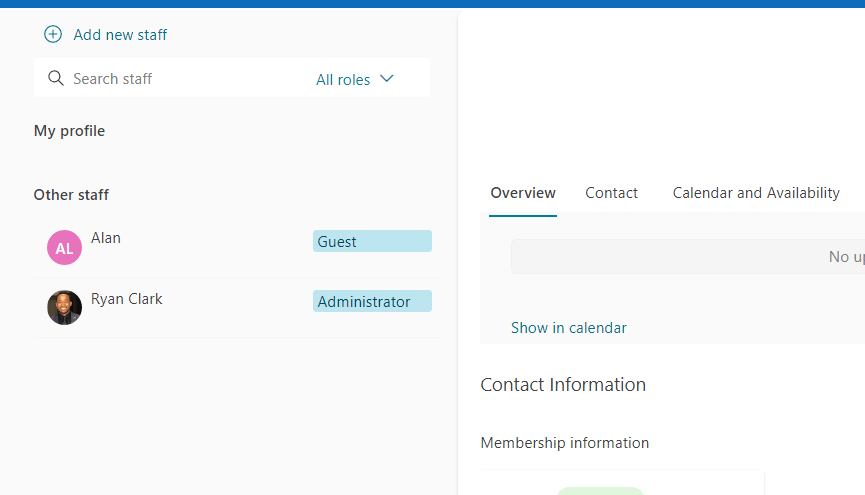
You can also add a new staff member from this screen.
Simply click on the add new staff button above the page and supply the needed information:
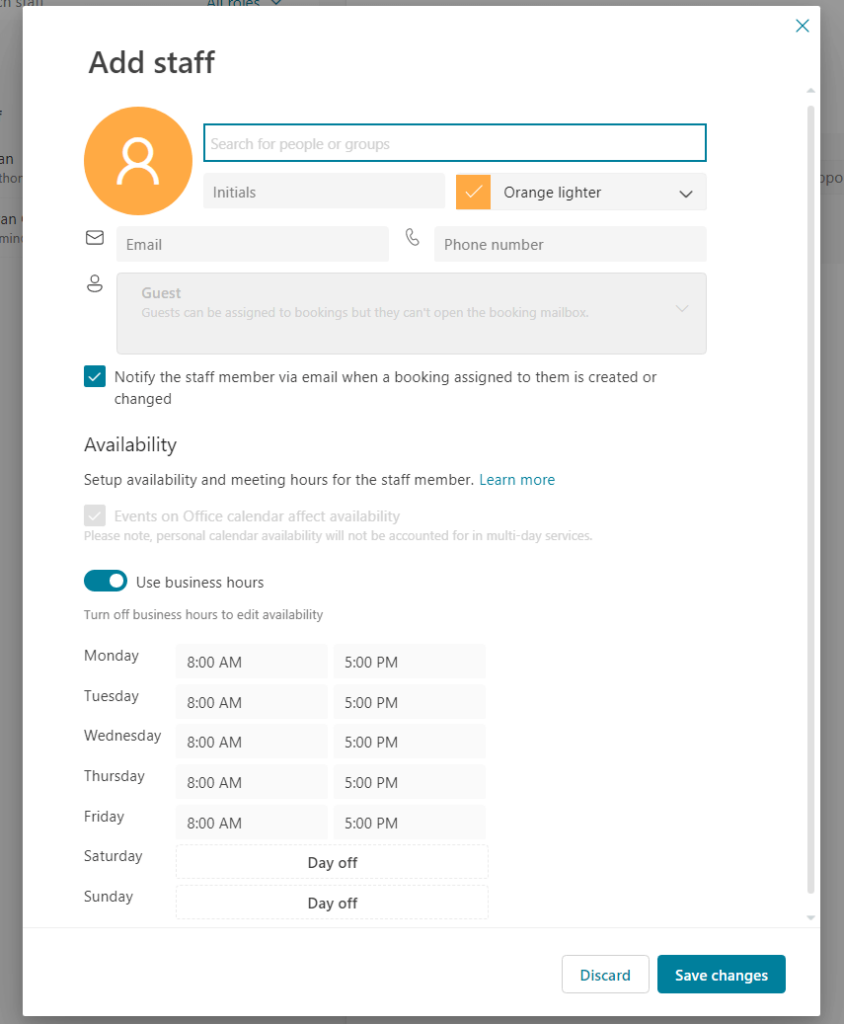
Click the save changes button once you’re done.
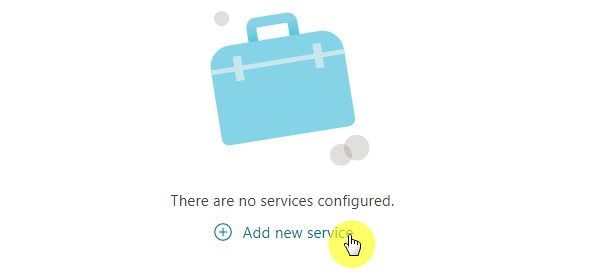
Services
On this page, you will be able to add new services as well as configure existing ones.
Since you have only started, the only button here is to add a new service:
This will open a new window where you can provide the following:
- The basic details of the service
- Availability options
- Assign staff to the service
- Custom fields
- Notifications
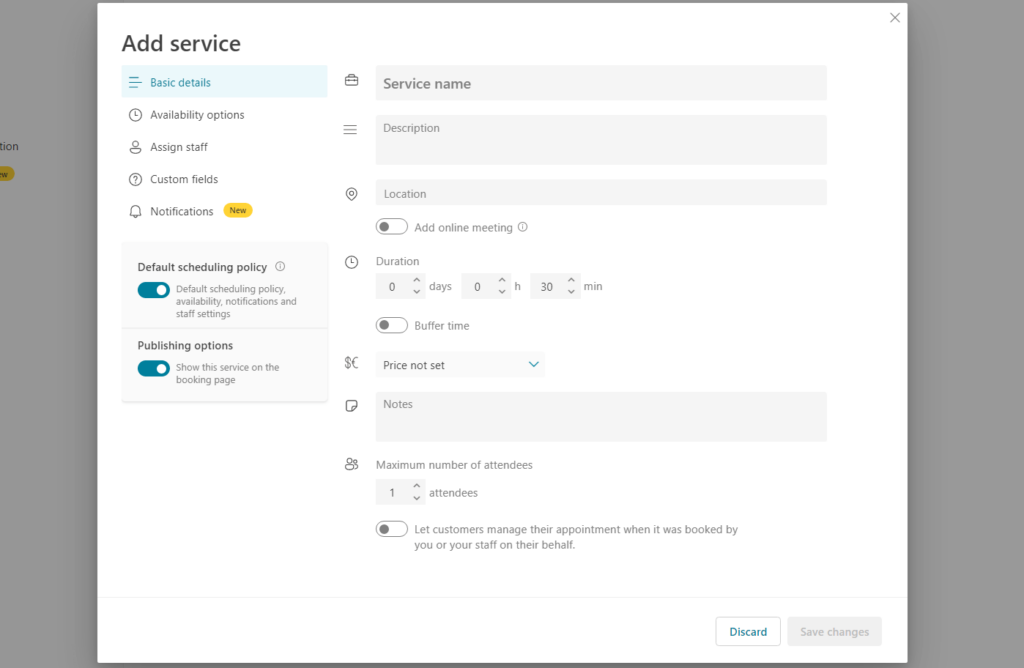
Most of the information here is things we covered earlier — but only specific to the service that you will be adding.
The custom fields part will allow you to require specific customer information as well as add new custom fields.
The process is quite similar to creating forms where you can specify the question (text or dropdown):

For notifications, you can also enable text message notifications to the customer and customize the reminders and follow-up.
Business information
The business information is where you can configure the basic details of your business shown in Bookings.
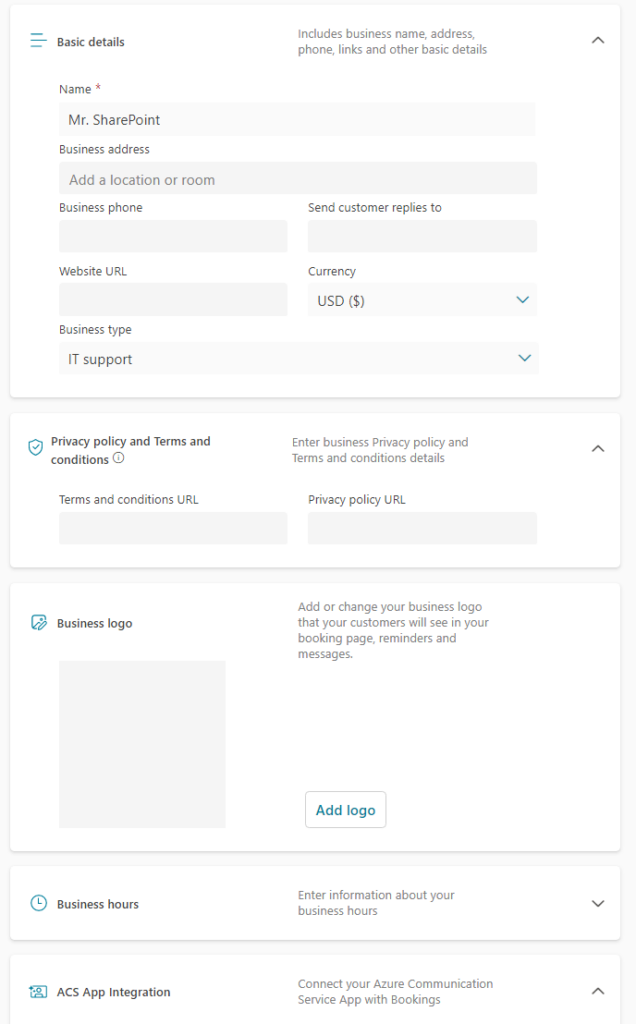
Specifically, this is where you can configure the following:
- Basic details
- Privacy policy and Terms and conditions
- Business logo
- Business hours
- ACS App integration
If you have a separate terms and conditions page and one for the privacy policy, you can enter the links here.
You can also integrate your Azure Communication Service App with Bookings so customers will receive a URL to the app for online appointments.
The integration part is new. Currently, it only allows you to connect with Power Automate using an SMTP address.
Note: For more information on Power Automate, check out my introduction article: Introduction to Microsoft Power Automate.
If you have followed closely the section above, you may have already come across the Bookings page link.
To put it simply, follow these steps:
- Go to the Booking page tab
- Click the action button to share the page link

For reference:
- Copy the link if you want to share the page on social media
- Use the email button to send an email directly to a client through Outlook
- Embedding will allow you to embed the page to your website
You can also change the privacy of the link from this page — from disabling the self-service feature to making the page available to anyone.
How do you feel about Microsoft Bookings? Do you see yourself using it anytime soon? Why or why not?
Need business help? Let’s talk it over. Kindly send me a message through this form here and I’ll get back to you asap.


Awesome post. Thank you, Ryan!
This was an extremely useful tutorial to work through MS Bookings Calendar methodically, Thankyou Ryan!
Hello, I’m trying to figure out how I could use Bookings to schedule a meeting when everyone has availability. Is there a way this can be done?
Extremely helpful post , Thanks to Ryan! Is there any options to Set the Max/Min bookings per day ? ( To set limit for the number of bookings per day )