

Last Updated on August 26, 2023
Does your team or company use Microsoft Teams frequently?
If yes, nice! Teams is a great collaboration and communication tool — and it’s getting even better thanks to the new updates.
In this article, I want to share with you the best practices for Microsoft Teams that can help you have a better experience with it.
To make things easier, I divided this article into a few sections by theme — governance, teams, channels, files and apps, and meetings and calls.
Let’s get started.
Table of Contents:
Best Practices: Microsoft Teams Governance
Here are best practices related to governance:
1. Slowly add teams and members
Don’t add teams right off the bat. Slowly add new teams and members as needed instead of creating new teams right away.
This only applies to those who are yet to start using Teams or those who have only recently started using Microsoft Teams.
My rationale for this is that you want to avoid clutter and disorganization. The smaller the better so you can govern the teams easily.
Don’t worry about adding members late too since they can always see what has been discussed since the files and chats are always available.
Note: For Microsoft Teams beginners, I recommend you check out this article first: MS Teams Tutorial: Become a Teams Expert Quickly.
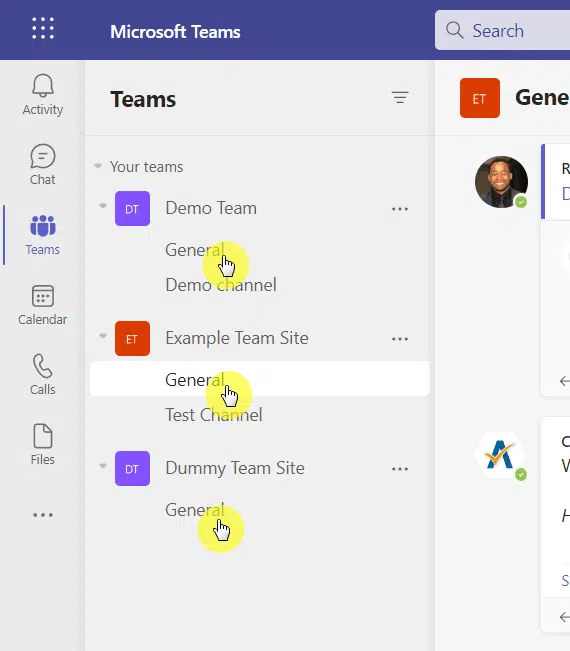
2. Use the general channel more often
When you first created a team — like the first time you activated it on a SharePoint team site — the system automatically creates a general channel.
Use this channel for:
- Sharing information that new members need to know
- Giving team members an overview of what the channel or project is all about
- Sharing news and announcements to members
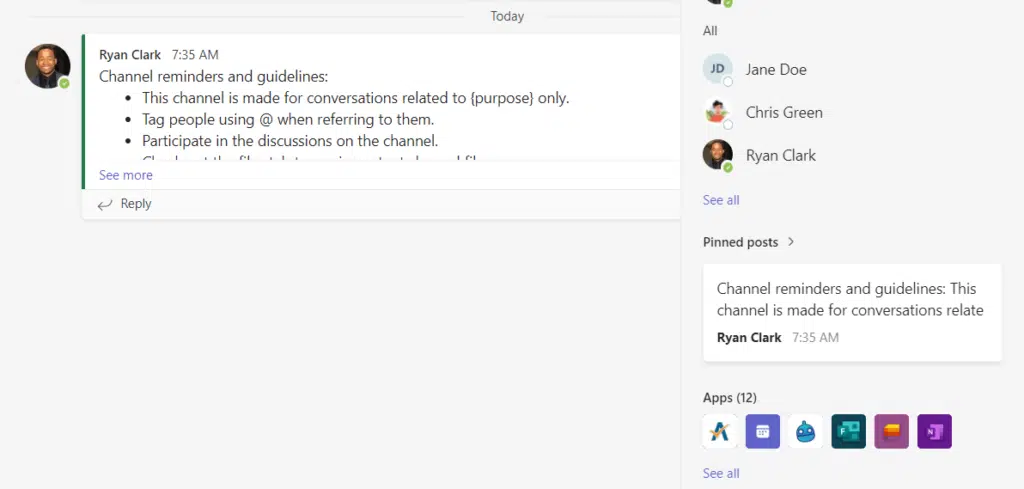
The general channel is a good place to post information that you want all team members to know since it’s the first thing they will see.
New channels appear alphabetically. But this channel will always remain at the top (you also can’t remove, move, or rename it).
3. Create initial channels for specific topics/discussions
In a team, plan out the different topics or discussions that might need separate channels from each other that you need to support.
There are two primary benefits to this:
- More organization in your individual teams
- Members will know which conversation to join depending on the topic
To help with this, make sure that each channel is named appropriately for its use — using project names can even help.
It might also help to create a channel that’s specifically designed for asking and answering questions related to the project.
It’s also a good idea to add the necessary tools as tabs that members may use in the channel like Planner, Tasks, Power BI, etc.
Note: For instructions on how to create a team and a channel, check out this article: How to Create a Team in Microsoft Teams [Quick Tutorial].
Sign up for exclusive updates, tips, and strategies
Best Practices: Organizing Teams
This time, let’s talk about how to organize Microsoft Teams:
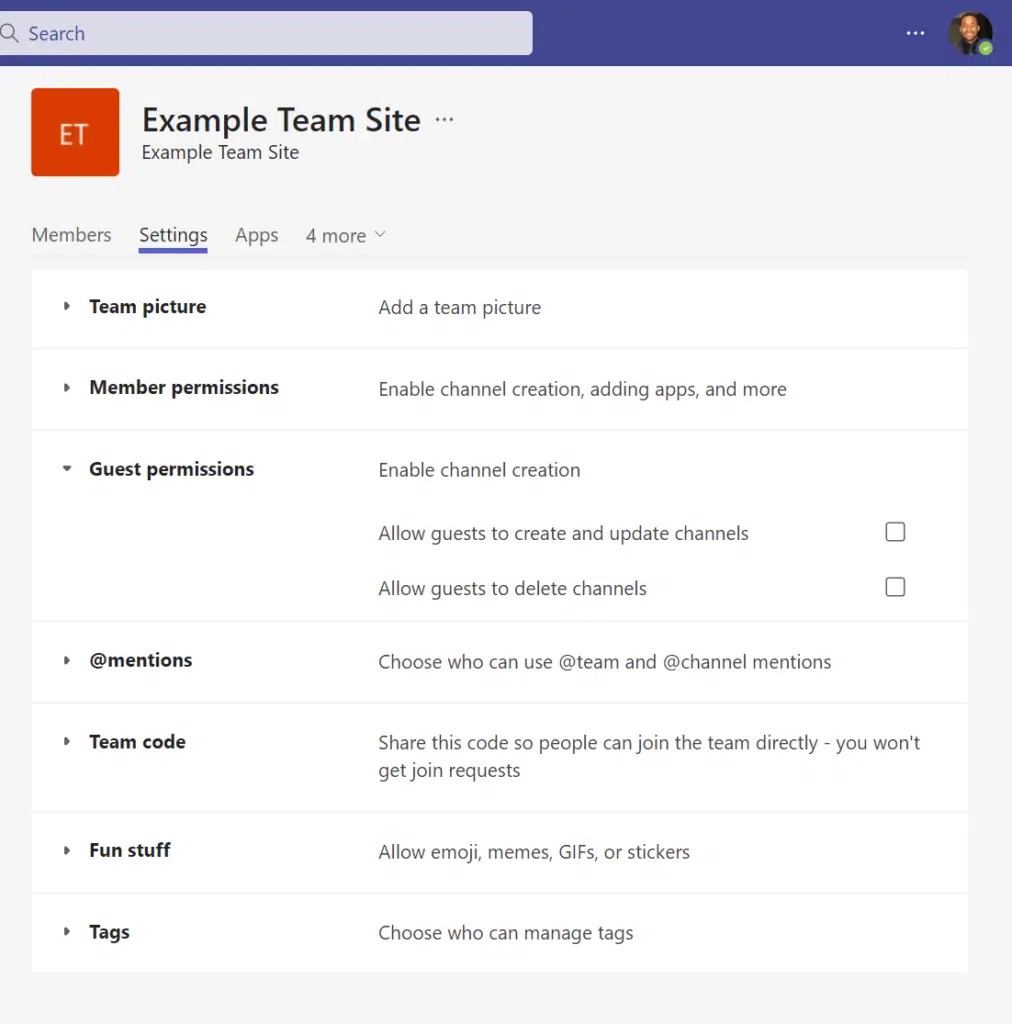
4. Control guest access and permissions
By default, Microsoft Teams allows guest access — though you can always disable this option in the admin center.
What you need to do here is review the guest access settings and disable the ones that are not needed:

If you’re not sure how to get here:
- Go to admin.microsoft.com first
- Then navigate to Microsoft Teams admin center
- Find the guest access settings on the users tab
Another thing to check is the guest permissions in the team settings — though the options are disabled by default (but you still might want to check):
Note: For more information on guest users, check out this article: How to Add External Users to Microsoft Teams [Guest Access].
5. Control who can create teams
Are there benefits to enabling users to create teams?
It’s a good idea especially when there is an actual need for one. Users can then create a new team as needed.
Related: Microsoft Teams Pre-Built Templates: The Beginner’s Guide
On the downside, this can also lead to a disaster:
- Duplicate teams
- Useless new teams
- Useless new SharePoint sites and groups
Unfortunately, restricting the ability of users to create a new team is easier said than done. You basically need to strip their ability to create a new Microsoft 365 group.
The other option is to allow them to create new teams. But you will have to manage those new teams and make sure they agree with your company’s policies.
Note: For more information on creating a team or a channel, check out this article: When to Create a Team vs Channel: Microsoft Teams 2022.
6. Understand what deleting a team or its content means
Do you know what happens when you delete a team in Microsoft Teams?
When you delete a team, you also delete the files shared in it, its content, as well as its SharePoint site, and other assets.
This is a little risky though especially if you deleted a team by mistake. You only have about 30 days to restore the team.
Note: The steps required to restore a team are basically the same as restoring a deleted site. Read here for more info: [Best Practices Guide] How to Delete a SharePoint Site.
The safer alternative to this is to archive teams instead. You can do this through:
- The manage teams page in the app
- The manage teams page in the admin center
If you need to restore a team, you can easily do so on the manage teams page:

This approach preserves the conversations and posts in the teams — though users won’t be able to reply to create new conversations anymore.
This renders the team read-only access for members. Team owners are not affected by this and can still add new members and tags.
Note: For more information about this, check out this article: How to Archive Microsoft Teams: Quick Step-By-Step Tutorial.
But what if you delete content from the team?
You can still retrieve the content from the recycle bin if the team is associated with a SharePoint site.
For messages and conversations, you may not be able to restore them directly. You need Microsoft E3 and E5 plans to legally hold messages in a channel.
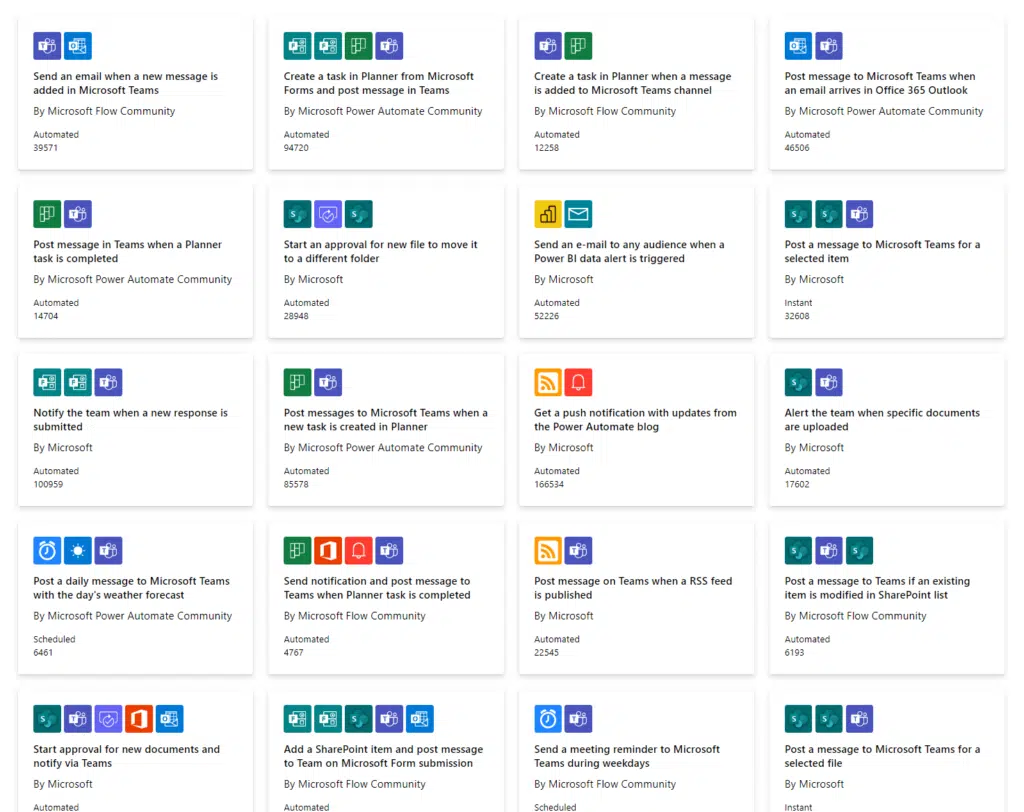
7. Automate what you can in a team
How about you automate some tasks so you will have an easier time managing the team?
There are a lot of tools out there that you can use to help users improve their experience as well as help new users adopt.
Some tools you can use include:
- Power Automate
- Zapier
- Automate.io
Better start with Power Automate as there are ready-made templates that work with Microsoft Teams.
Note: For a primer on how Power Automate works, check out this article: Introduction to Microsoft Power Automate [2022 Version].
Best Practices: Microsoft Teams Channels
Here are best practices related to channels:
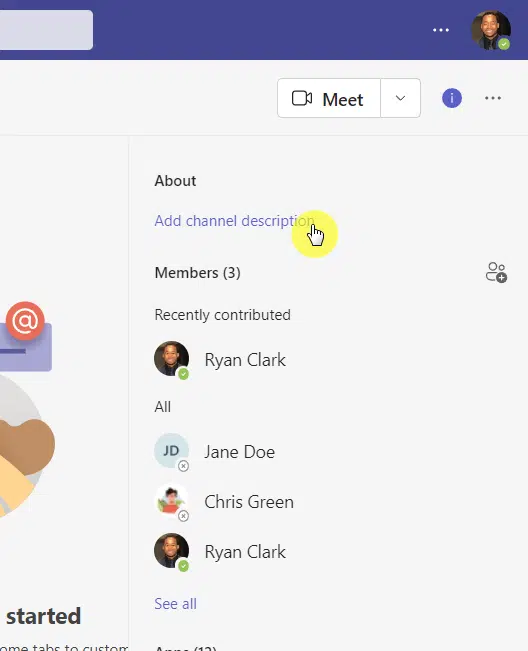
8. Descriptive channel name and description
When you create a new channel, make sure that it has a descriptive name and a good description in its about section.
Well, there isn’t really a right or wrong way when it comes to naming a channel. If you have a standard naming in the company, then use it.
If you have lots of channels, then giving each channel a good description might help clarify its use or purpose.
Here are some Microsoft Teams channel description examples:
- This channel is strictly for internal communications only. Discuss other matters on the * channel.
- Customer support channel for clients using the * product. Kindly use the right channel for the right product.
You can add a channel description in the about section and change it anytime:
9. Pin important information in the channel
Do you know that you can pin posts on a channel?
You can use it to pin important posts which the system displays at the top of the chat during one-on-one chats.
Pinned posts also appear in the information panel (links to pinned posts section):
If you want to pin a post:
- Hover over the target post
- Click the … button on the upper-right corner
- Hit the pin button near the bottom
It’s also a good idea to tell your members to pin important posts themselves.
By the way, there is an option in the channel settings that will allow you to restrict who can start conversations in a channel.
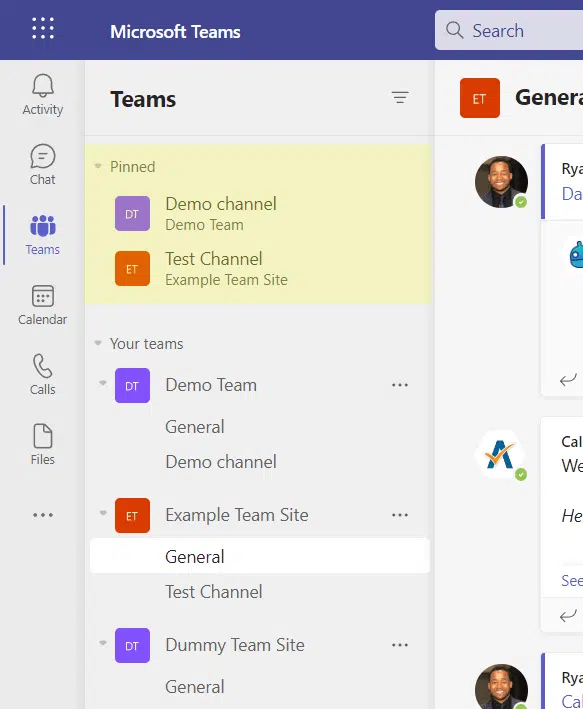
10. Learn to pin and hide channels
In the spirit of pinning important stuff, it’s also a good practice to pin important channels so you can find them faster.
When you pin a channel, you create a new section in the teams and channels panel for pinned channels:
At the same time, it’s also worth hiding channels that users no longer use to declutter the Microsoft Teams space.
When you hide a channel, users will no longer be able to see it — though team owners can. You can always unhide a channel anytime.
For pinning and hiding a channel:
- Go to the teams and channels pane
- Hover over the target channel
- Click the … button inline with that channel
- Select either pin or hide from the options
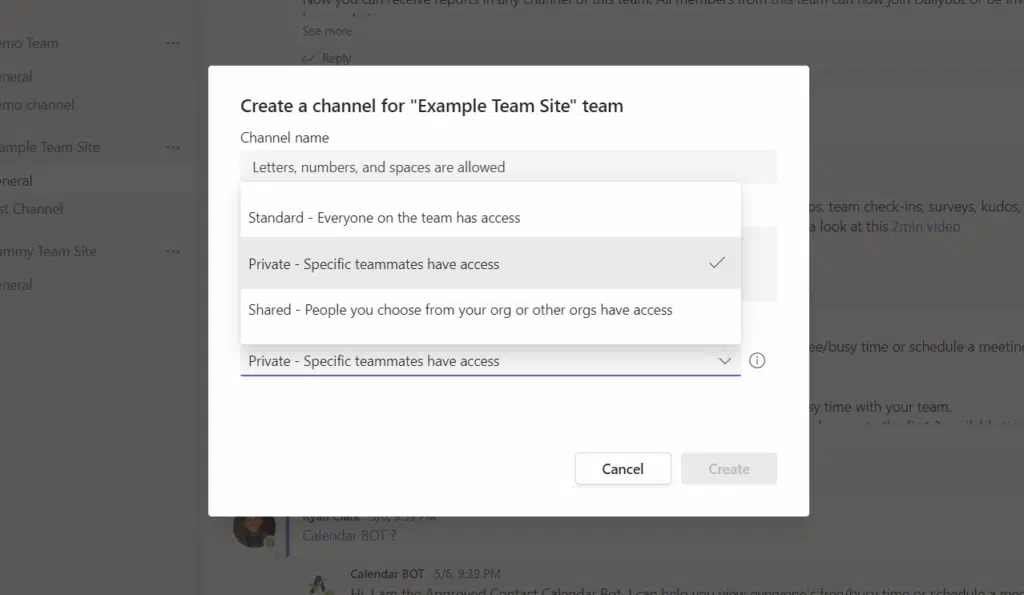
11. Create a private channel when necessary
Do you need to discuss private matters related to the team?
Instead of creating a new team and inviting select members, how about creating a private channel?
The steps are the same when creating any other channel — except that you need to choose the private option in the privacy field:
This is useful in cases like:
- Talking with leaders about user evaluation
- Managing user complaints or suggestions
- Discussing sensitive matters related to the team
Some notes when creating a private channel:
- Only members of the main team can be invited
- A separate site collection is created from the main team
- Can have a different owner than the main team
When it comes to Teams in general, don’t assume that the space is private. The IT team can audit the chats.
Best Practices: Files and Apps
Here are best practices related to files and apps in Microsoft Teams:
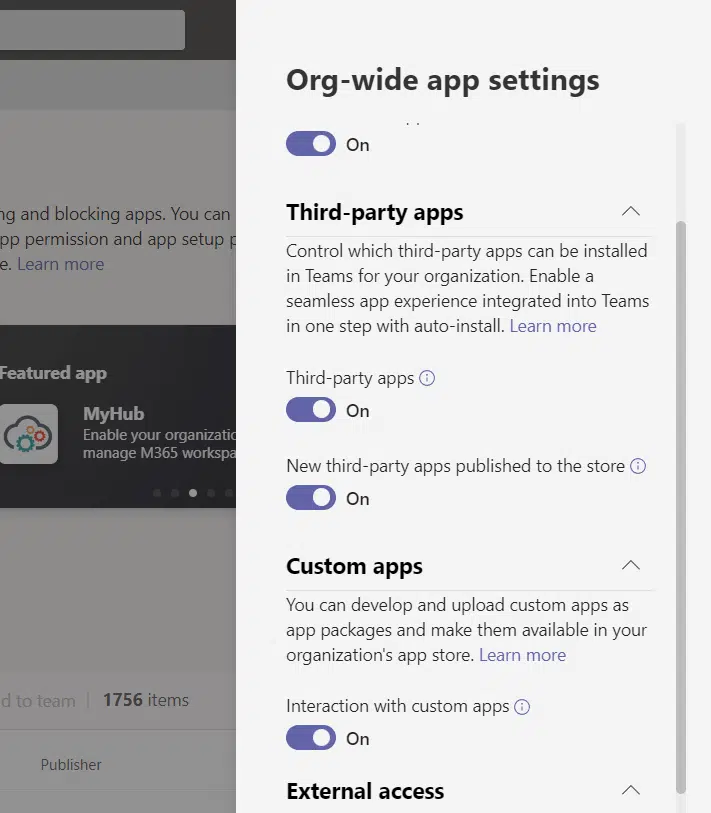
12. Manage third-party apps
When it comes to managing third-party apps, there are two things to remember:
- If you enable users to install apps, you won’t have to entertain messages about having to install new apps.
- If you disable users to install apps, they will be able to install any third-party app, which you might not like.
In the admin center, there is an option where you can allow/disallow installing of third-party and custom apps:
You may have to discuss this one with other leaders and managers and decide what to do (like setting up a way to request access every time users need to install a new app).
There is also an option in team settings under member permissions where you can allow or not members to add/remove apps or upload custom apps.
Note: To see the best practices for Microsoft Teams, go here: Microsoft Teams Security Best Practices: Compliance & Governance.
13. Enable cross-platform chats with other apps
The truth is that not everyone is a fan of Microsoft Teams. Many of your users may still continue to use other apps as well.
The solution to this is to enable cross-platform chats (and other helpful features) with other apps so you can still see everything in Microsoft Teams.
Some apps to think about integrating include:
- Slack
- Zoom
- Webex
Here are articles that might help you choose apps to use:
- Best Microsoft Teams Add-ons: Productivity And Collaboration
- The Best Project Management Apps for Microsoft Teams
- Zoom vs Microsoft Teams Comparison: Features Showdown (mrsharepoint.guru)
14. Learn how files work in Microsoft Teams
It might be a little confusing to find files when you upload them to Teams.
Remember these when dealing with files on Teams:
- Uploading in the files tab in a channel will save the file to SharePoint
- Uploading in the private chat will save the file on your OneDrive
Other notes related to how files work in Teams:
- You can move a file from a team or channel to another
- Files and folders can have unique permissions
- Files in a private channel are stored in a separate site collection
By the way, it might work better if you send the links to the documents to other users instead so you can make use of the co-editing feature in Microsoft 365.
Related: Microsoft Teams: Intranet Alternative to SharePoint Online?
15. Use bots to automate low-level tasks
Did you know that there are bots in Microsoft Teams?
Bots are little apps that can do simple and repetitive tasks. There are all sorts of bots available for different purposes.

Users interact with bots right in the chatbox. There are commands available that bots understand when you tell them to do it.
Note: For more information on bots, check out this article: Getting Started With Microsoft Teams Bots [Beginner’s Guide].
Best Practices: Meetings and Calls
Here are MS Teams best practices related to meetings and calls:
16. Use schedule a meeting for team calls
Do you need to set up a meeting?
Well, if you’re doing it with the entire team, the easiest way is to go to the general channel and schedule a meeting.
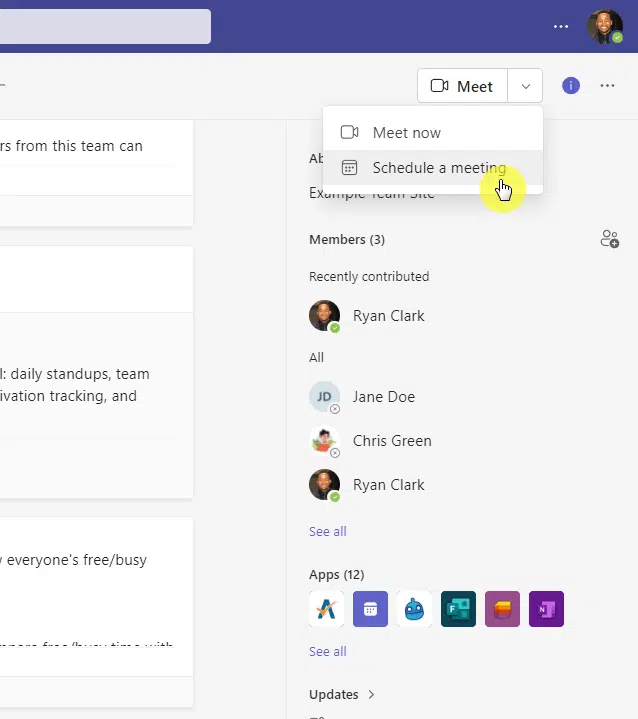
The system will then send an invitation to everyone on the team (since all of them are in the general channel).
Otherwise, if you need to meet with certain individuals only, you need to set up a meeting and manually invite those people.
Note: For more information on setting up meetings in Teams, check out this article: How to Set Up and Schedule a Meeting in Microsoft Teams.
17. Learn to optimize meetings and calls
There are a few things that can help you get the best experience in meetings and calls:
- The desktop app experience is better compared to the web app version
- You can continue a call from the desktop app to the mobile app
- Use video only when you have a strong internet connection
- When using video, blur your background to minimize distractions
- When showing your screen, zoom in so members can properly see
It might also help if you record your meetings so that you and your team can go back to them when you need to.
If you’re using a private channel, you won’t be able to see any option to schedule meetings (since it’s not designed for it anyway).
Got some questions about Microsoft Teams? Feel free to drop a comment or two in the comment section below.
Need professional help? Send me a message from the contact form here and I’ll get back to you as soon as possible.


