

Last Updated on August 5, 2022
Do you want to create a new view in a document library or list?
Fortunately, you can easily do this through the modern experience — although editing it might need a little work.
In this article, I’ll show you how to create a view in SharePoint Online and some examples of custom views you can make.
Let’s get started.
Table of Contents:
Right after creating a new list or document library, the view that you’re seeing is the default view that shows everything without filters or groups.
If you want to create a new view, follow these steps:
- Click the view icon on the document library or list
- Hit the option for creating a new view
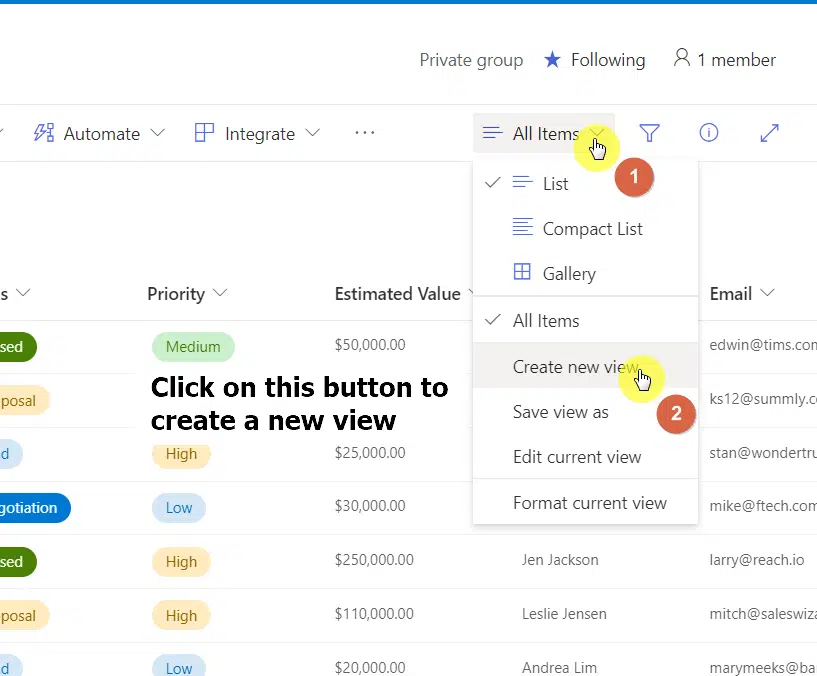
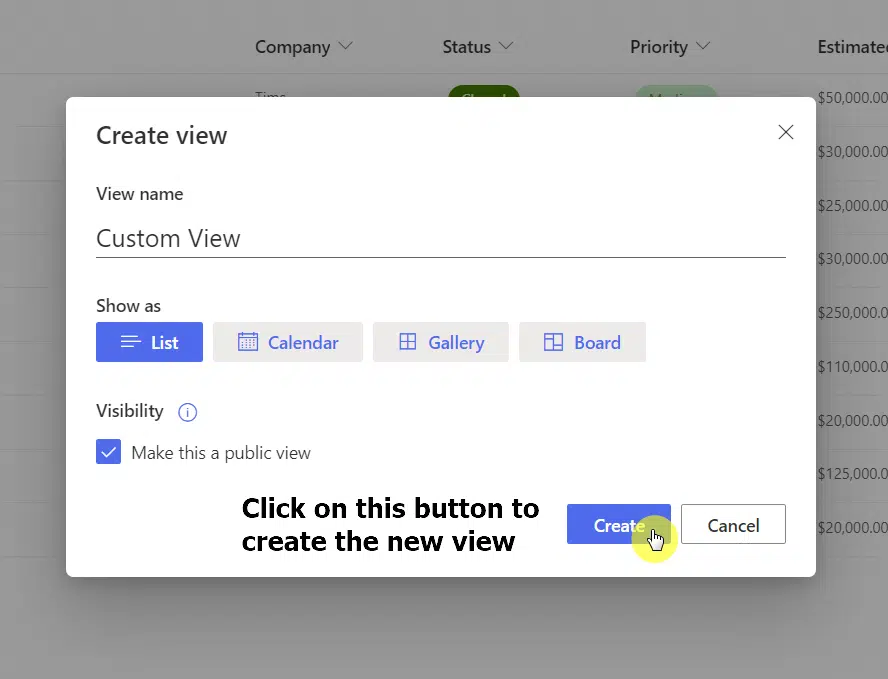
These will open a small window:
- Give the view a name
- Select the format of the view
- Configure the view’s visibility
- Click the create button at the bottom
Sign up for exclusive updates, tips, and strategies
Now that you have a custom view of your own, you may want to customize it (as it still looks like the standard view).
For that:
- Click the view icon on the library or list
- Hit the option for editing the current view
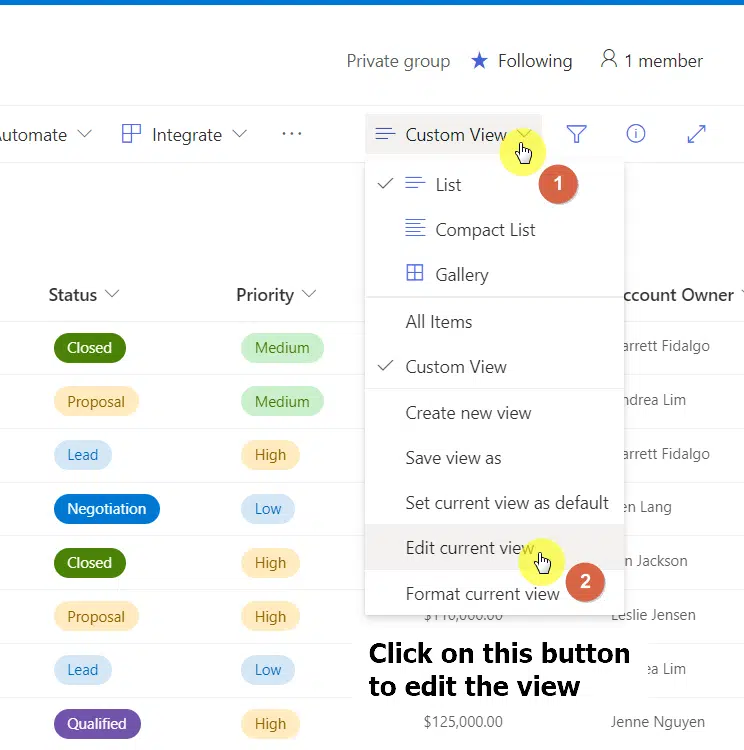
The next page will allow you to rename the view, change its address, make it the standard view of the library or list, and edit the view.
There’s another method to get to the new page where you can also view and edit all the custom views as well as create a new one.
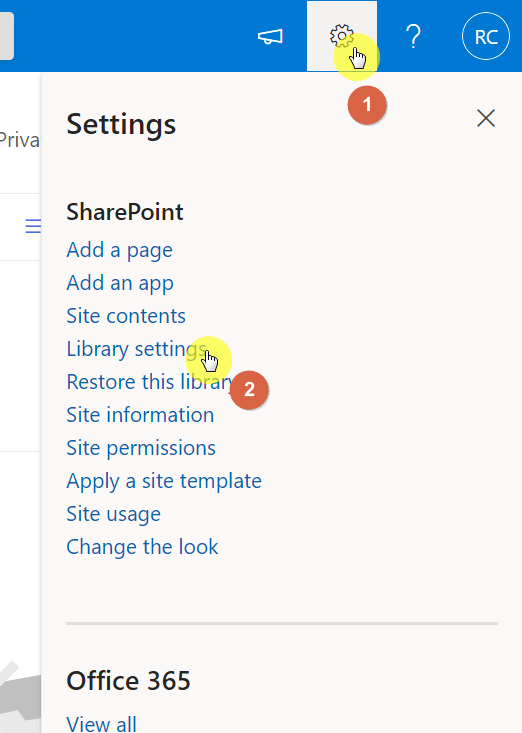
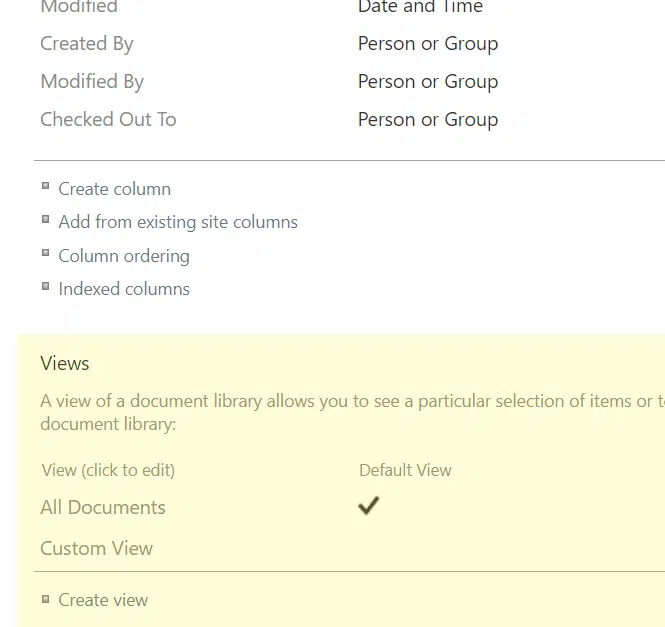
You will need to get to the library settings page first:
- Click the gear icon on the upper-right corner
- Click the library settings option
The options for the custom views are in the bottom part of the page:
- Click a view to edit it
- Hit the create view option to create a view
Examples of custom views you can create
There are a lot of options on the next page — which can easily overwhelm you and lead you to simply do the most basic of changes.
That’s why I want to give you some examples of custom views that you can create:
Group by metadata columns
Seeing the metadata columns in a list or library is great. But there are times when you wish there was another way (especially when there are a lot of columns).
Fortunately, you can group the items by metadata (maximum of two) and simplify the experience through this feature.
Here’s how:
- Navigate to the group by settings
- Indicate which metadata to use to group the items
- (Optional) Indicate the other metadata to use
- Configure the other settings if you want to
- Click the OK button
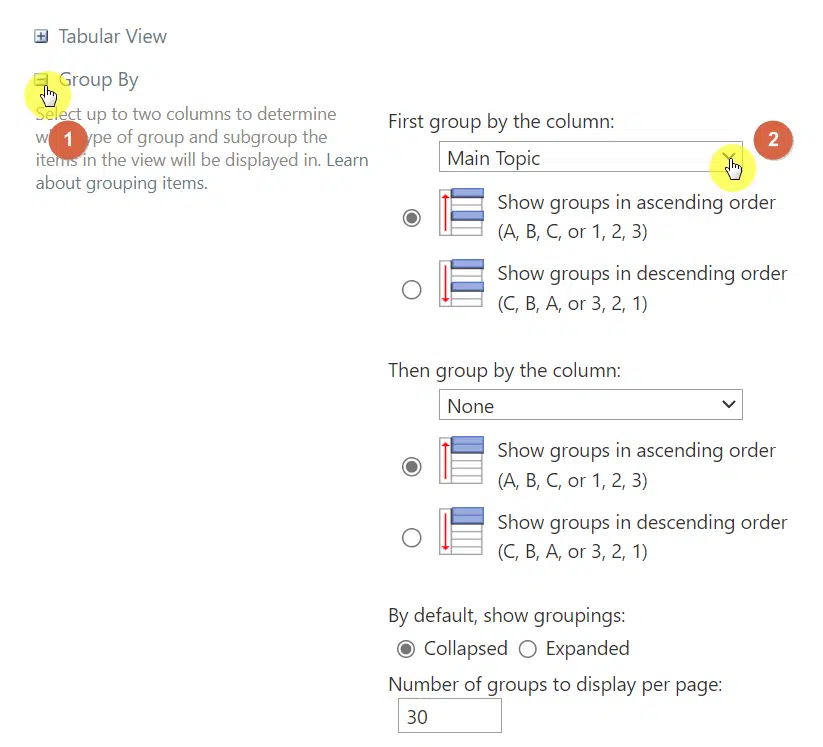
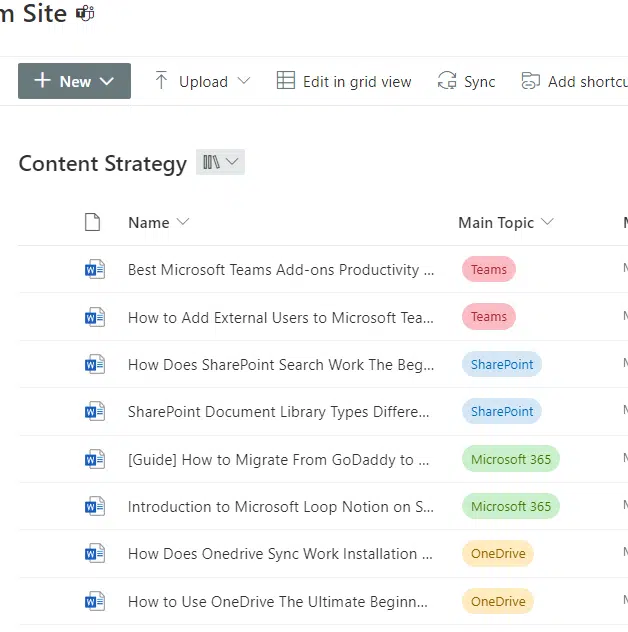
In the example above, I wanted to group the documents by the main topics that I tagged them with (like OneDrive, Microsoft 365, etc.)
Note: The metadata accepted by this feature are only those where you can select one option only. Multiple selection metadata can’t be used here.
This is how the library looks now:
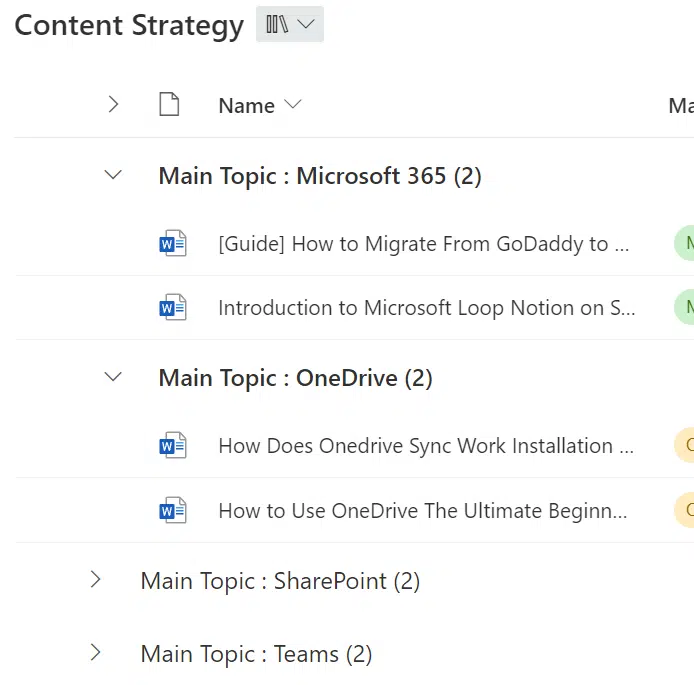
As you can see, this one is a good alternative to using folders in a library. It’s also good for limiting the number of items shown at one time.
Show items without folders
How about doing the opposite? Like what if you want to show all items unhindered — without any folders being shown?
Well, there is an option for that in the settings where you can make the folders disappear (only in the view).
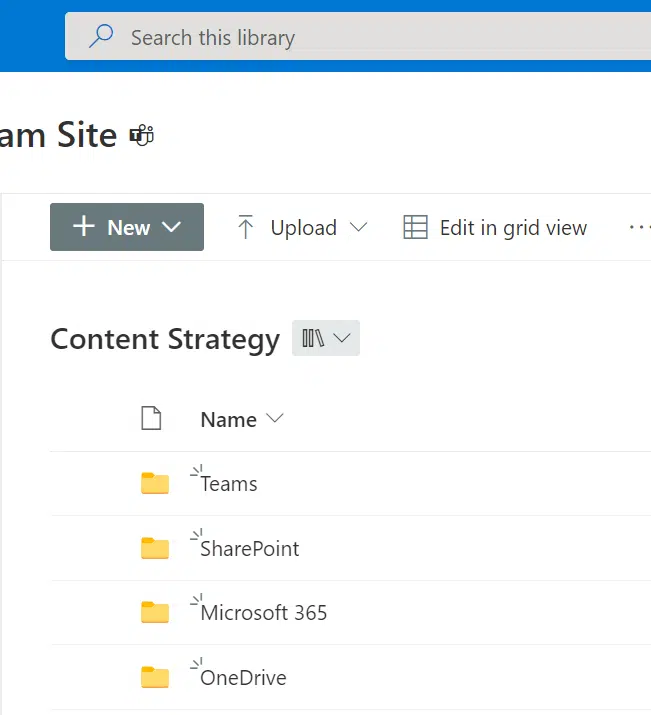
Before that, I added new folders in the library so it now looks like this:
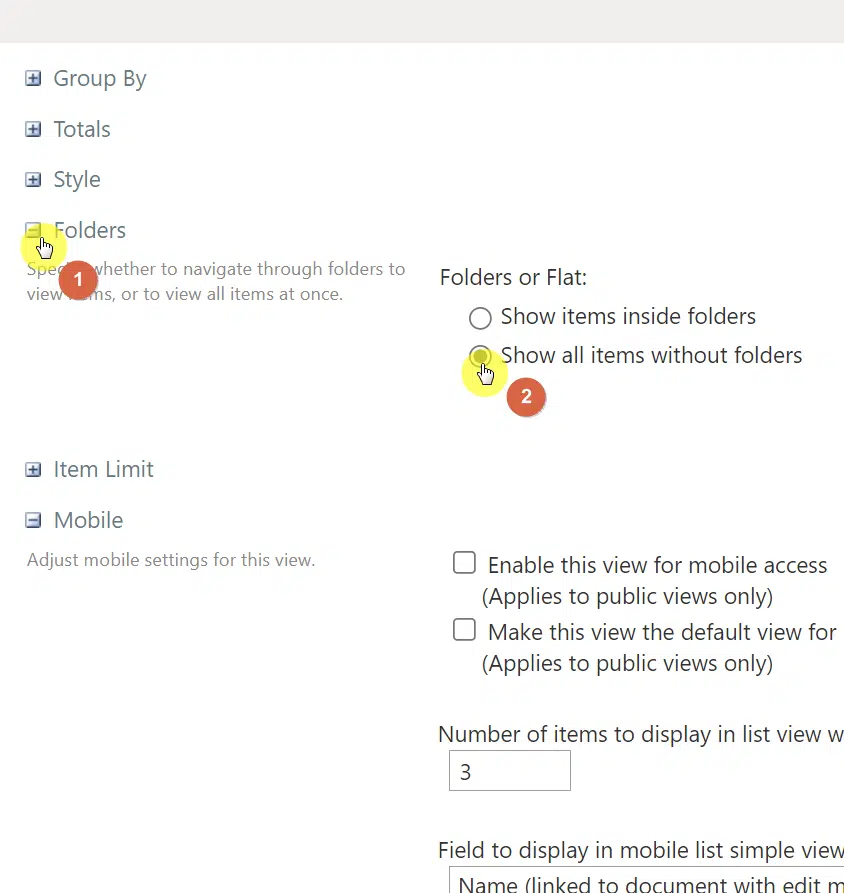
If you want to hide the folders, follow these steps:
- Go to the folders settings
- Click the option to show all items without folders
- Click the OK button
SharePoint will then magically show the library as if there weren’t any folders in it in the first place:
Note: Since it’s only libraries that have folders, this option can’t be found when you’re editing a custom view on SharePoint lists.
Limit the number of items shown
What if you want to limit the number of items shown in the library or list?
This is understandable especially if you have hundreds or thousands of items. Nobody will go so far as to check out the 475th item.
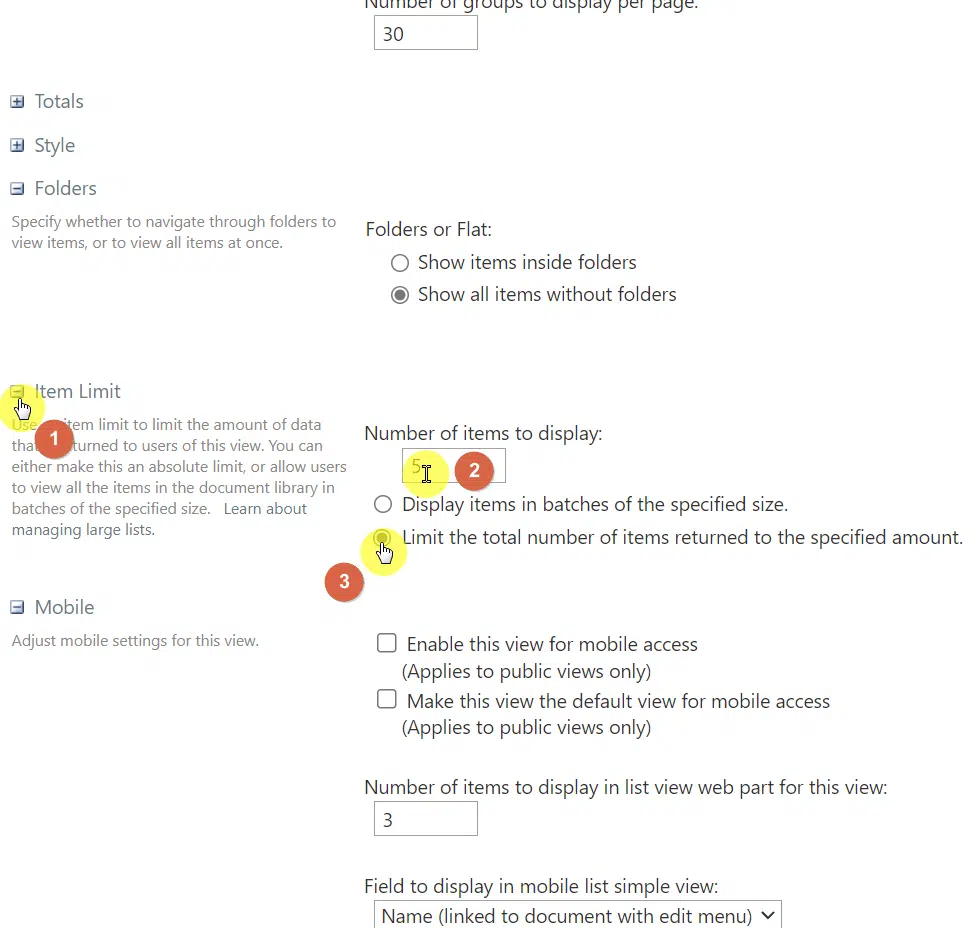
To do that, follow these steps:
- Go to the item limit settings
- Change the maximum number of items to display
- Choose the option to limit the total number of items returned
- Click the OK button
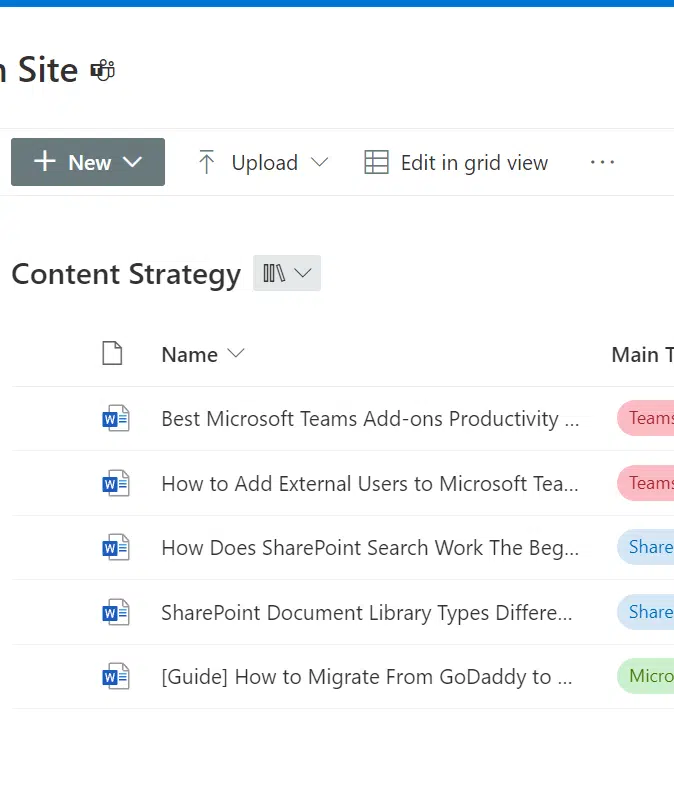
Once you go back to the library, you will then see that it’s limited according to the number you have specified:
If you’re working with a lot of files in your SharePoint lists and libraries, then this is a good practice to implement.
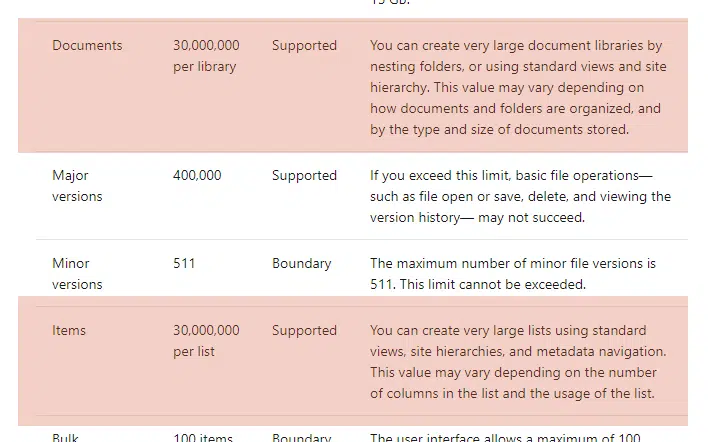
One of the limitations of SharePoint Online is the limit threshold where a list or library can’t show more than 5,000 items.
To be precise, libraries and lists can support more than 30 million items:
Note: If you’re having this problem, then check out this guide where I discussed how to resolve the item limit threshold issue.
Anyway, do you have any questions on how to create a view on a list or library? Simply share your thoughts below.
For inquiries and other concerns, kindly use the site’s contact form and I’ll get back to you as soon as possible.


