

Last Updated on April 30, 2024
Are you looking for a way to create a modern wiki knowledge base with SharePoint? If so, you’re not alone.
Right from the start, SharePoint already has a way for users to create a wiki with the use of the wiki page library web part.
But since the introduction of modern pages, you can now create a modern wiki quite easily (with all the benefits of the modern experience).
In this article, I’ll show you how you can easily create a modern wiki knowledge base in SharePoint.
Follow these steps:
Table of Contents:
1. Organize your knowledge base wiki on the site pages library
For the knowledge base wiki, let’s use the site pages library, a place that stores all the pages in your SharePoint site.
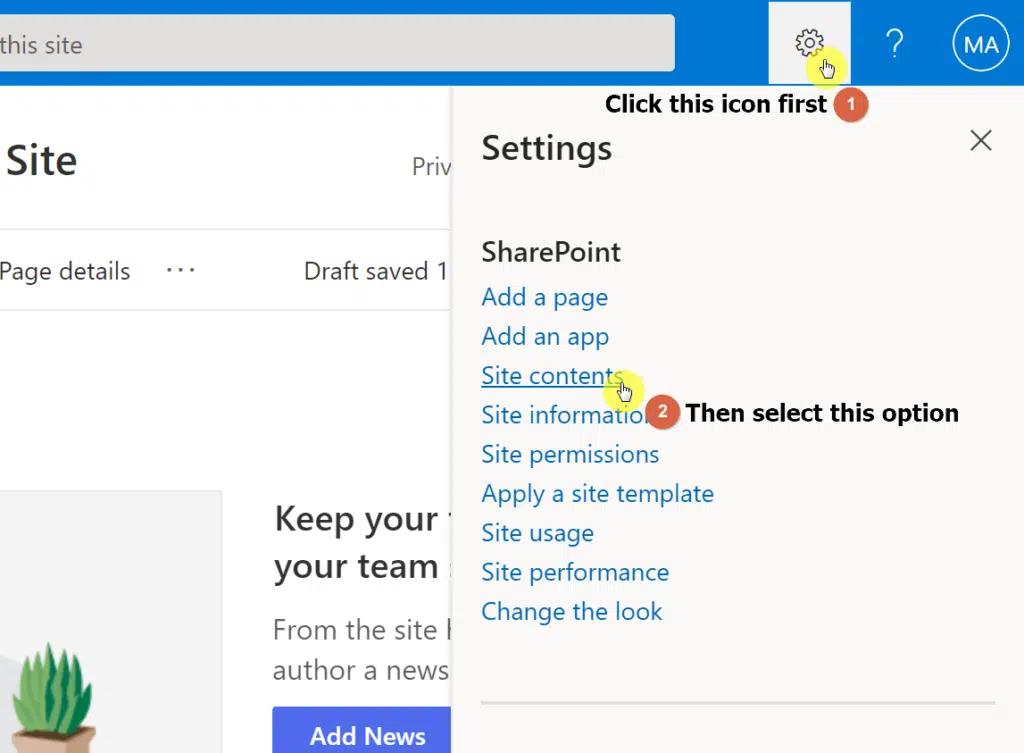
To get started, go to the site contents page first through any of these methods:
Click on the gear icon in the upper-right corner of the page. Then, click on the “Site contents” option.
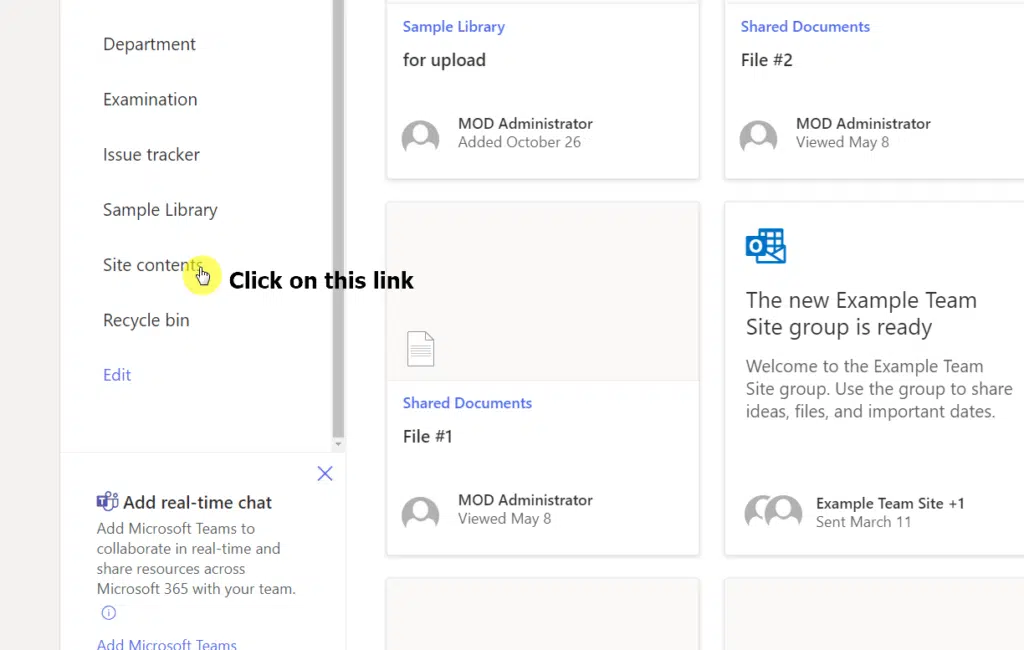
You can also click on the “Site contents” link on the quick launcher bar of your site (found on the left corner for team sites and on the top corner for communication sites).
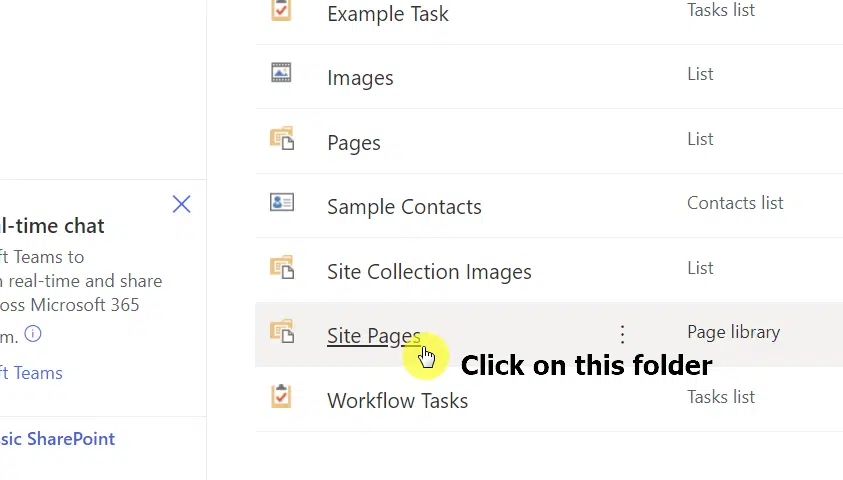
Once you can see all the site contents, open the “Site Pages” folder.
The site pages library, like a list, has rows (with the page as the main item) and columns (for metadata).
The next step you need to do here is to create metadata columns to organize your knowledge base wiki.
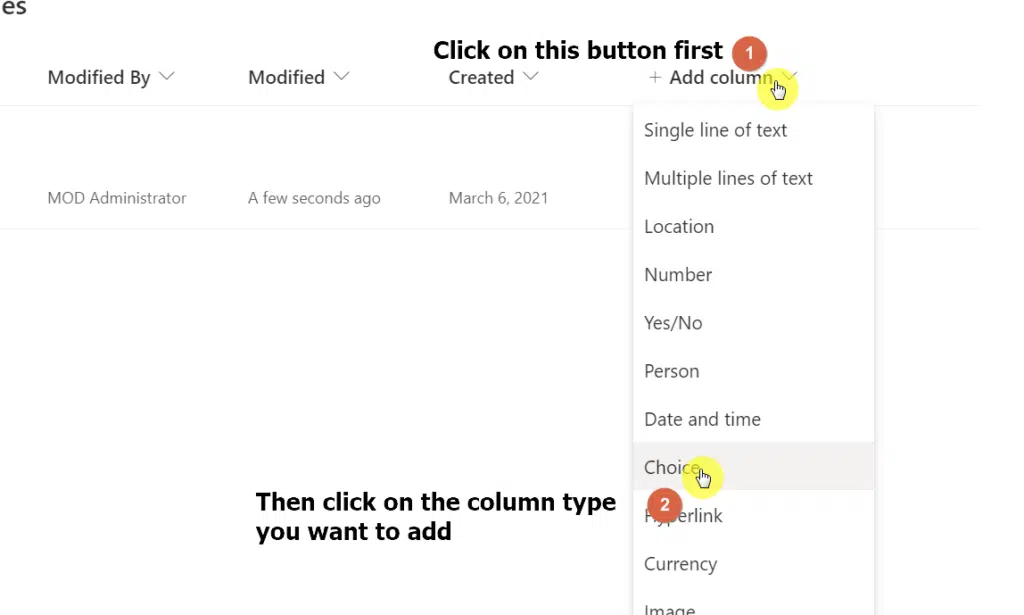
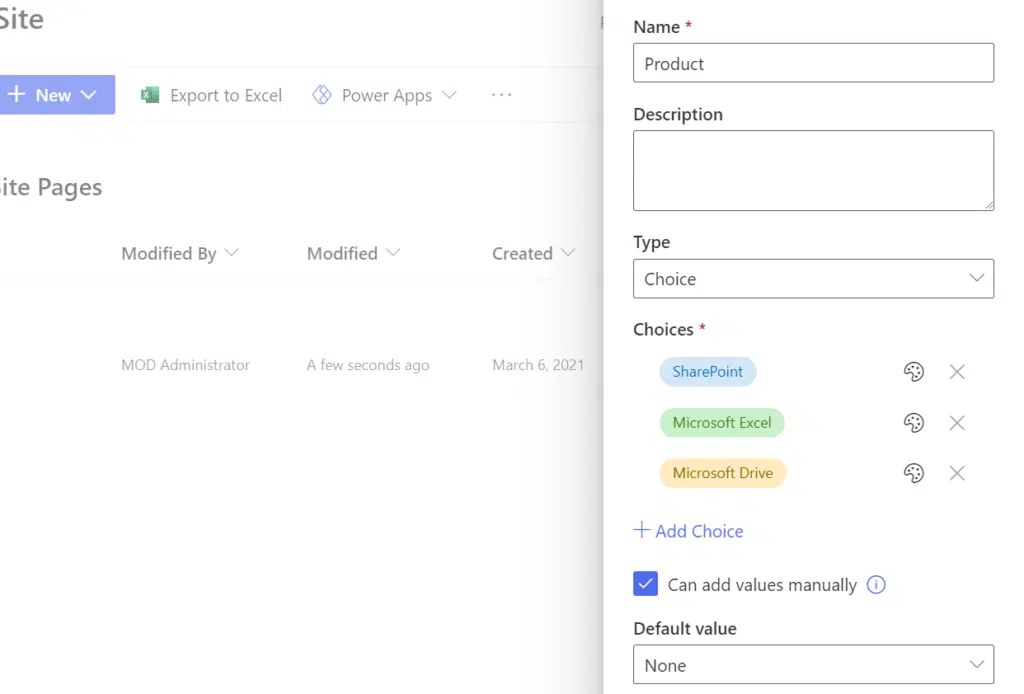
To do so, click on the “Add column” button and click on the column type you want to add to the library.
For example, I want to add a choice column where the publisher can choose the product the wiki article is talking about.
Customize the column you want to add.
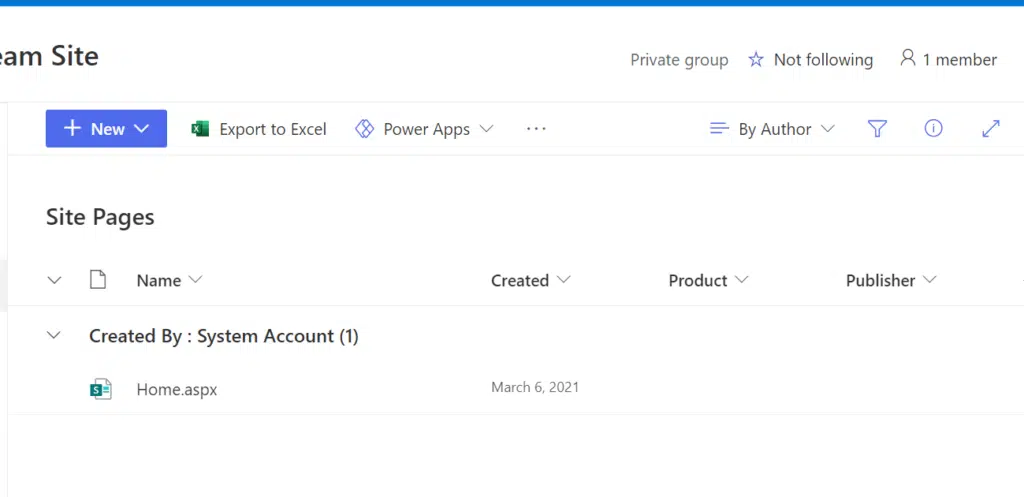
Since this is an example knowledge base wiki only, I’ll only be adding two new columns to the library. I also rearranged the columns and hid the other ones I didn’t want to show.
Note: For creating an enterprise wiki, check out this guide: SharePoint Enterprise Wiki Guide: Classic to Modern Sites.
Do the same to your own knowledge base wiki too. Add all the metadata columns you want to so you only have less work in the future.
Sign up for exclusive updates, tips, and strategies
2. Create the wiki page template
Creating a page template for your knowledge base wiki articles is the best way to go.
You would be able to save time by using a template instead of creating a new page each time. Using a template also makes sense since all your wiki pages look the same.
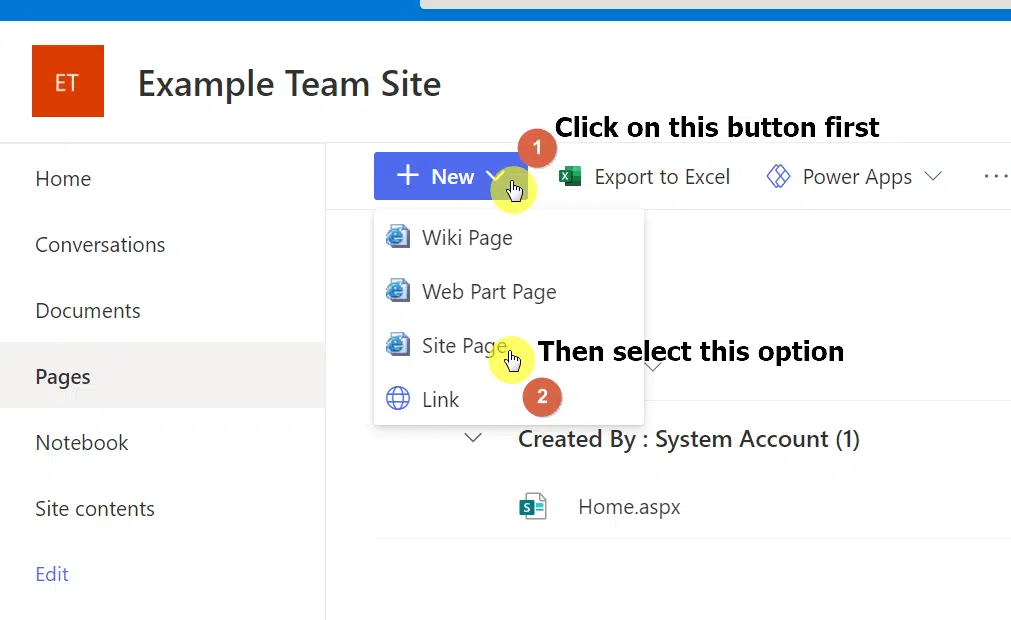
To get started, click on the “New” button and select “Site Page”.
Yes, there is an option for a wiki page but since we want to create a knowledge base wiki that makes use of the modern experience, we will use the site page option.
The next step is to modify your page template.
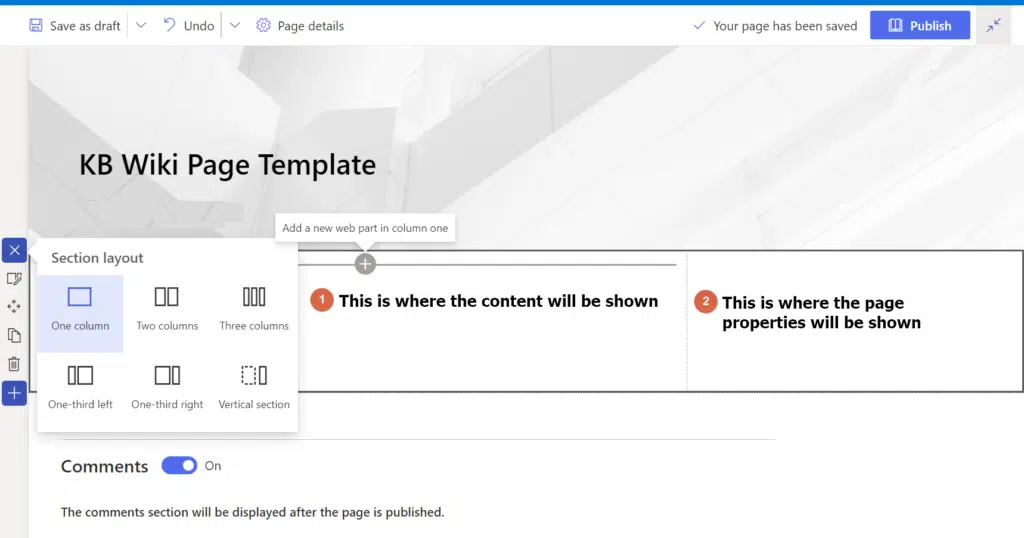
For example, you can name it first and then change the layout. Personally, I wanted the wiki pages to look clean and make the page properties visible too.
So what I did is I added a one-third right section — the left part will contain the content and the right part will be for the page properties.
Related: How to Create a SharePoint Site From Template: Full Tutorial
Feel free to copy this layout or design your own.
For the next step, I will add the page properties web part into the right section as you can see from the screenshot below:
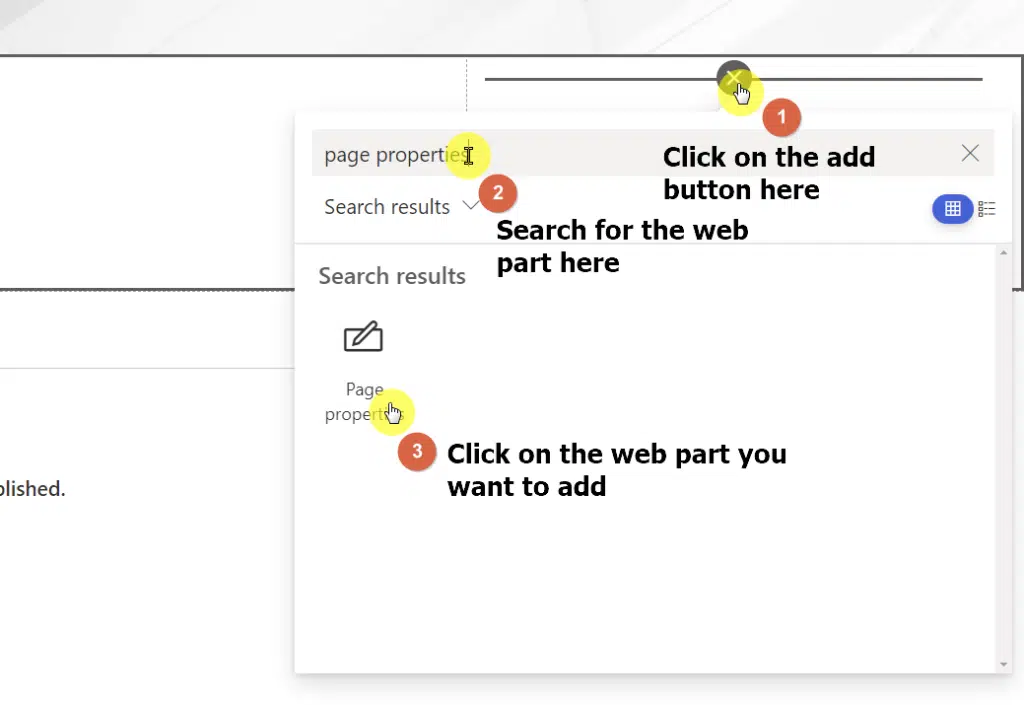
After adding the page properties web part, you will see an “Add” button.
When you click on it, you will be able to add properties to tag the wiki template with metadata from the columns you added earlier (which is the idea).
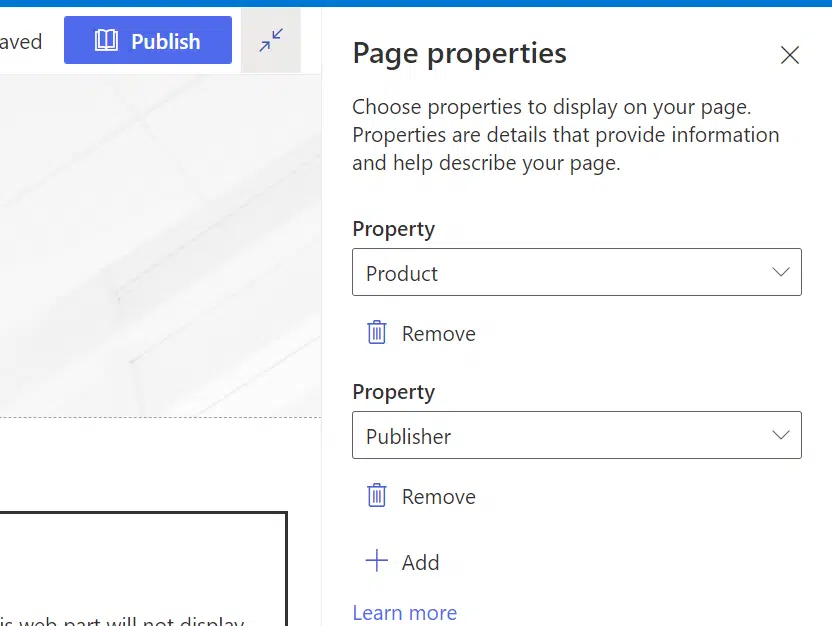
Right now, it’s still empty. But later on, when you add new page templates, you can tag the wiki pages.
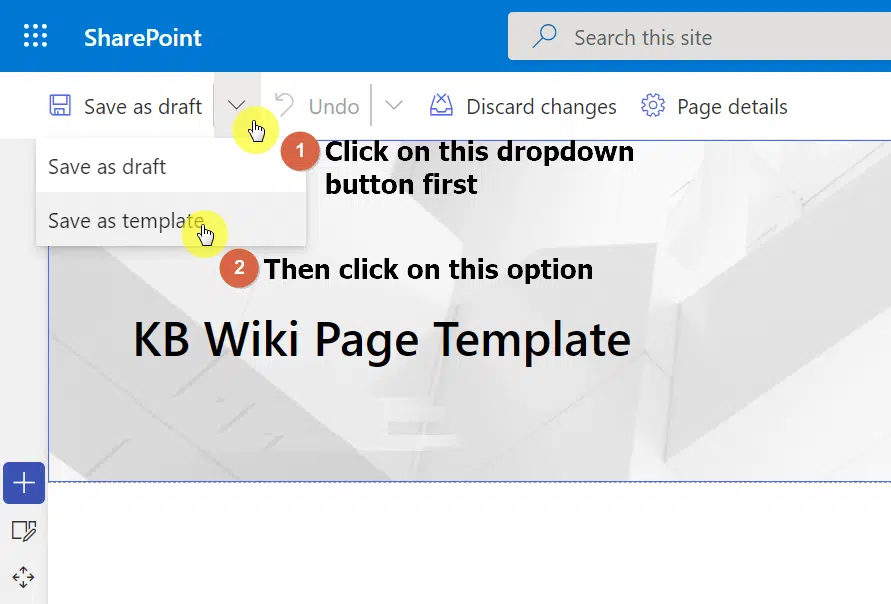
Finally, to save the page as a template, click on the save dropdown button and click on the “Save as template” option.
Related: Using Site Templates in SharePoint Online: Beginner’s Guide
3. Create wiki pages for your knowledge base
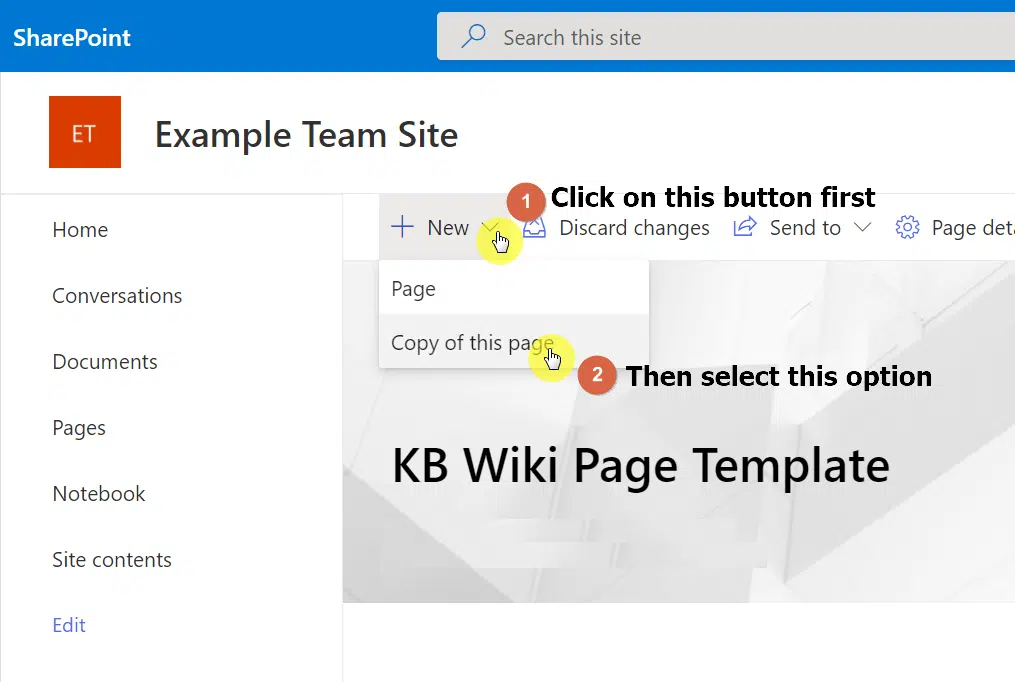
When you go back to the site pages library, you will now see the template page you created.
To start creating a new wiki page, open the template page. When you click on the “New” button above, you will see an option to create a “Copy of this page”.
Click on it.
Now, fill out the page with content. Don’t forget to add a title to your page too.
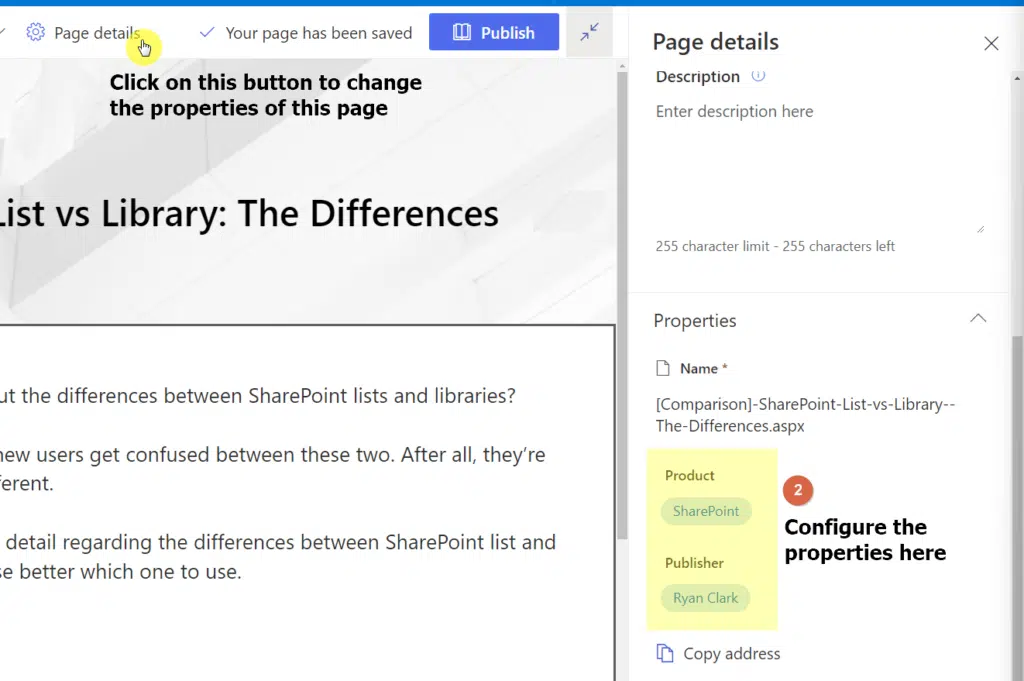
You can then tag the page with the correct properties by clicking on the “Page details” button.
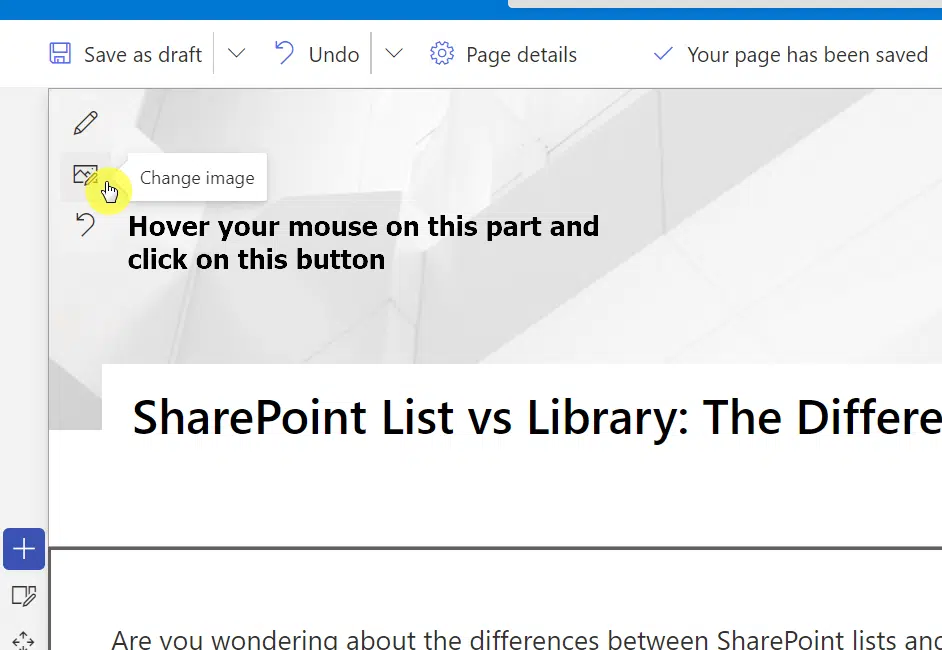
You can also add a featured image to your page. Hover your mouse over the cover image part and click on the image icon.
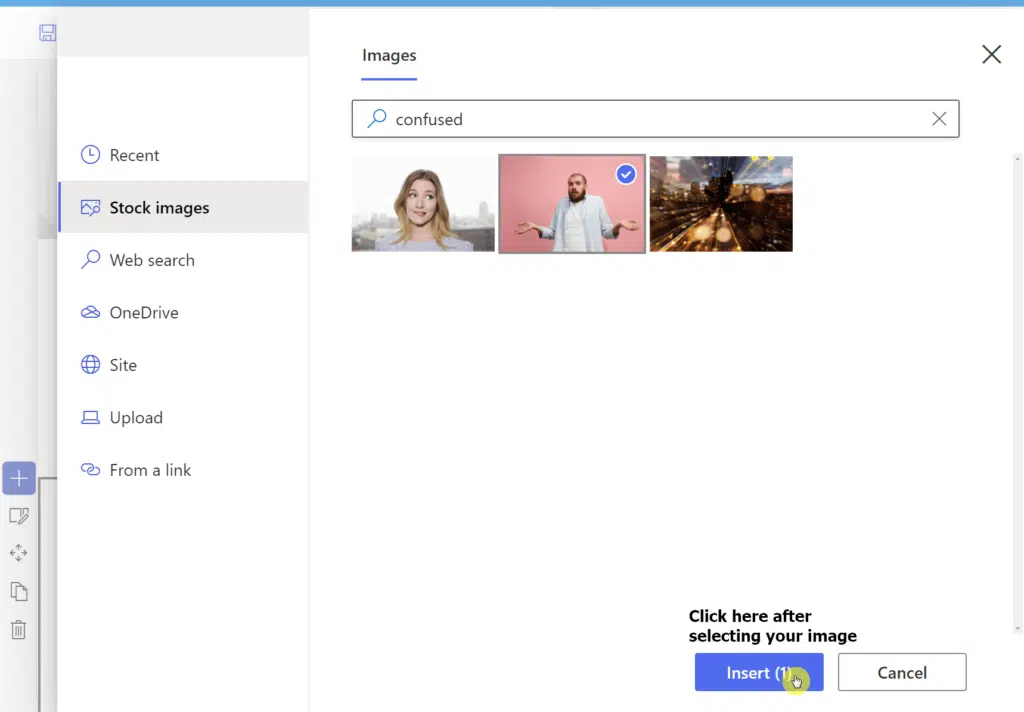
Then, select the source of the image. In my example, I used a stock image and searched for a keyword.
Once you select an image, click on the “Insert” button in the lower-right corner.
Once you’re done customizing the page, click on the “Publish” button.

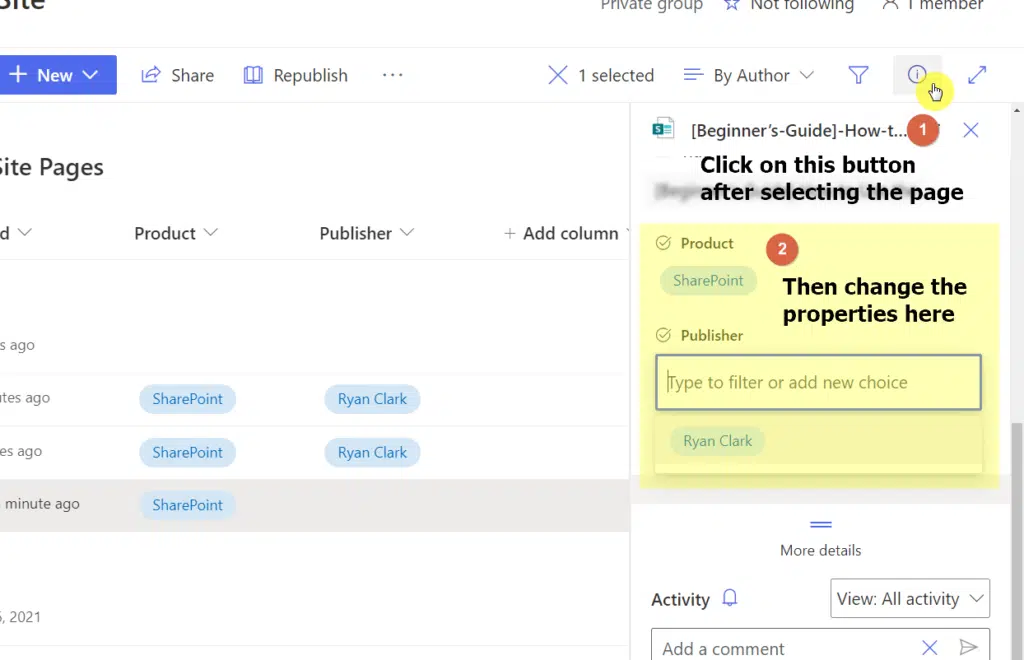
Note that you can also add the properties in the site pages library without opening a page. Simply select the page and click on the info button.
You can then edit the properties in the right panel.
4. Create a new view for the library
Your site pages library might look a little messy especially if you have a lot of metadata columns.
This is why creating a new view with filters and sorting is a good practice.
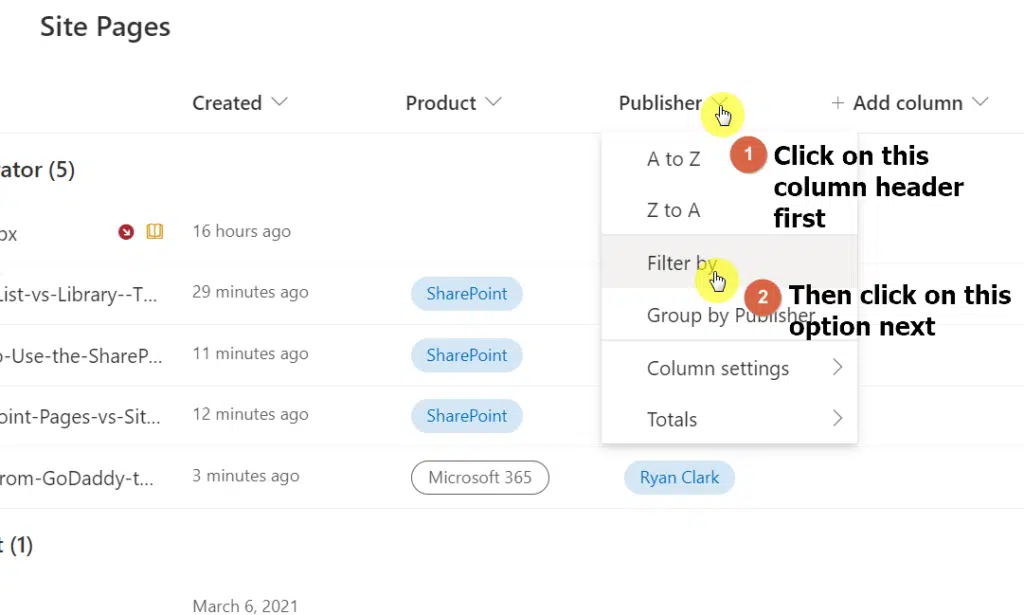
For example, let’s say I only want to show all the wiki pages that were published by me. I can then click on the “Publisher” column header and on the “Filter by” option.
The system will then show me some filter options.
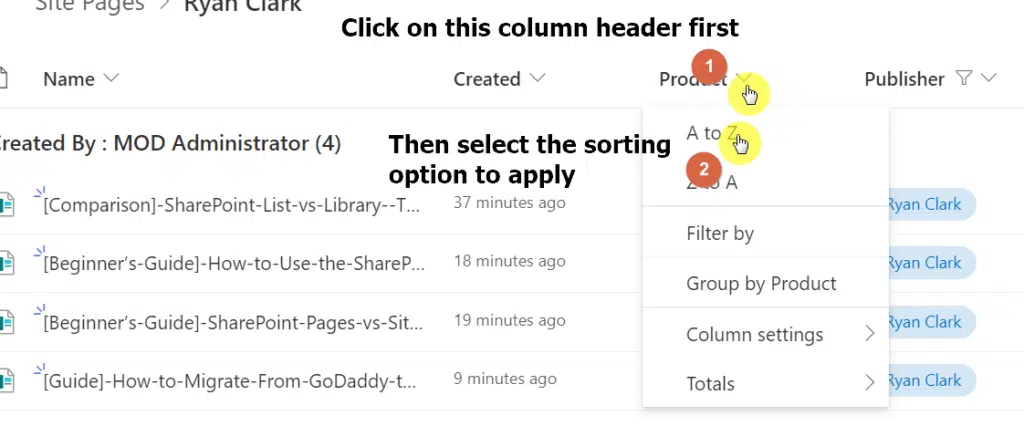
You can also sort the order of the pages according to how you like them.
For example, I can sort the pages by product alphabetically by clicking on the “Product” column header and selecting the “A to Z” option.
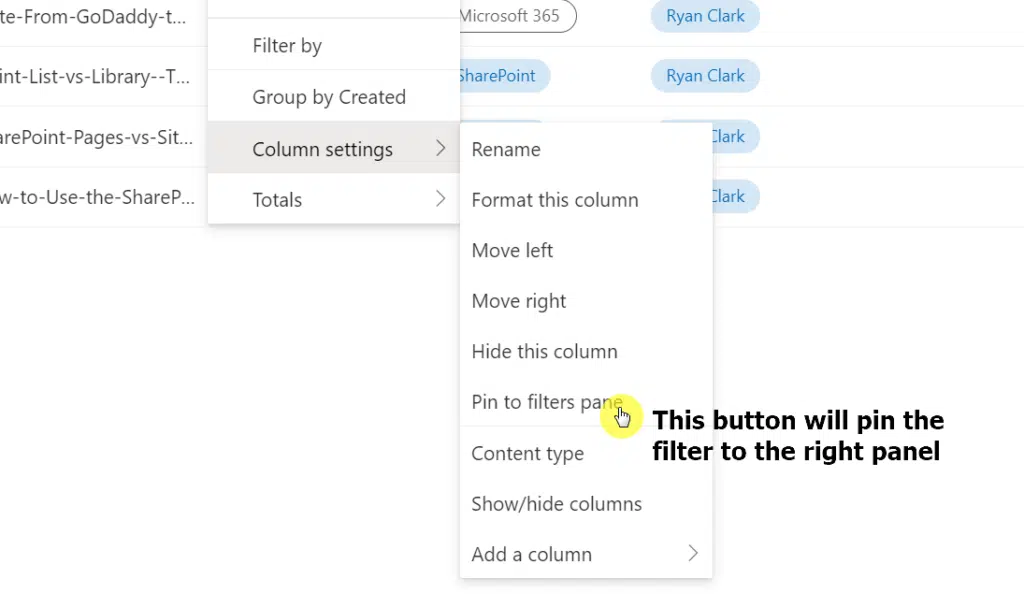
Note that you can also pin the filter to the right panel. There’s an option for it under the column settings option.
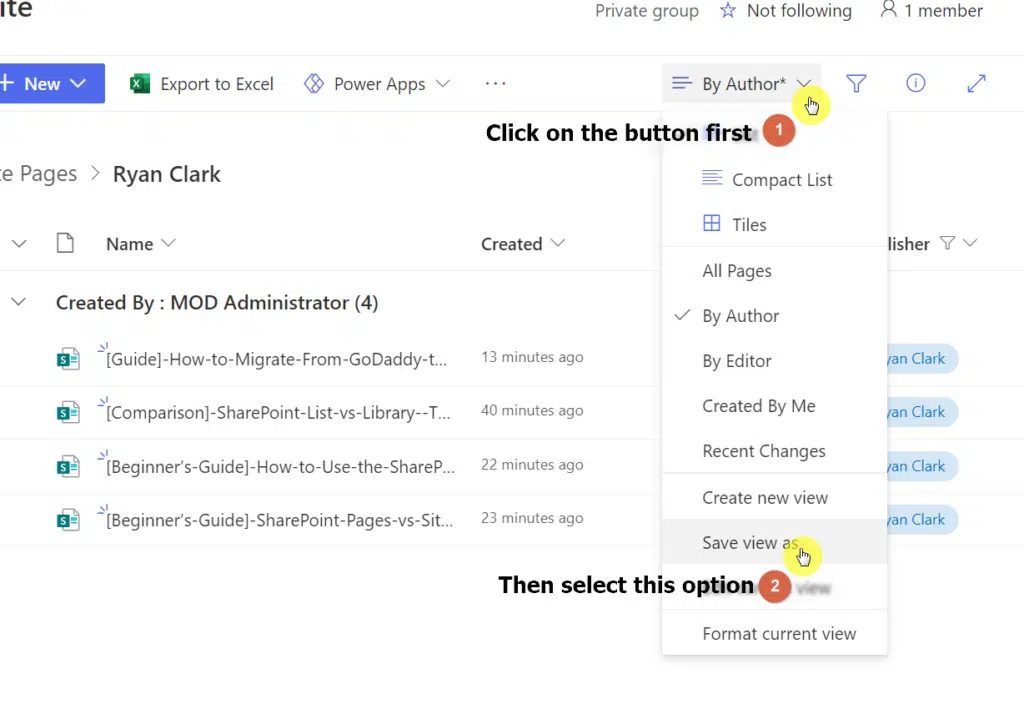
Once you get the preferred view, you can save it so you don’t have to reapply the settings every time you get to the site pages library (and for your users, too).
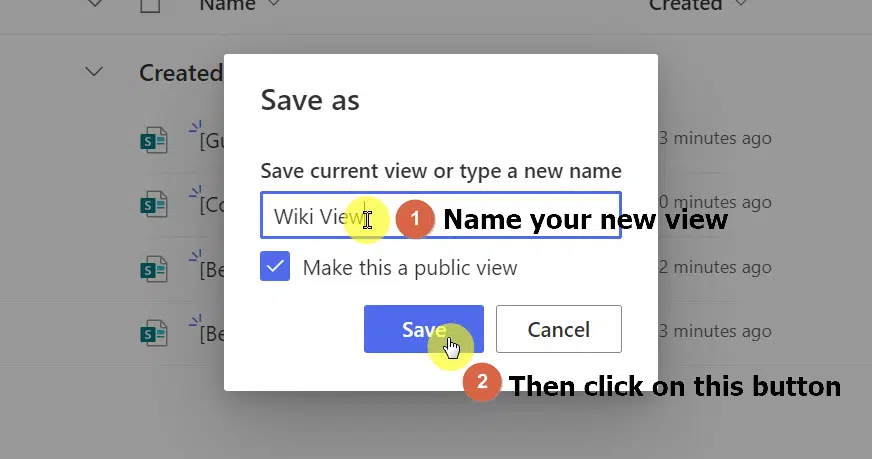
Click on the view button and select the “Save view as” option from the dropdown.
Give the new view a name. You can also enable this view to be a public view (so it’s available for your users to use).
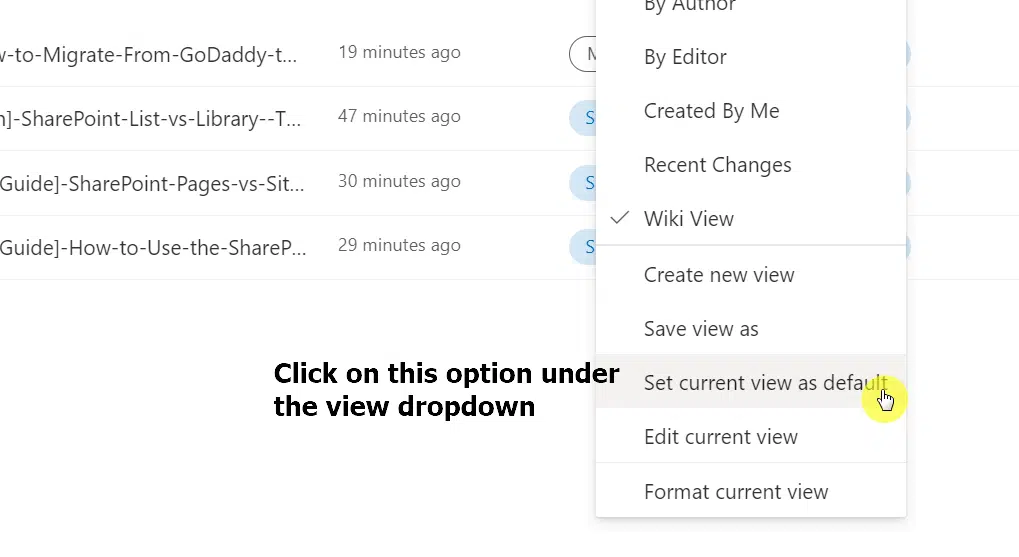
You can then set the new view as the default one. Click back on the view button and this time, select the “Set current view as default” option.
5. Create the main wiki page for your knowledge base
If you have followed everything up to this point, then you’re almost done. But first, you need to build the wiki page so users can navigate through the pages.
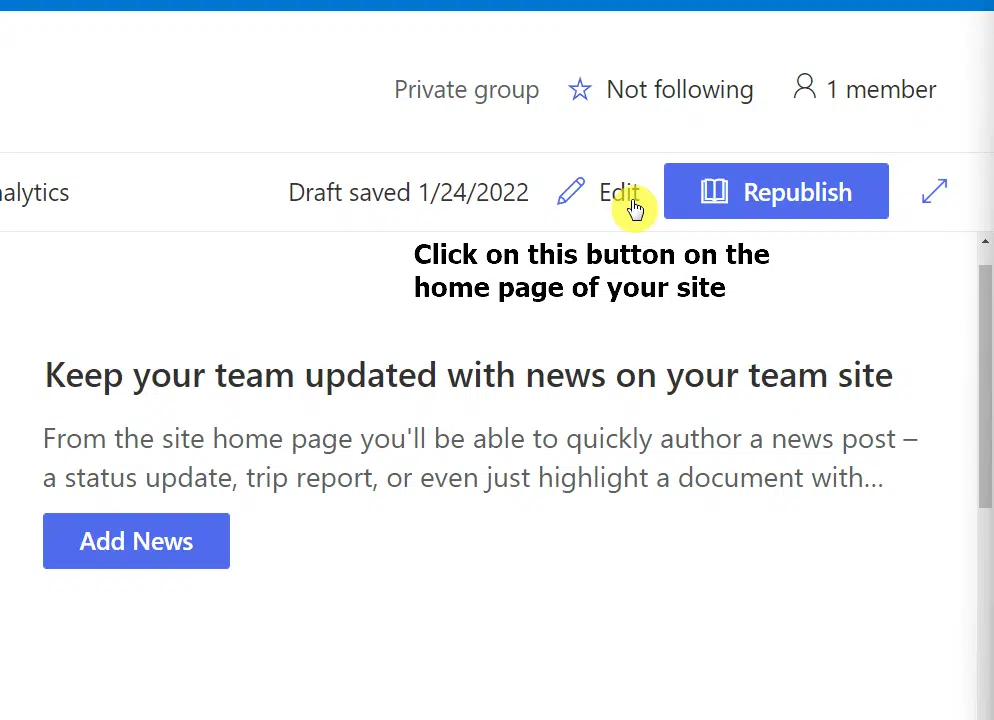
Well, technically, what you need to do is add a web part to the home page so users don’t have to go to site contents and then to the site pages library.
Go back to the homepage of your site and click on the “Edit” button.
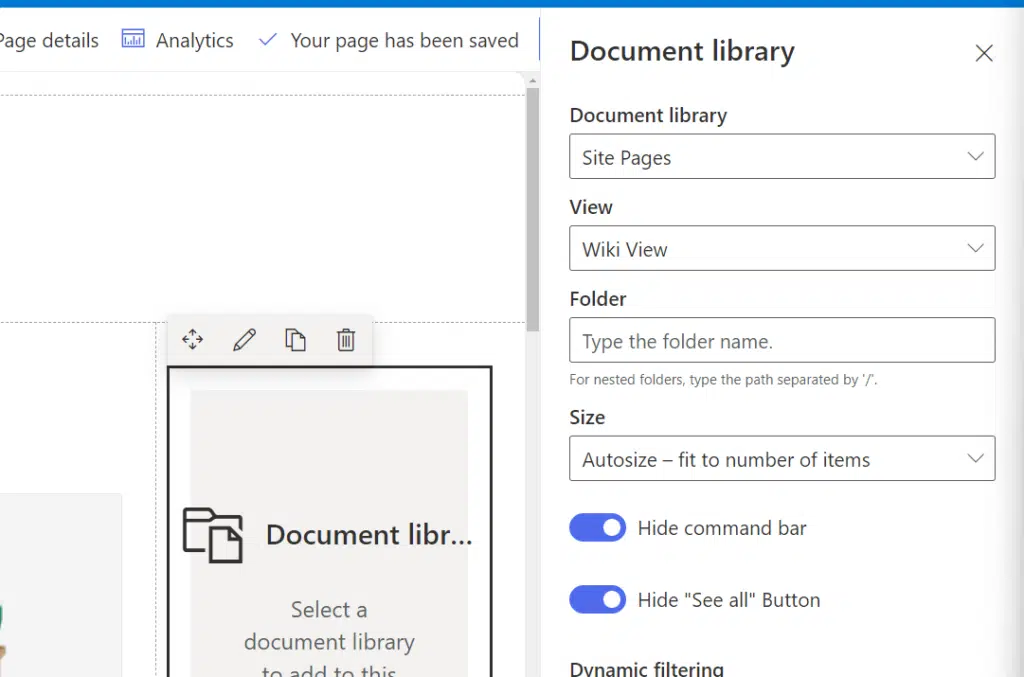
On the section you prefer, add a “Document library” web part (make a search for it).
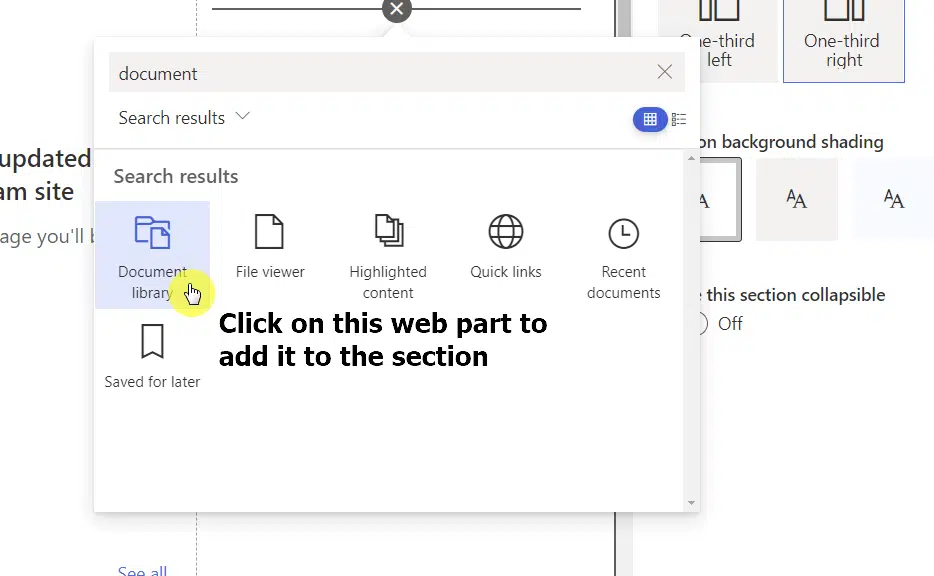
Then, configure it. Make sure it points to the site pages library. You can also select the view you prefer and some of the other options.
For example, on my site, it looks like this:
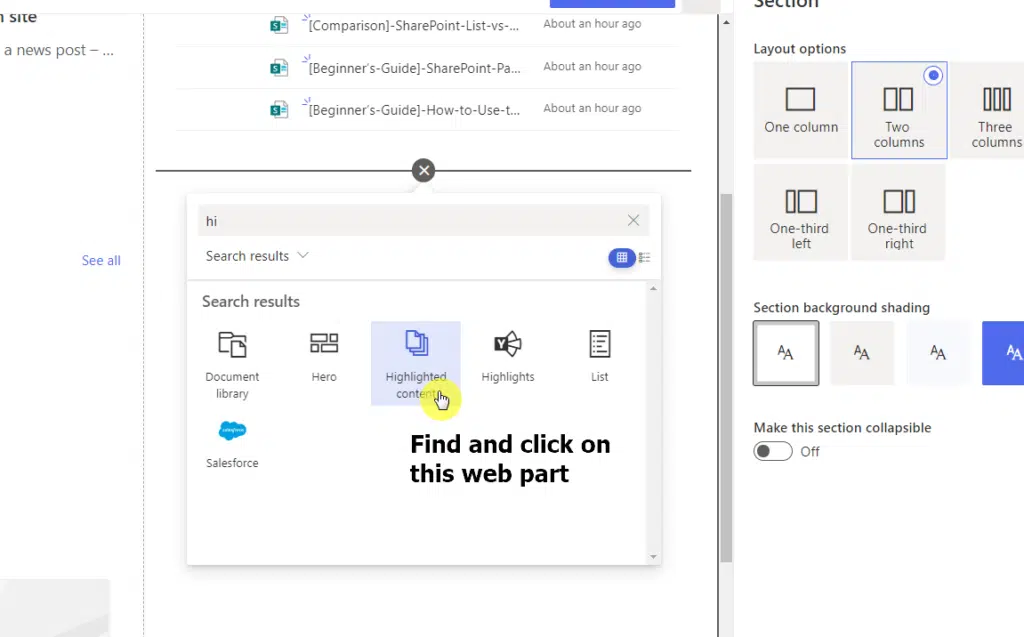
If you want to add more powerful functionality, you can also add a highlighted content web part.
What this web part does is collect and show pages with the keywords or information you provided (even search results from a keyword).
Related: Search Guide: SharePoint Search Tips and Tricks Overview
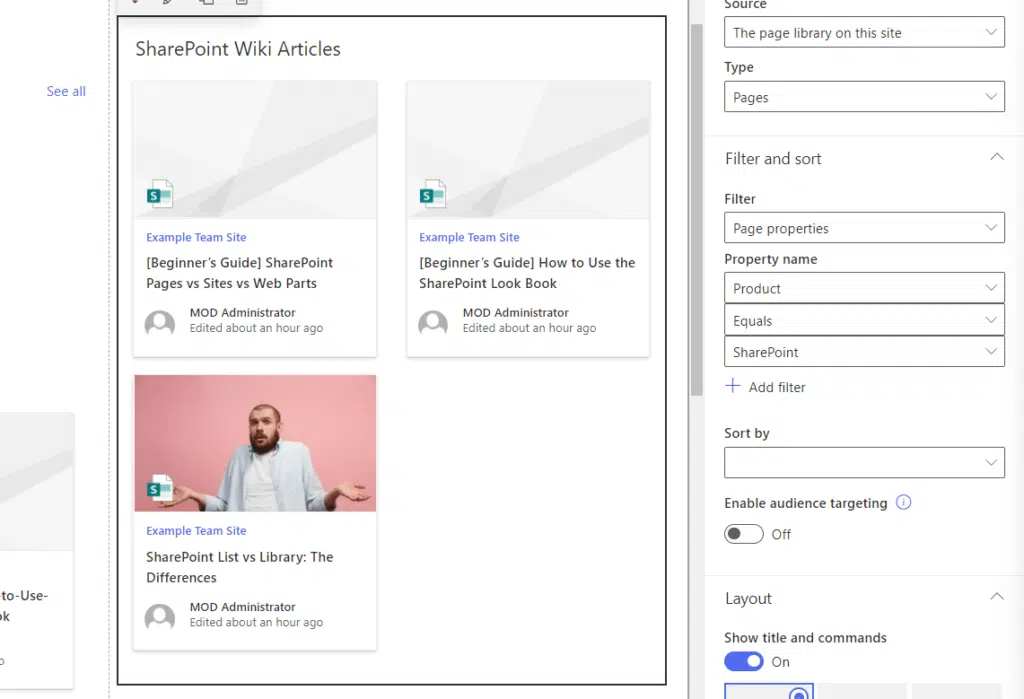
For example, what I did is show all the wiki articles from the site pages library tagged with “SharePoint” on its “Product” properties.
This is only an example. You can design your own highlighted custom based on a filter or a custom query.
After that, you’re now done.
Though of course, you can always make further customizations on the home page especially if the sole purpose of the site is for a knowledge base wiki.
As you have seen, it’s not really that complicated anymore to create your own modern SharePoint wiki knowledge base.
In fact, if you already have all the wiki pages you want to add, you can finish your own knowledge base wiki in under an hour.
Structuring it is easy because of the modern experience in SharePoint. You’re basically using the modern features available.
Do you have questions about creating a modern wiki in SharePoint? If so, drop them down in the comment section.
For inquiries and concerns, reach out to me through my contact page and I’ll get back to you as soon as possible.


I love this! We are planning to make KB WIKIs for our technical depts. Some info will be specific to each department, but some will apply to all departments. I’m looking for a way to display the pages that apply to all departments in those departments’ associated sites, but keep those pages in the hub site. Then I want to be able to mix these general pages from the hub with specific pages from a department in that department’s site. I want the reader so see content from both sources on the department’s page; not use links to open several… Read more »
Hi Erin – This would require custom development.
I am trying to build the columns in the site library, is there a way to have one column show a filtered set of choices based on another column? For example in the first column I have software and Policies as choices, and the second Column I want to have that list based off of what was entered in the first, so if software was selected, a list of software categories would show, and if policies was selected a list of policy categories would show.. kinda a category.. sub category thing.
Hi James – Yes, this is called cascading dropdowns. See here: https://www.mrsharepoint.com/cascading-dropdown-tutorial/
Bookmarking this – great write-up, thanks!
Thanks Jake!
Hi, Thank you for your tips. I will explore them. I wanted to create a wiki to handover a complex project. There are lots of groups of information and they cross linked each other. The default Sharepoint template can create a main page and sub pages. There isn’t a simple way to link articles or navigate backwards.
Hi Alfred – I have actually built a solution that does exactly what you’ve mentioned above.
Thanks a lot Ryan, I’m proposing a KB in my organization and this information was very useful to make a demo.
Alaejandro – You’re welcome. I’m glad this was helpful.
I need to create a KB for users and the tech dept. and have no Sharepoint experience and, as easy as it may seem, i struggle to understand the why’s and how to’s in this article.
Please tell me you have an idiots guide on how to do this.
Thank you so much for this!
I am unable to replicate this on our instance because when I go about creating the template, I am unable to see the Column we created in the Page Properties Web Part. Do you know how I can fix that?
Thank you. Your blog is a goldmine!
Thank you for the helpful post! I am stuck on figuring out how a user can easily search the text on the wiki-specific page (sort of like the search or find feature in Word – where it finds and highlights the word/phrase on the page). We are thinking of converting our docs to SP wikis but this feature is lacking (or I don’t know how to set it up 🙂
Thank you for this post! I was just assigned a project at my work to create an online Manual – knowledgebase. My question is do you create a Hub and do these settings on the communication site?