Last Updated on March 19, 2024
Microsoft SharePoint Online is a great tool that allows collaboration and content sharing within various departments of an organization.
One of the many capabilities of the cloud-based SharePoint tool is that it allows users to design a list form with JSON.
In the past, SharePoint list forms can only be customized with InfoPath, a tool for designing, filling, submitting, and distributing online forms.
The process is quite tedious and long to perform.
Using JSON (JavaScript Object Notation), a more human-friendly and readable data interchange format, users can now have more fun with shorter and non-boring ways of configuring their lists.
In this article, you will learn how to use JSON to customize a SharePoint list form.
Table of Contents:
A user can configure list forms by adding a custom header, footer, and body section.
The body of the form can also be customized by adding sections. These sections contain fields that are a group of forms.
The added configurations do not alter the data of the list being applied upon — it only changes the looks and feels of the form.
JSON is a great way of configuring forms as it allows for building the custom header, body sections, and footer with their attributes and elements.
Below is a step-by-step process of configuring forms in a list:
1. First, open the list or library you want to customize.
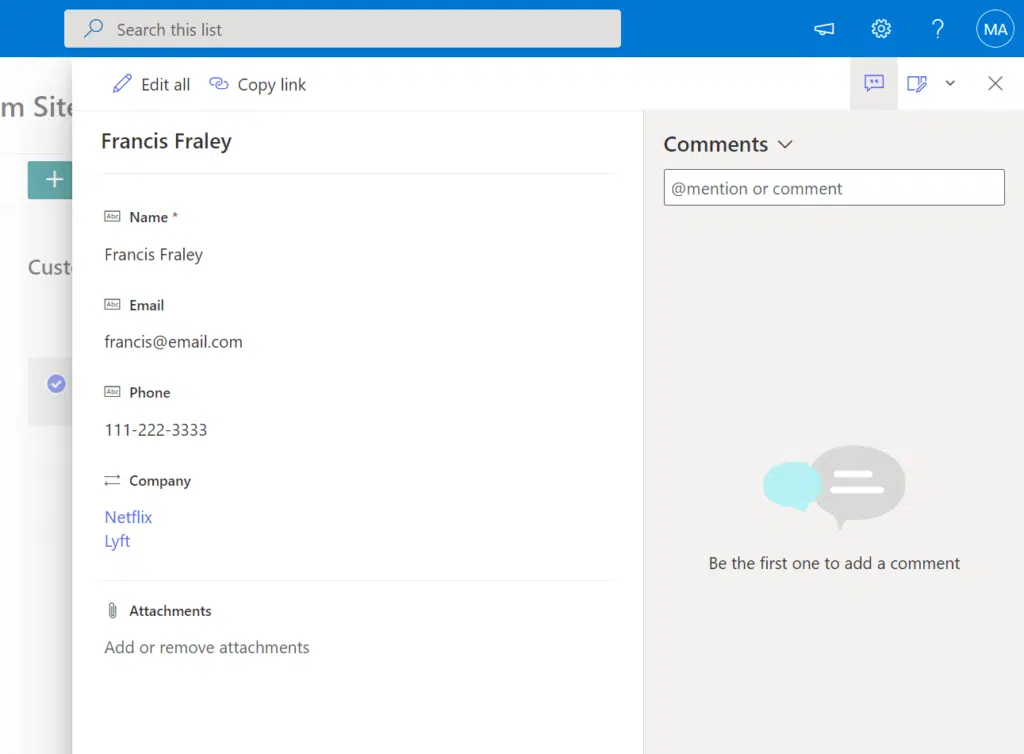
When in the list, open an item by clicking on its name or title to view its details in the display form.
Here’s an example of the default look:
2. At the top of the form, click on the dropdown button to expand the edit form settings and select the“Configure layout” option.
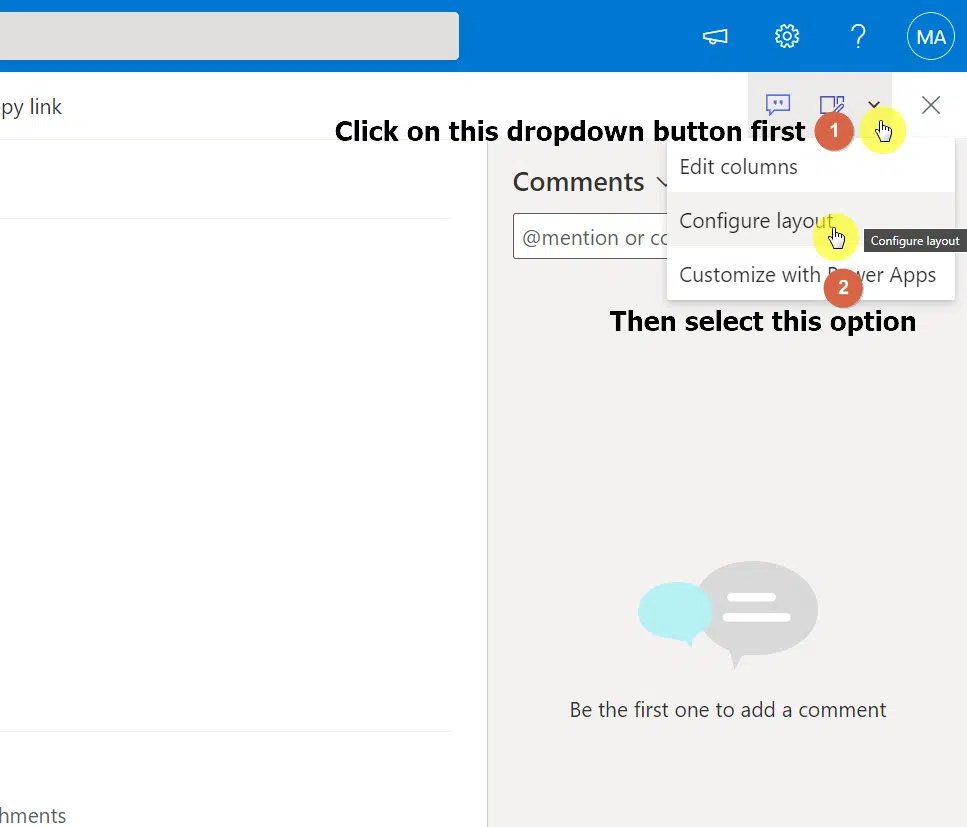
This will open a format pane where you can select what part of the form you want to customize.
To configure the Header section of the list form, follow this process:
1. From the format pane, make sure the “Header” option is selected on the first field (as by default).
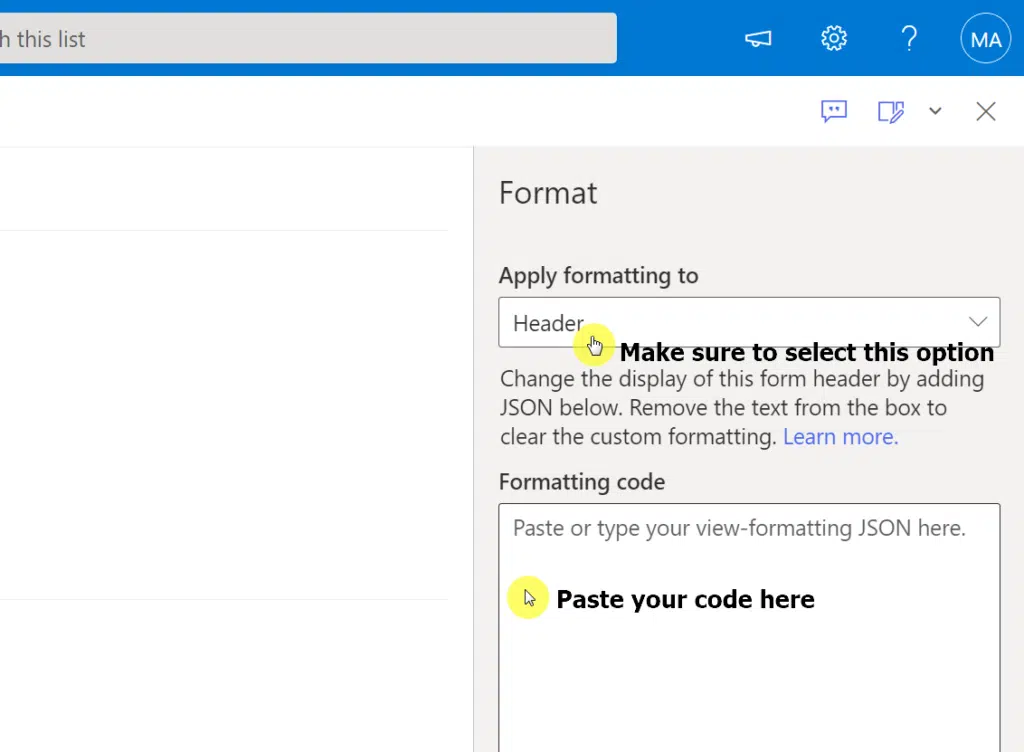
Below that, you can see a text input area where you can enter a custom header in JSON format.
2. The next step is to enter the JSON code.
Here’s a sample of a JSON code you can use:
{
    "elmType": "div",
    "attributes": {
        "class": "ms-borderColor-neutralTertiary"
    },
    "style": {
        "width": "99%",
        "border-top-width": "0px",
        "border-bottom-width": "1px",
        "border-left-width": "0px",
        "border-right-width": "0px",
        "border-style": "solid",
        "margin-bottom": "15px",
        "background-color": "blue"
    },
    "children": [
        {
            "elmType": "div",
            "style": {
                "display": "flex",
                "box-sizing": "border-box",
                "align-items": "center"
            },
            "children": [
                {
                    "elmType": "div",
                    "attributes": {
                        "iconName": "Group",
                        "class": "ms-fontSize-42 ms-fontWeight-regular ms-fontColor-themePrimary",
                        "title": "Details"
                    },
                    "style": {
                        "flex": "none",
                        "padding": "0px",
                        "padding-left": "10px",
                        "height": "40px",
                        "color": "white"
                    }
                }
            ]
        },
        {
            "elmType": "div",
            "attributes": {
                "class": "ms-fontColor-neutralSecondary ms-fontWeight-bold ms-fontSize-24"
            },
            "style": {
                "box-sizing": "border-box",
                "width": "100%",
                "text-align": "left",
                "padding": "21px 12px",
                "overflow": "hidden",
                "color": "white"
            },
            "children": [
                {
                    "elmType": "div",
                    "txtContent": "='Employee Details - ' + [$EmployeeName]"
                }
            ]
        }
    ]
}
Simply paste that code into the field.
3. Now, you can always preview the changes made to the list by clicking on the “Preview” button right after pasting the code.
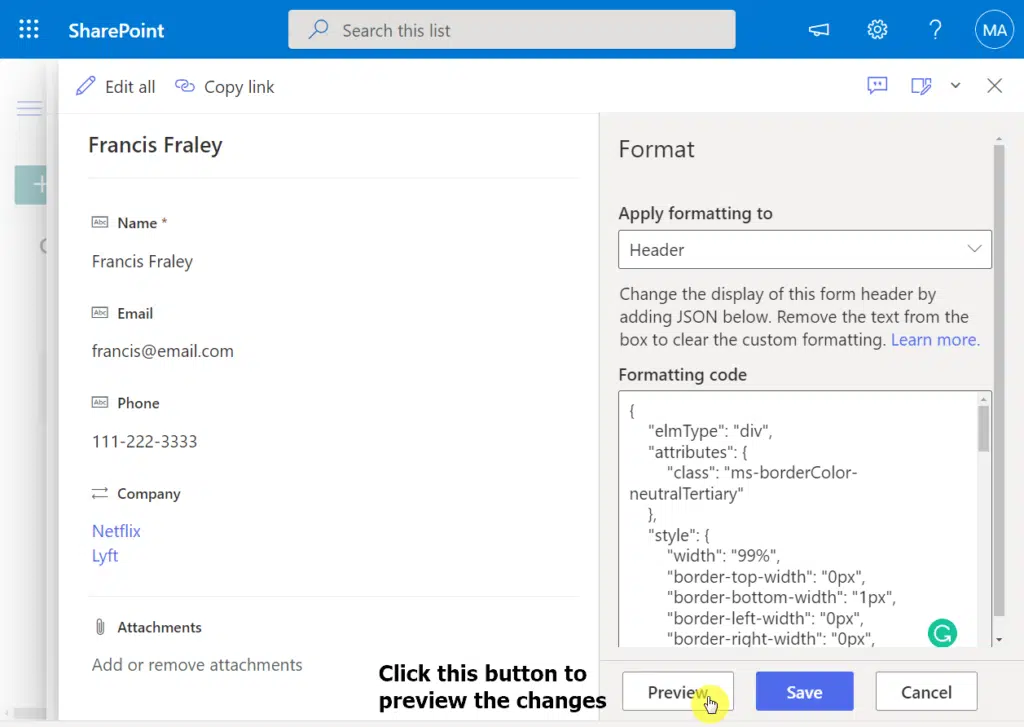
You will immediately see the difference on the list form:
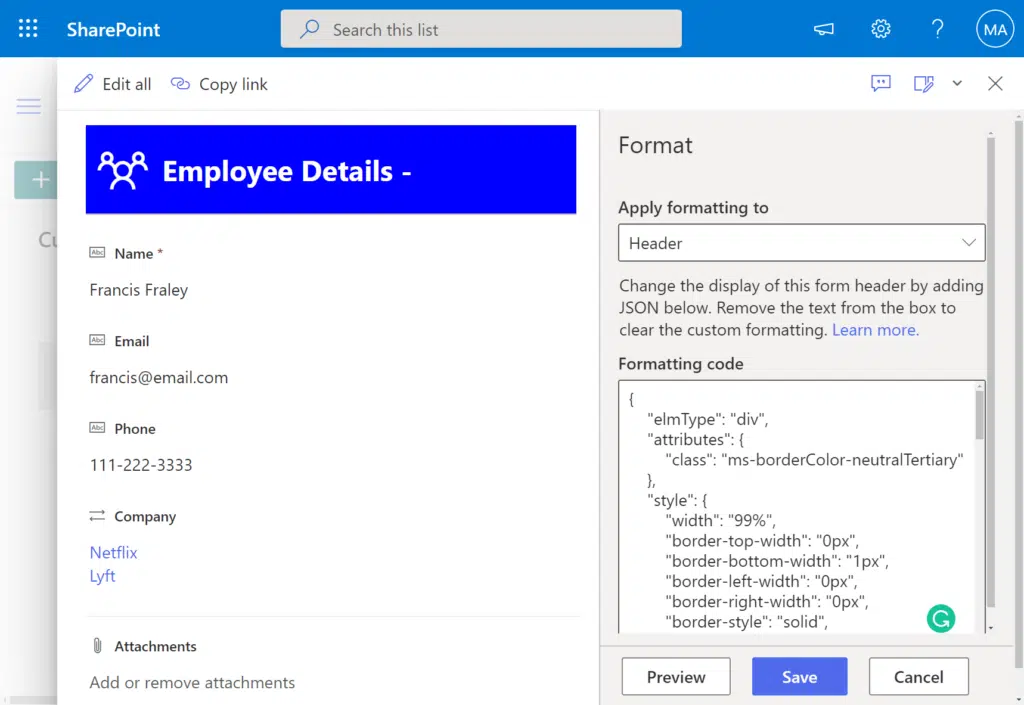
4. If you are pleased with the preview, click on the “Save” button to apply the changes to your form.
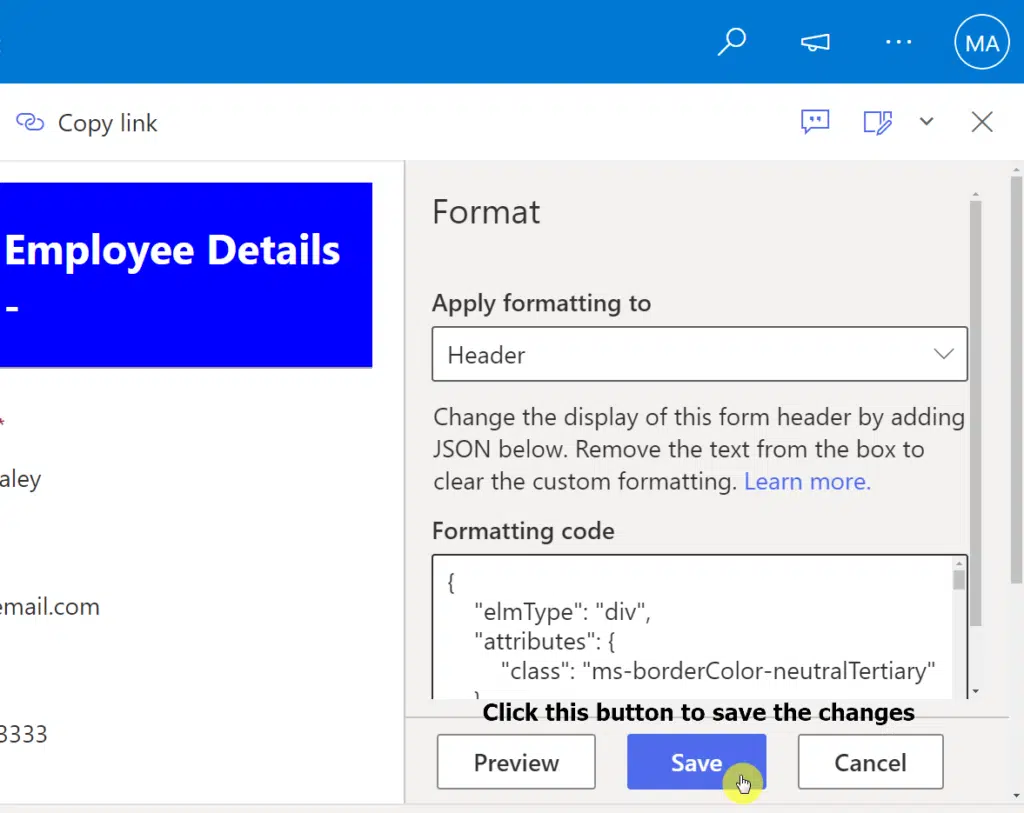
When done, close the form. When you open the list form again, you will see the same changes you saw while in preview.
To configure the body section of the list form, follow the steps below:
From the format pane, select “Body” on the “Applying formatting to” field.
Like when customizing the header, you will see a text input area where you can paste your code.
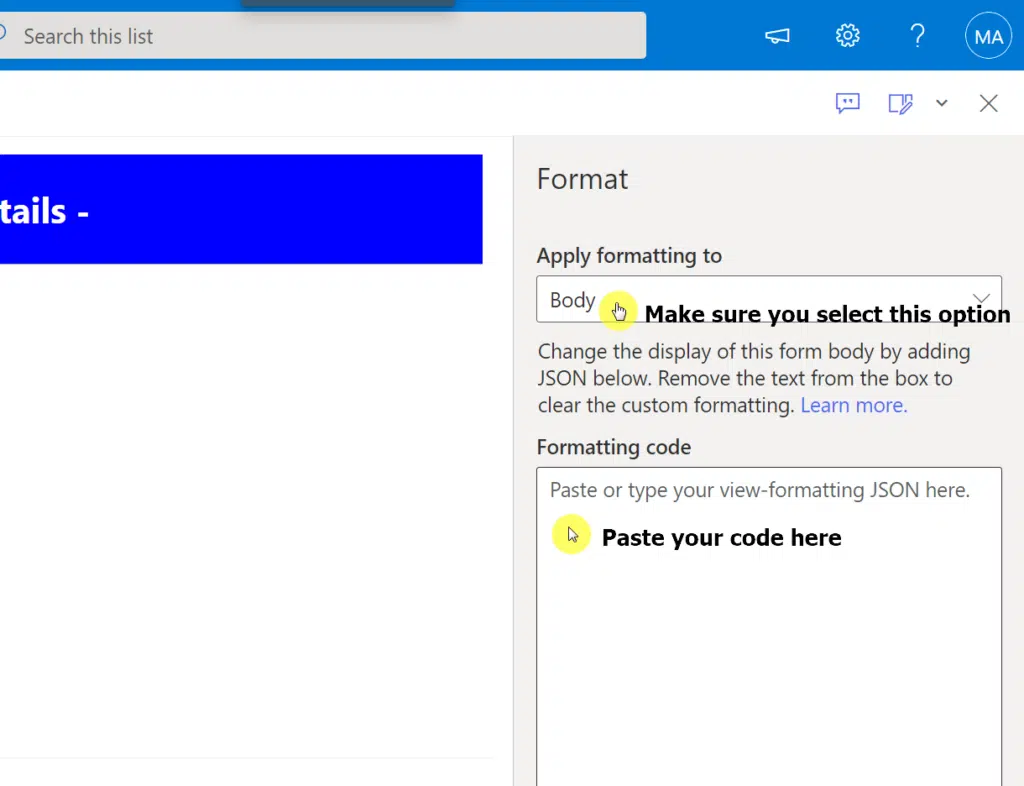
Then, enter your JSON code. You can use the code below for a demonstration:
{
    "sections": [
        {
            "displayname": "Personal Details",
            "fields": [
                "Name",
                "Company"
            ]
        },
        {
            "displayname": "Contact Details",
            "fields": [
                "Email",
                "Phone"
            ]
        }    ]
}
What the code above will do is divide the details into two parts —personal details and contact details. Feel free to customize this according to your list.
Click on the “Preview” button to see how the code will affect the body section.
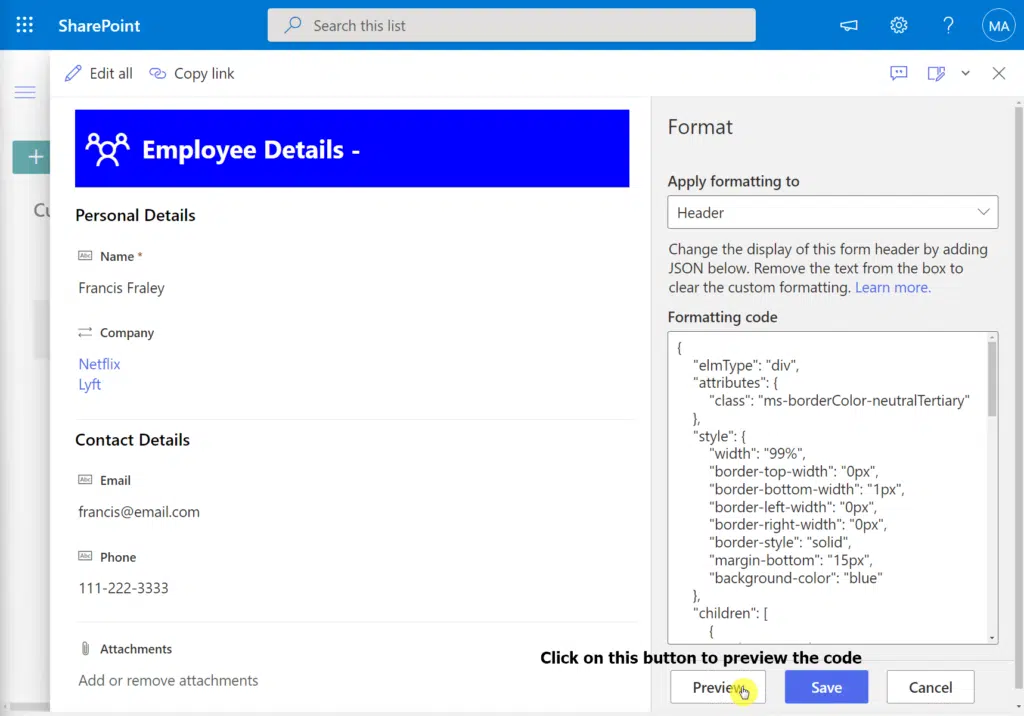
Don’t forget to click on the “Save” button once you’re done.
Note: The Body configuration is a bit different from that of the header and the footer.
This is because it allows the user to define one or many sections and also allows the user to add one or more columns into those sections.
Below are some key attributes of the body section:
- Users can define one or more sections for the body.
- Each defined section can reference one or more columns in the list.
- One column can only be referenced in one section.
- Before a column is referenced in multiple sections, the first section where it is referenced will take precedence — thus, nullifying the references in other sections.
- If you do not reference a column in any sections, it automatically gets referenced in the last section.
- Unless specified, any added new columns will be referenced in the last section.
- If a user configures the body with one or more sections, the list form automatically switches from a single-column to a multi-column layout.
To configure the footer section of the list form, follow this process:
From the format pane, make sure the “Footer” is selected on the “Applying formatting to” field.
Like with the sections above, you will see a text input area where you can paste your code.
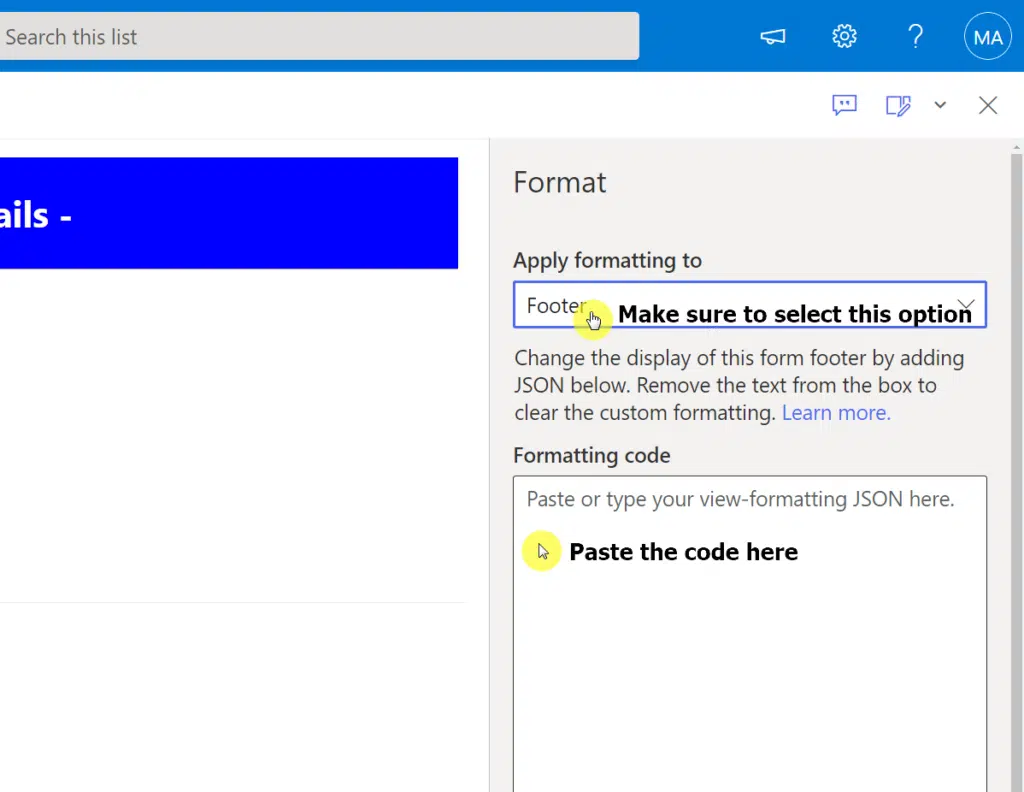
Then, enter your JSON code. You can try out the code below to demonstrate:
{
    "elmType": "div",
    "style": {
        "width": "100%",
        "text-align": "left",
        "overflow": "hidden",
        "border-top-width": "1px"
    },
    "children": [
        {
            "elmType": "div",
            "style": {
                "height": "15px",
                "width": "100%",
                "color": "#fff",
                "font-size": "13px",
                "border-top": "5px solid #eee",
                "background-color": "orange",
                "padding": "10px"
            },
            "children": [
                {
                    "elmType": "a",
                    "txtContent": "© MrSharePoint 2021"
                }
            ]
        }
    ]
}
Click on the “Preview” button to see how the code will affect the body section.
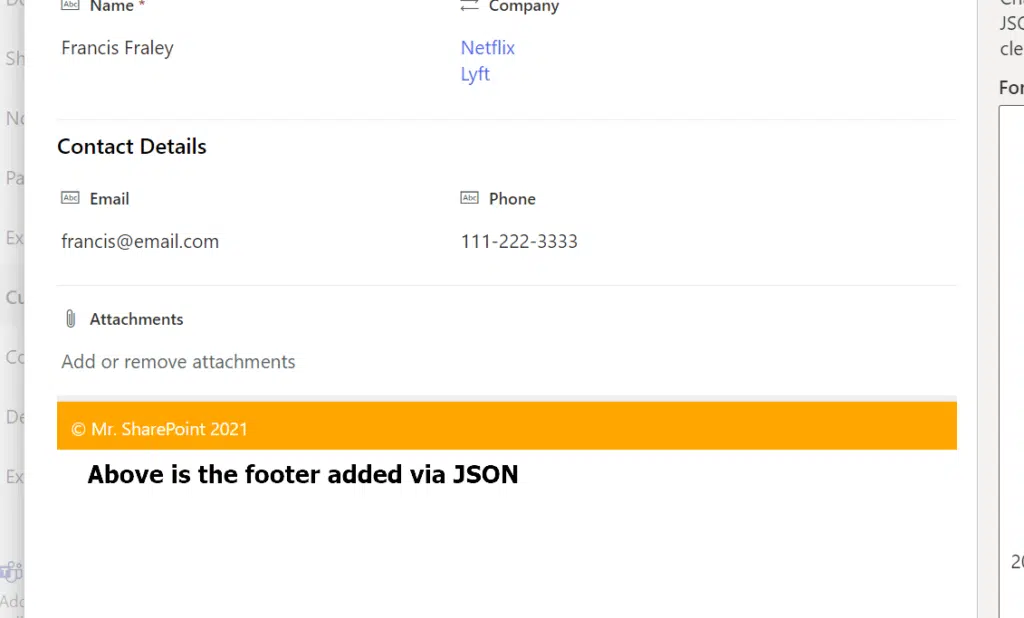
Don’t forget to click on the “Save” button once you’re done.
Sign up for exclusive updates, tips, and strategies
Although the JSON format is an efficient method for customizing list forms, it comes with a few drawbacks.
Some of which include:
- Wider look (due to the increase in form width)
- The inability to manipulate fields (e.g., show/hide visibility option)
- Apply styles to the body section.
Apart from these few limitations, JSON is an all-around efficient tool.
If you feel confused, feel free to comment with your questions below. For inquiries, reach out to me directly through my contact page and I’ll get back to you asap.


Great information! Thank you.
When I click save for the body formatting, it doesn’t actually save it. I’ve tried many times.
I just tested it and it worked just fine. Feel free to contact me and maybe I can quickly assist.
Thanks! This was very helpful!
I am working on trying to create a photo voting platform, I would love to use the Card View, however I keep running into a snag that rating aka liking is not available in the gallery view. Would you have any idea how to get liking to work in the Card View? Thanks_ Lori
Grate introduction! THANKS!
Is it also possible to separate the form into tabs, for switching between them and have a good overview?
Ryan, Great post. But I am finding issues when pasting your sample code (I did update the icon and Title only. It seems a majority of the JSON code is not valid? This is also a brand new list, brand new fields, and no existing data. Any ideas? { “elmType”: “div”, “attributes”: { “class”: “ms-borderColor-neutralTertiary” }, “style”: { “width”: “99%”, “border-top-width”: “0px”, “border-bottom-width”: “1px”, “border-left-width”: “0px”, “border-right-width”: “0px”, “border-style”: “solid”, “margin-bottom”: “15px”, “background-color”: “blue” }, “children”: [ { “elmType”: “div”, “style”: { “display”: “flex”, “box-sizing”: “border-box”, “align-items”: “center” }, “children”: [ { “elmType”: “div”, “attributes”: { “iconName”: “Edit”, “class”: “ms-fontSize-42… Read more »
Never mind – problem solved. I had added an invalid character in the title and the JSON was correct. Sorry for the interuption.
Thanks for the update. Glad you were able to get it to work.
I’m having trouble displaying Created By and Modified By on my JSON formatted body. Is there something special about those fields?
I think because they are people look ups, it’s a different type of object. I think you need: “txtContent”: “@currentField.title”
😍
Oh this is fantastic! I’ve been wondering for a while if I can group fields into sections. I think you have answered this question already… but is it possible to use JSON to make each section ‘collapsible’ so that they can be collapsed or expanded? Not specific fields being hidden or shown, but the entire section?
This is not yet possible via JSON. You could use SPFx to do this though.
How do you add a static help text to the header? Meaning, instructions to how to use the form
You could simply add a new div to the code I wrote above. If you need help, send me a message via the contact form.
Thanks for your comprehensive explanation on formatting forms.
Problem with Microsoft’s default way, I have a final section for comments and want the comments field to span the three columns SPO creates for me. It’s useless to me if I can’t do that for the one field. There’d be a fair amount of comments and you wouldn’t be able to read it.
This is definitely a limitation. If I find a solution, I’ll write back under this comment.
Any chance there was ever a solution found to this issue?
Thanks
Was wondering the same thing here.
Is it possible to modify sections in “Body” , e.g. to make the lines bold or to color the sections?
Hello, I am trying to update MS Lists to move a question to the right position in MS Form. I do not see the configuration layout or the icon to select the edit button. I need to use JSON. Each time I add a question and move it to the right position, alladded questions are at the bottom of the form. How do I get the configuration layout option? I have had it before but cannot remember. Thanks
I like the simple header info – but how could I tie in the Status Colour (I have a Status Field) to be the same colour as the background of the header instead of blue?
Just dabbling with some simple JSON Stuff as I learn to pretty up my SharePoint Lists 😉
Great information!
I have a header with multiple text lines and “div” sections, and with an icon. How can I vertically align the icon to remain at the top of the section independent of the browser size? Currently I am running a specific value with a name-value using “height” and the location of the icon changes alignment vertically with form size.
Hi, great explanation and guidance! We have been applying some JSON to lists with some working ok, but with a couple of lists we are encountering an issue. When we click on a record the JSON formatting applies but no data is displayed on the page. When we perform a ctrl F5 this resolves the issue whilst staying in the browser session. You only have to do the ctrl f5 once within the session and then all records display formatting and data until the browser session is closed. This is consistent across different browsers so leads me to think that… Read more »
Hi. Can you help me? I can’t hide and can’t move the down of form this field: Field=_ComplianceTagUserId
Thanks for the post! I still reference it years later 😊
Have you notice any issues trying to use hyperlink columns in the header/footer? Everywhere else in the list formatting, I can just use “href”: “[$LinkColumnName]” and it works fine. But when trying to do this in the Header or Footer, it uses the link AND the description. (Example: if the link is “https://google.com” and the description is “Google” the link in the header/footer is “https://google.com, Google”
Pulling my hair out LOL