

Last Updated on April 30, 2024
Metadata is important in keeping your files and content organized and easily searchable.
However, if you’re new to SharePoint, you may have the tendency to skip it all out — especially if you’re the type to use drag-and-drop when copying files to a list or library.
In this article, you will learn the whats and whys of metadata in SharePoint and how to use metadata on your site.
Let’s get started.
Table of Contents:
Metadata is simply data attached to any file on SharePoint, whether it’s an image, document, or spreadsheet.
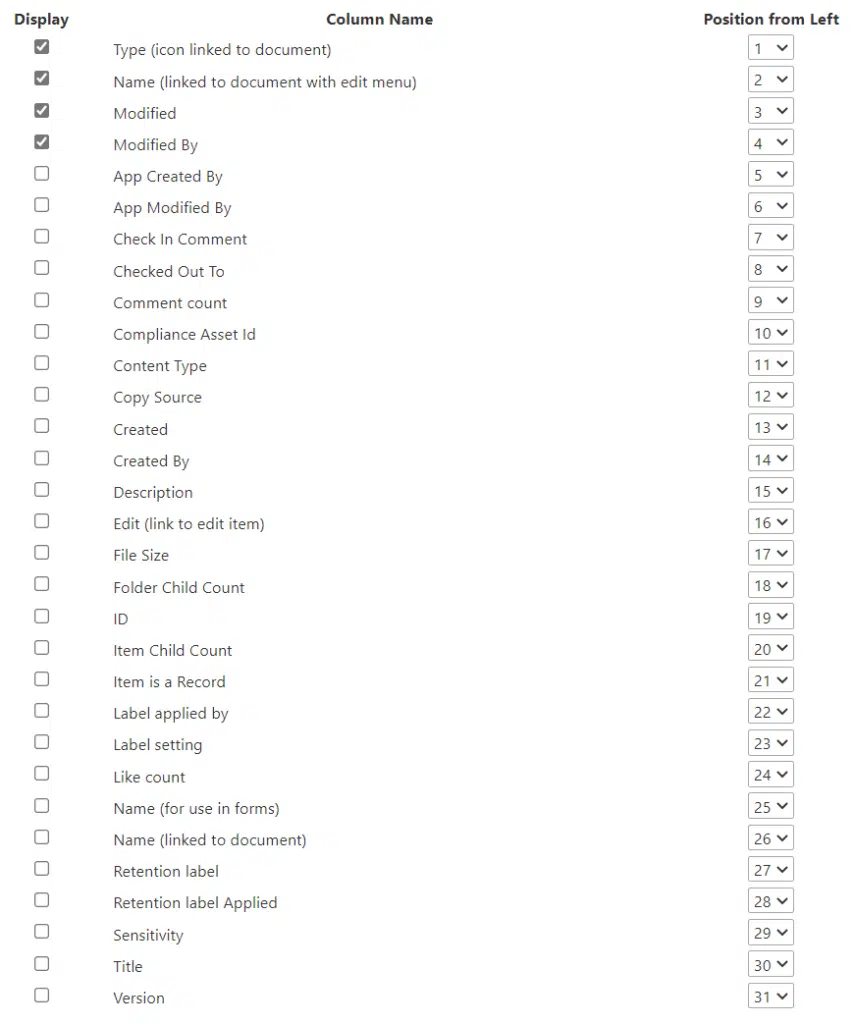
In SharePoint, there are lots of default or standard metadata fields. You can see all of them when you create a new view.
At the same time, all the files uploaded to SharePoint will automatically populate some of the metadata files. In addition, you can also create your own and add custom metadata fields — which you will learn more about later on.
Sign up for exclusive updates, tips, and strategies
In a nutshell, you can use metadata to your advantage in organizing your files and content.
For instance, you can add the year from when you apply a date stamp for easy sorting and retrieval.
In addition, you can add custom metadata for more specific usage, such as adding the keywords you want people to search on when finding a particular file you uploaded.
Hence, you can say that metadata in SharePoint is the key to easy content management.
To use metadata in SharePoint — aside from the standard or default ones — you need to add a column.
Now, in relation to metadata and making navigation easier, there are two types of columns you must be aware of:
- Site-level columns
- List or library-level columns
List or library columns are the ones usually used since it’s easier to make (the usual way of creating a column). However, columns created at this level can only be shown, edited, or accessed, within the list or library it is created on.
On the other hand, site columns can be applied to all lists and libraries on your site. Meaning, if you have related lists or libraries, you don’t have to create metadata columns and define metadata again.
Before you create a new column, especially on the site level, check first the default site-level columns (different from the standard columns shown earlier) since it’s likely that what you need is already there.
First off, you must know that site-level columns are hierarchical in nature. If you create a site column, it can be used across different lists and libraries. If you create a site column on a top-level site, it will be available on all subsites.
Now, here are the steps to create a site-level column:
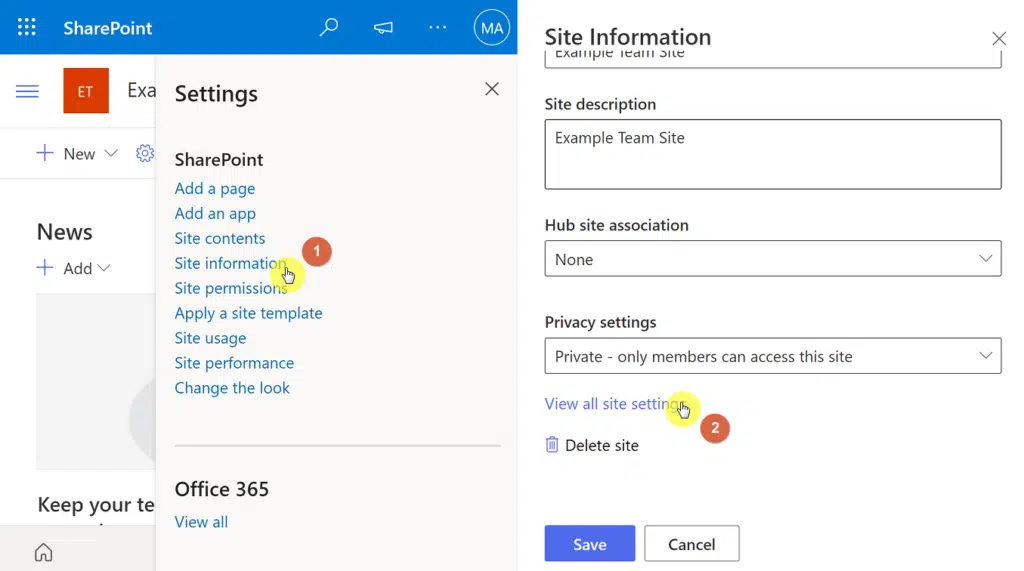
1. Go to the home page of the site where you want to create a site-level column (and later use it for housing specific metadata)
2. Click the settings (gear) icon on the upper-right corner of the top bar.
If there is no “Site settings” option in the dropdown, click “Site information” first, and on the bottom part, click “View all site settings“.
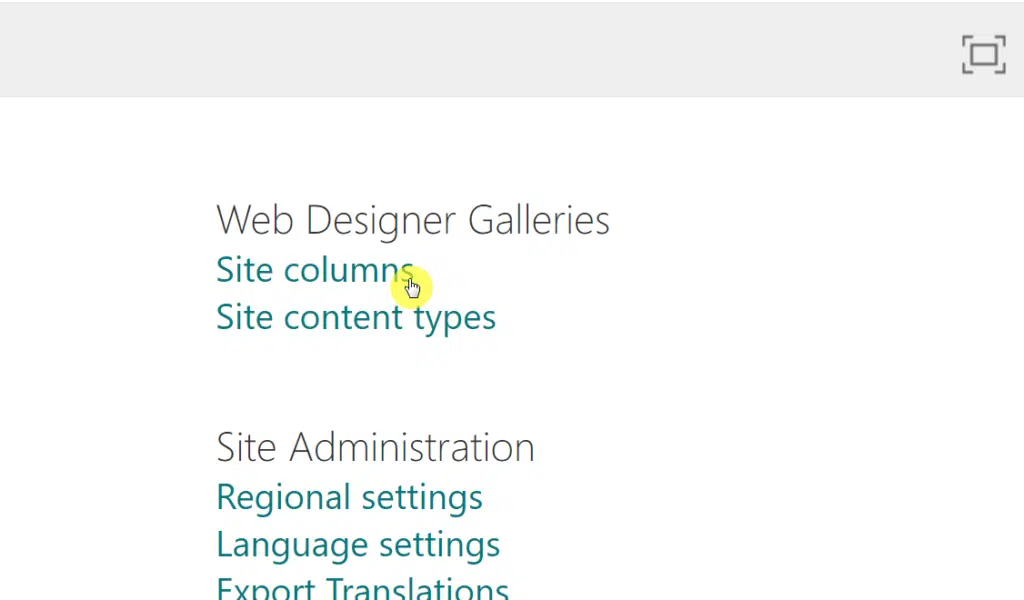
3. Under the “Web Designer Galleries”, click “Site columns“.
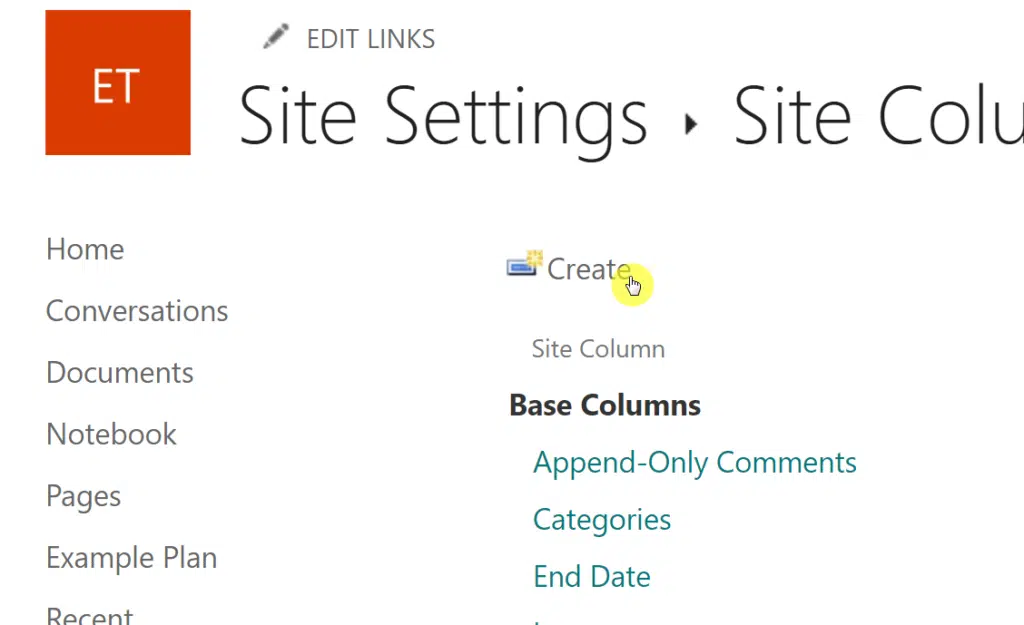
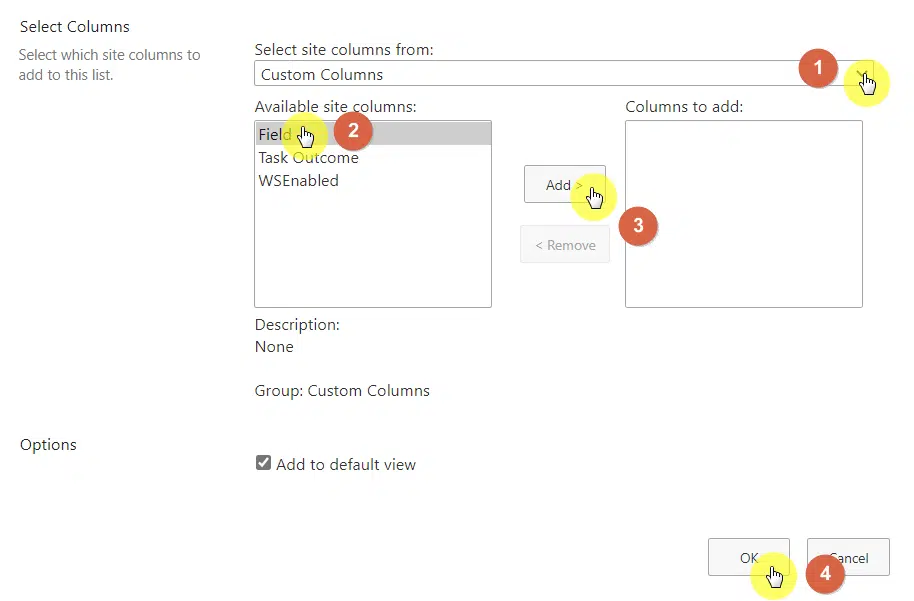
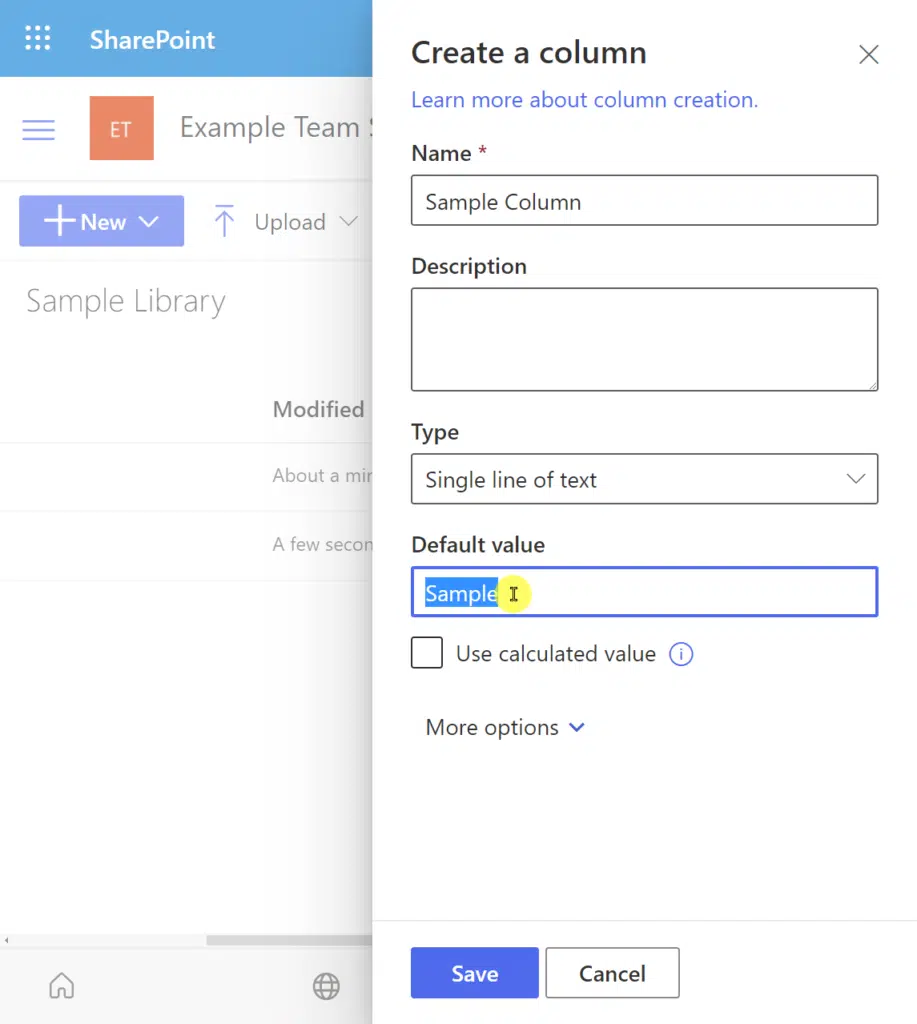
4. The next step is to actually create a new column. Click the “Create” button at the top of the page.
5. On the next page, provide the details of the new column.
For example, let’s name the column “Field”. I wanted users to easily choose from various options available, so I will be selecting “Choice” from the information type.
On the other hand, if you want users to supply their own information, you can select “Single line of text”.
For the group, you can leave it as “Custom Columns”. But if you want, you can also create a new group.
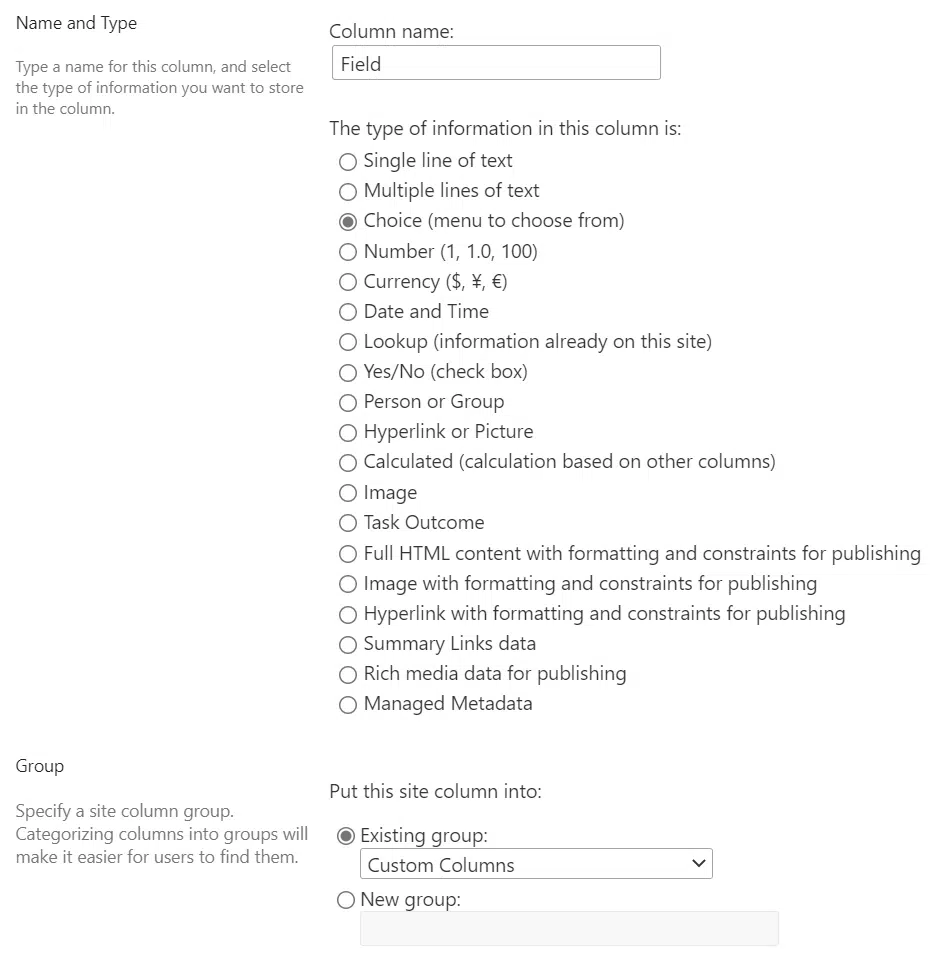
Then, you can either require that this column must be filled out or not. Meaning, for every new upload, SharePoint will ask the user to supply this column with information.
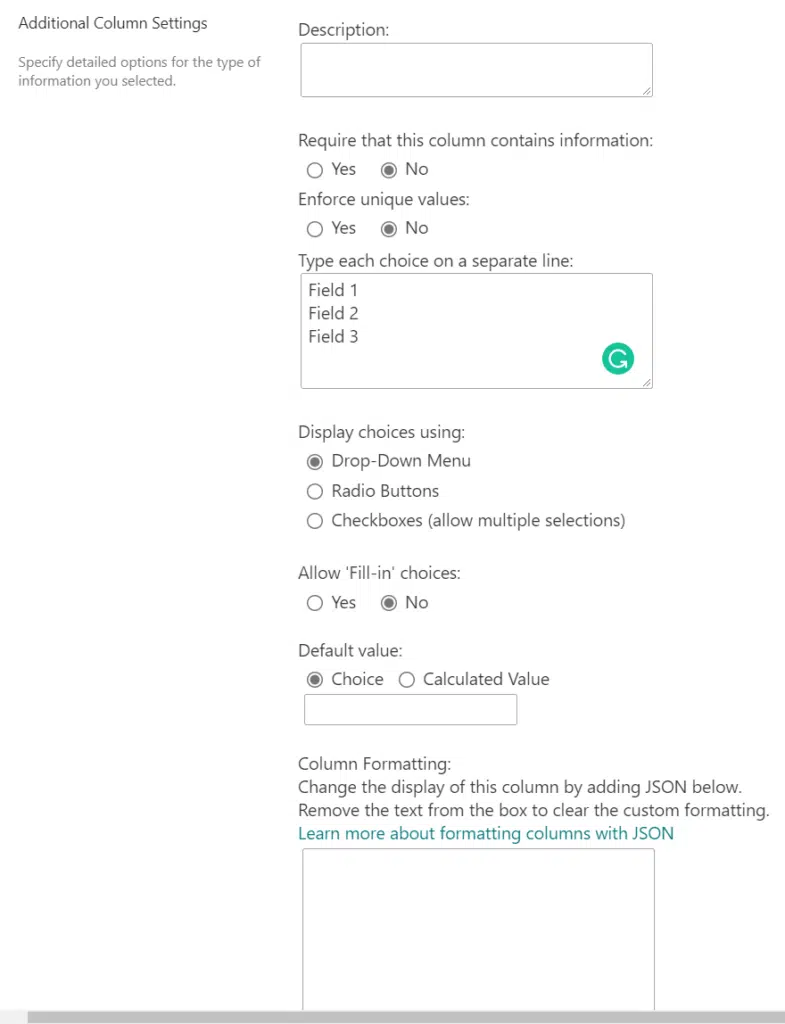
Some of the options after this depend on the type of information to show you selected.
In this case, I selected “Choice”, so I have to type out the choices as well as the display type of the choices.
Once you have supplied the information needed, simply click on the “OK” button at the bottom of the page.
After creating a site-level column, you then have to assign it to a list or library to use it.
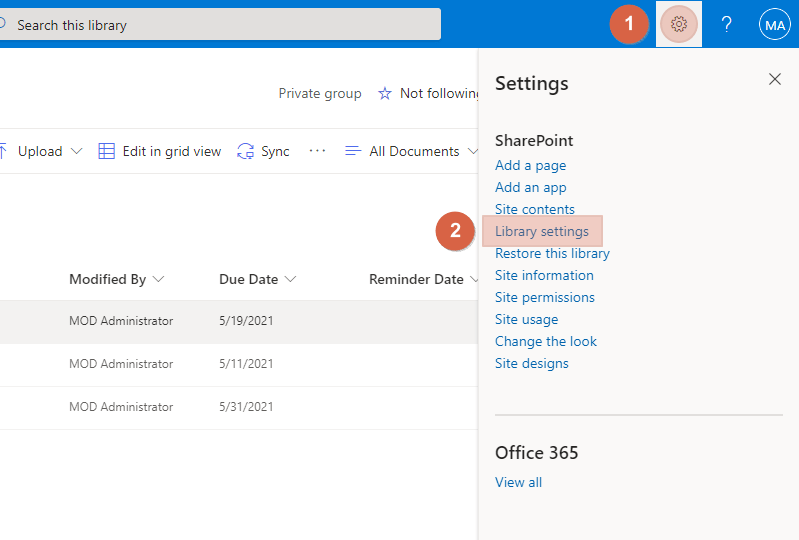
6. Go to the list or library you want to apply the new column.
7. Click the gear icon and choose “Library Settings” or “List Settings” from the dropdown.
8. On the library setting, scroll down and click “Add from existing site columns” near the bottom of the page.
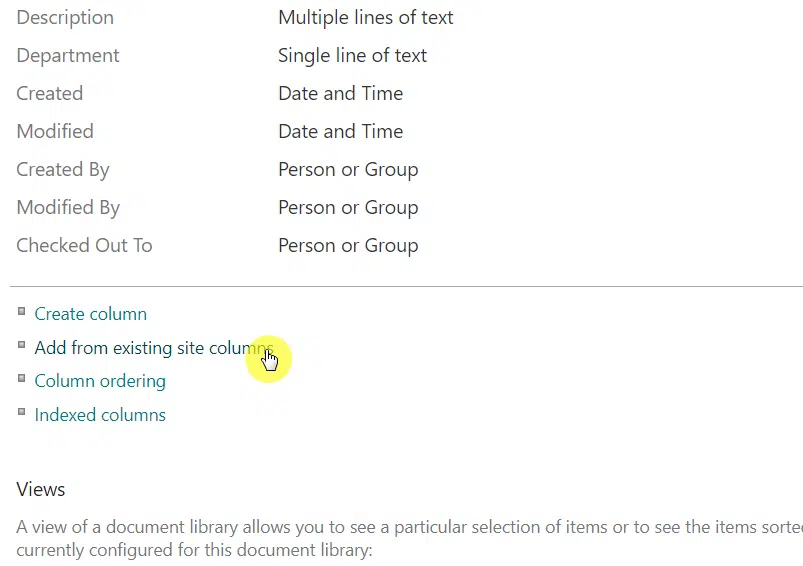
9. On the next page, simply select the site column group (if you left it at default, it’s probably on the “Custom Columns” group). Then, select the column name and click the “Add” button.
Don’t forget to click the “OK” button once you’re done.
Note that if you leave everything as it is, then the new column will be shown on the default view of the list or library.
Now that you know how to create a new site-level column and assign it to a site, it’s time to learn how to add metadata to your files. We didn’t discuss how to add a list or library-level column since it’s simply adding a column on the list or library.
Here are the steps:
1. Right-click on a file on the library or list.
2. Hover your mouse over the “More” option and select “Properties“.
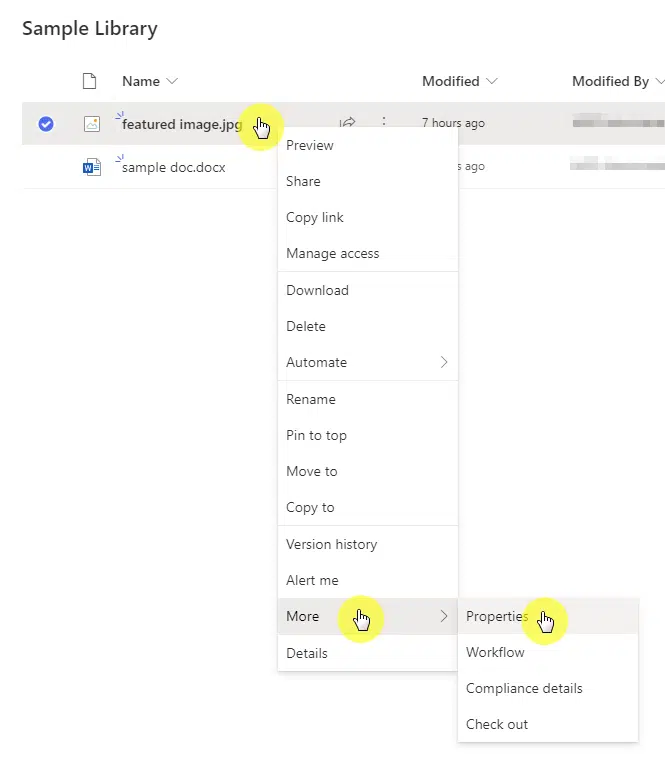
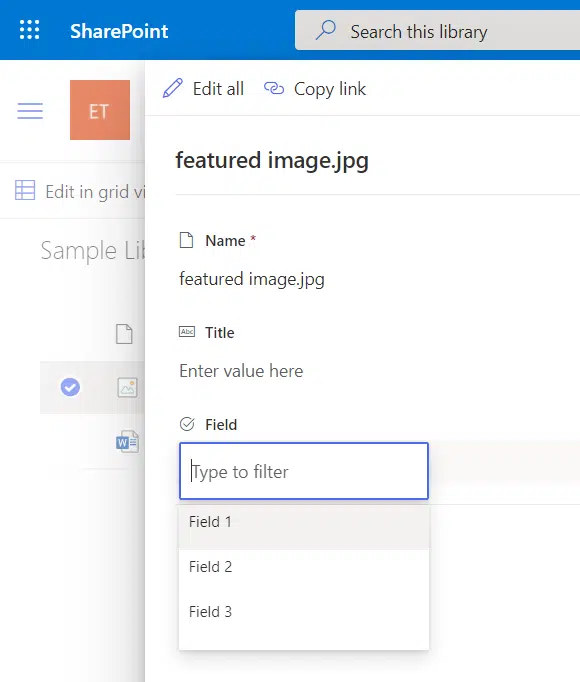
A side window will open where you can edit the metadata of the file you clicked.
3. Supply the information on the metadata field.
4. To edit files in bulk, click the “Edit in grid view” icon on the command bar.
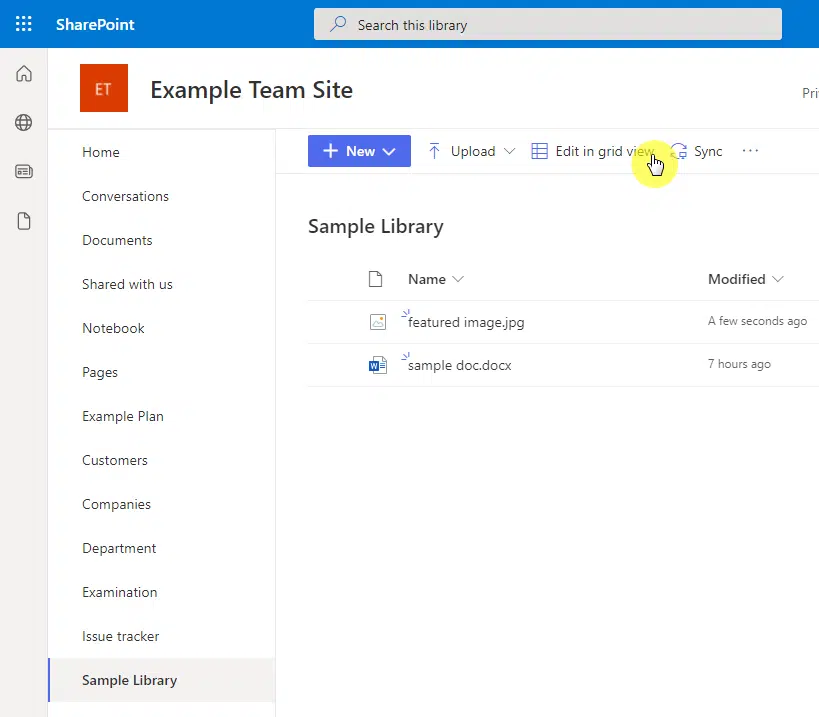
5. Now, you can edit all the metadata columns of all your files like a spreadsheet.
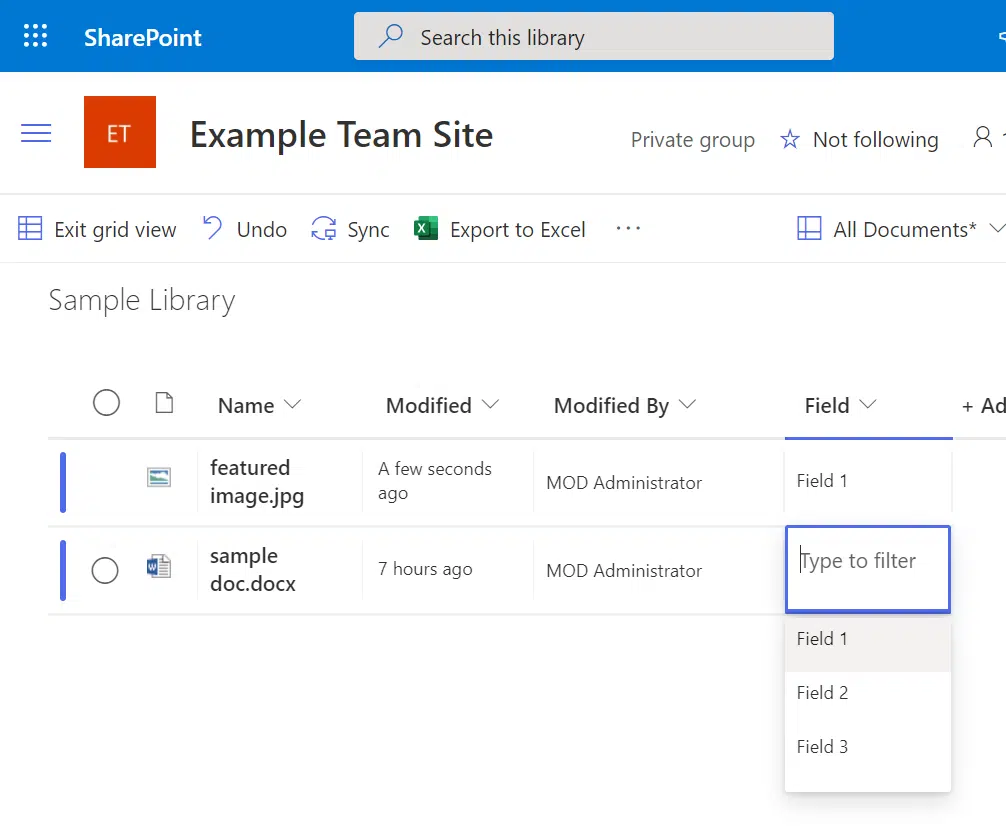
If you want to exit the grid view, simply click the “Exit grid view” found on the command bar.
How to create a metadata column with a default value
What if you have a folder, a list, or a library where all the files or documents in it must have the same metadata?
It’s a common question many SharePoint users struggle with. If you rely only on the folder, that means you must manually navigate to the folder and have its contents shown to you.
Meanwhile, if all the files or documents on that folder have some sort of metadata, you can simply search for all of them and even make a finer search if your files or documents have unique metadata.
But how do you create a default column value? Fortunately, it’s easier than it seems.
When creating a list or library-level column, simply indicate the default value before you save the column.
You can also indicate a default value on your site-level columns assigned to the list or library.
Simply head over to the list or library settings (same steps above — gear icon, list/library settings).
Then, click the “Column default value settings“.
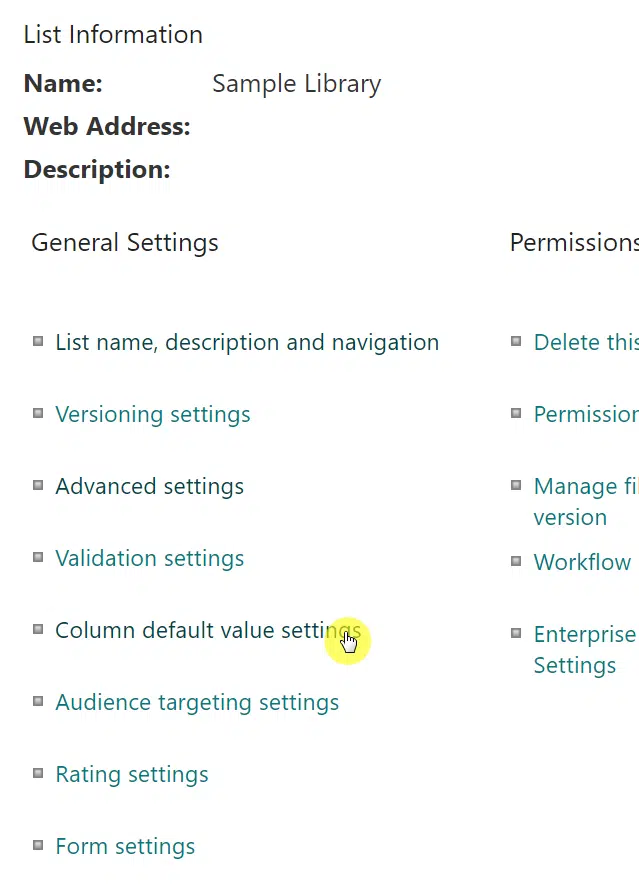
On the next page, all added columns (including list/library-level ones) added will be shown here.
To change the default column value, select a column and indicate the default value.
Click “OK” to save the changes.

After adding a new file, both the site-level column and the library-level column is showing the default value.

Metadata plays an important role in how you interact with your SharePoint site.
Whether you are creating a site or list/library-level column, you must always indicate the default value before saving it to avoid confusion if you want all files within that folder/list/library to share the same metadata.
If you’re assigning a site-level column, you can also choose whether you want this information shown throughout your entire SharePoint hierarchy (default) or only on one specific location where there is already another field for custom metadata values assigned.
Finally, once you have created metadata fields and added them to either folders, lists, libraries, or even your entire company’s SharePoint structure as mentioned above — take advantage of these fields by using them.
Do you have any questions related to using metadata in SharePoint?
If so, don’t hesitate to drop your questions or concerns in the comment section below. You can also reach me directly through my contact page.


Hi Ryan, I have a question I’m hoping you might be familiar with. I have created my own custom columns, use “Choice” and have added my own list of options. I have process documents in this library, and my columns are used for the process category names and business team names which allow me to create a view to “Group by Process” or “Group by Team”. The problem I keep having is as I’ve updated some of my Process categories and go back into the column settings to update my meta-data, I then have to edit the meta-data previously chosen… Read more »
Hi Mical,
Instead of using choice columns, I would recommend using lookup columns. I wrote a blog about it here: https://www.mrsharepoint.com/sharepoint-lookup-column .
great, I will check it out. thank you!
Hi Ryan, Thank you for this very helpful explainer. I’m new to SharePoint, and this has helped loads. I have a library with lots of documents that students are working on. I want them to be able to mark documents as ‘done’ or ‘in progress’ in the library. I thought I could do this with a ‘choice’ column in the metadata, but I don’t see any way for users to quickly change the metadata in a column with a drop-down menu. Is this possible to do, or do I need to go and learn about workflows? I just want students… Read more »
Hi Anya,
What you’re looking to achieve is possible but the document’s properties would need to be edited first on the front end. A choice column does provide a dropdown when on the edit form or via the details pane (see attachment).