
Last Updated on October 25, 2024
Not sure how to install Microsoft Entra Connect?
In this guide, I will walk you through installing Microsoft Entra Connect (previously Azure AD Connect).
Let’s get started.
Table of Contents:
What is Microsoft Entra Connect?
Previously known as Azure AD Connect, this is used to synchronize on-premises directories with Microsoft Entra ID.
This allows organizations to provide a unified login experience for users and bridge on-premises and cloud environments.
Microsoft Entra Connect offers several core benefits:
- Sync user identities, passwords, and other directory attributes across environments
- Supports various authentication methods
- Enables Single Sign-On (SSO) for users
Microsoft Entra Connect also helps with compliance, as IT administrators can control and manage the identity data flow.
The tool also provides scheduling options, so syncs can be automated while making sure data stays consistent.
With Microsoft Entra Connect, organizations can achieve a seamless and secure experience across all their digital resources.
👉 Related: SharePoint Group vs Active Directory Group (Comparison)
Sign up for exclusive updates, tips, and strategies
Prerequisites for Installing Microsoft Entra Connect
There are a few technical and security requirements to keep in mind.
Here’s what to know:
- Windows Server 2016 or higher
- At least 4 GB of RAM and a quad-core processor (recommended)
- An account with Enterprise Admin rights in your Active Directory
- An Entra ID Global Administrator account
- Ensure ports 443 (HTTPS) and 80 (HTTP) are open for outbound traffic
Additionally, avoid installing Entra Connect on domain controllers to maintain performance and security.
The recommendation is to use a dedicated server.
You might also have to disable multi-factor authentication temporarily for the admin accounts during setup if needed.
Once everything is prepared, you’re ready to install Microsoft Entra Connect.
Installing Microsoft Entra Connect (Express)
Installing Microsoft Entra Connect is straightforward, but it requires a few essential steps.
You can follow the steps here:
Step 1: Download the Installation Package
To get started with Microsoft Entra Connect, the first step is to download the installation package from Microsoft’s official site.
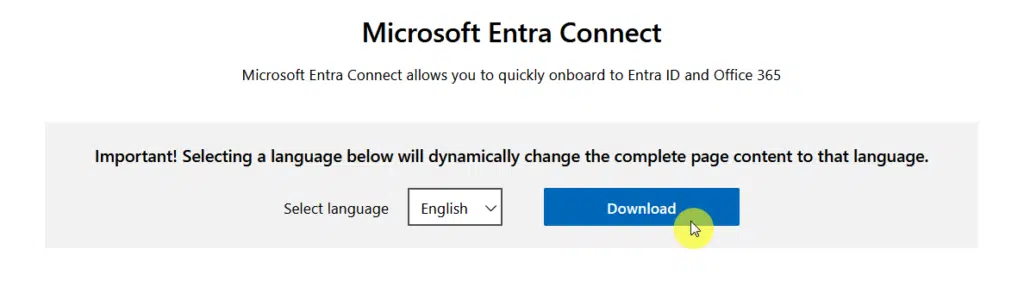
Just click on the download button and choose where to save the file locally.
Open the file.
If you encountered an error that looks like this:

That means the machine you’re using doesn’t have Windows Server installed.
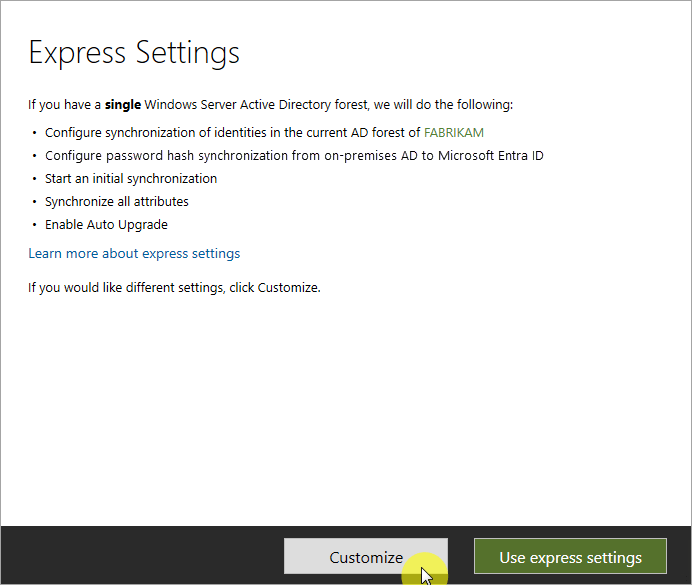
Step 2: Install Microsoft Entra Connect
For installation, the most common method used is the “express settings”, which you can see right after the wizard runs.
The other one is “customized path”, which has more options, but is usually used when you have no enterprise admin access.
Anyway, after agreeing to the licensing terms, this is what you will see:

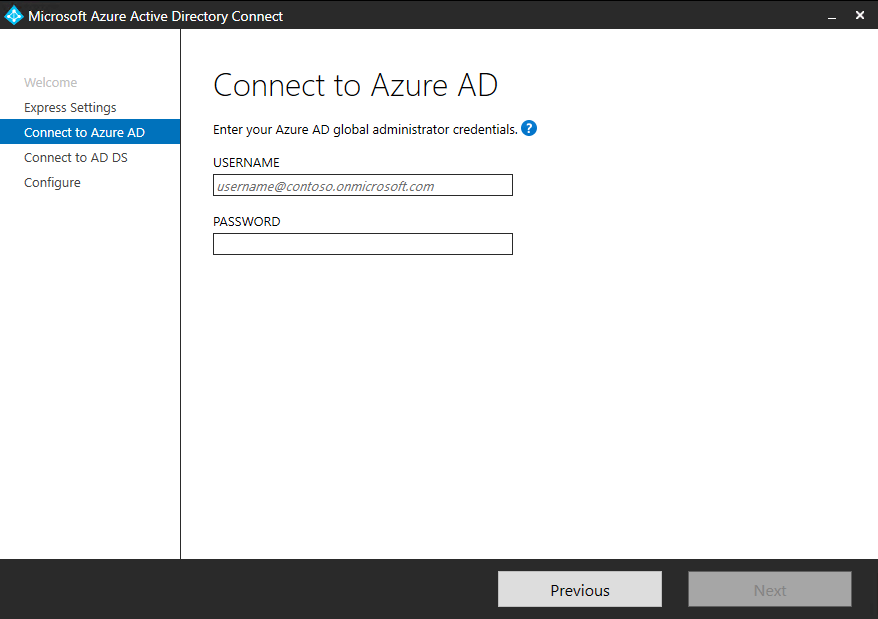
The next part here is to simply sign in to Microsoft Entra ID (Azure AD).
You can use here the username and password of your identity administrator account.
Like this:
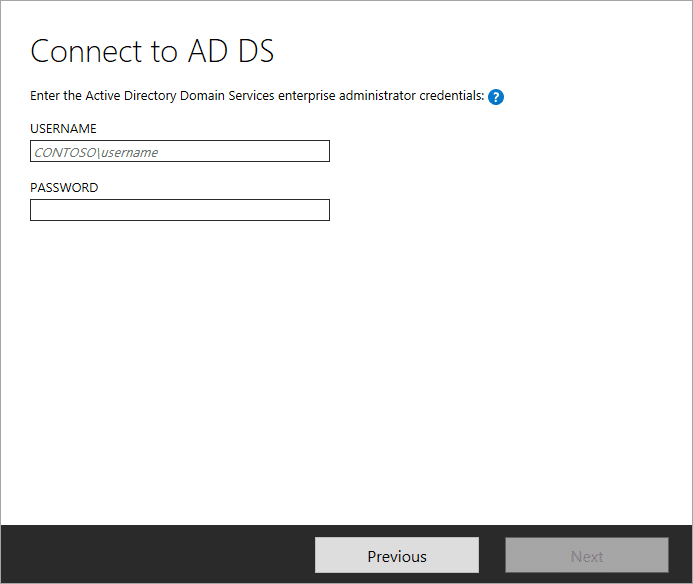
In case there’s an error, you may have to check your connectivity settings.
But anyway, in the “Connect to AD DS” portion, use the username and password of your enterprise admin account.
For the domain, you can use NetBIOS or FQDN format like:
MRSHAREPOINT\administratormrsharepoint.com\administrator
Nice! 🙂
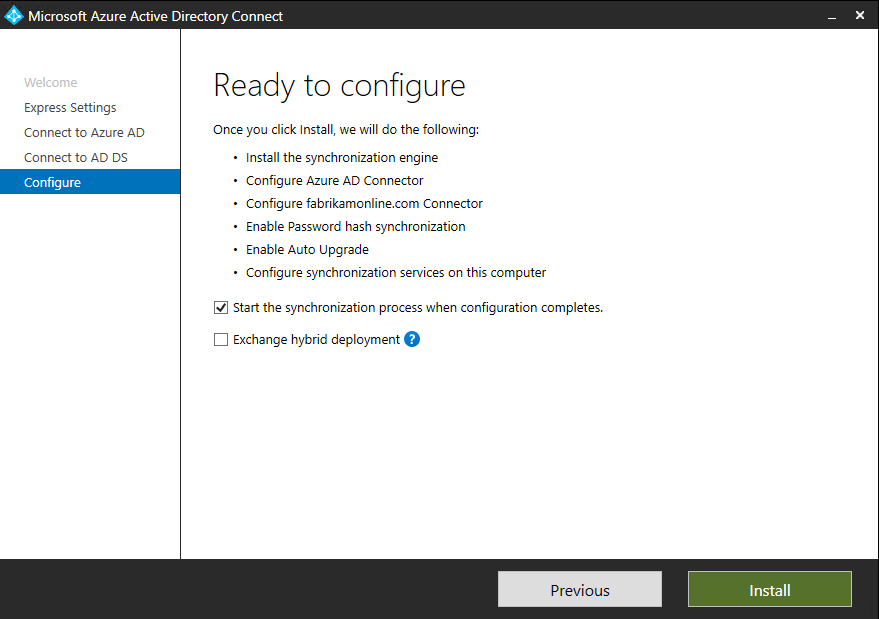
Step 3: Ready to configure
If all goes smoothly, you will arrive at the “ready to configure” page.
Some notes here:
- Unchecking the “starting the sync process” will allow you to add more configurations like filtering.
- If you check it instead, the tool will begin a full sync of all users, groups, and contacts to Microsoft Entra ID.
- The “Exchange Hybrid Deployment” option will allow you to maintain Exchange mailboxes both on-premises and in the cloud.
Anyway, this is what you will see:
If you don’t see this page, you will likely see a “configuration” page, which appears only if you didn’t verify your domain.
Simply review the domain marked “not added” or “not verified” and make sure to verify them (then refresh).
Custom Installation of Microsoft Entra Connect
If you need more installation options, you can use the customized path.
This setup is ideal for scenarios like multiple forests or when you want to enable optional features.
I won’t be including here the steps that are more or less similar to what you see in the express settings. 🙂
Step 1: Install the required components
To start, simply click on the customize button at the start of the installation process:
Technically, during the sync services installation, you can leave the optional configuration section to Microsoft Entra Connect.
That’s because it will install a SQL Server 2019 LocalDB instance, create necessary groups, and assign permissions.
If you want to customize any of these options, you can do so on this page:
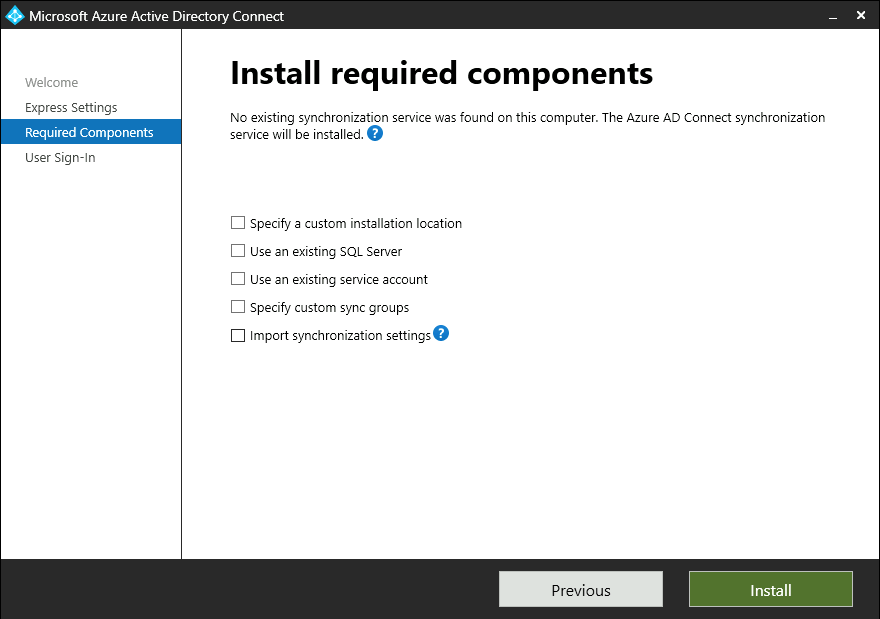
The options here include:
- Specify a custom installation location
- Use an existing SQL Server
- Use an existing service account
- Specify custom sync groups
- Import synchronization settings
Once you have selected your choice, just click on the install button to continue.
Step 2: User Sign-in
After that, you will have to select your user’s single sign-on method.
Just select which one you want to apply:
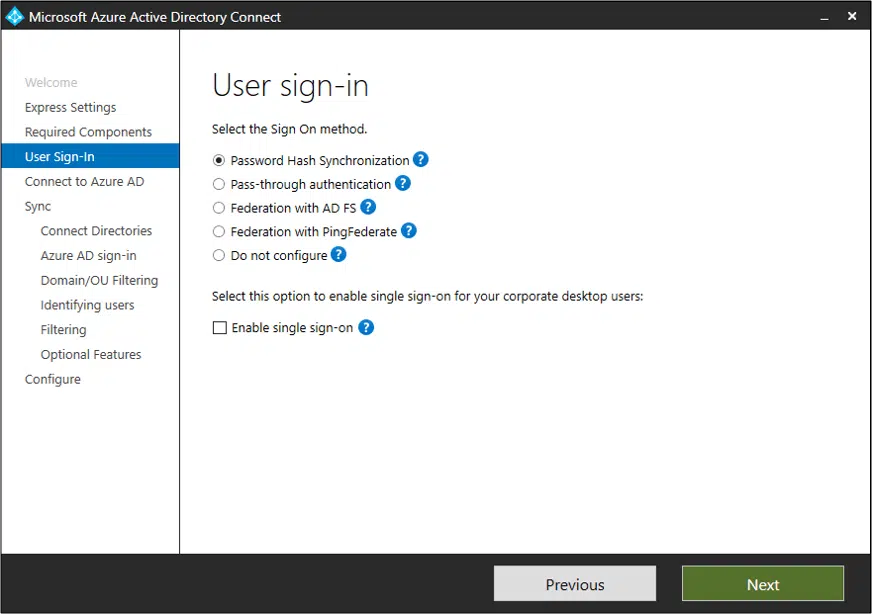
The choices here include:
- Password hash synchronization
- Pass-through authentication
- Federation with AD FS
- Federation with PingFederate
- Do not configure
- Enable single sign-on
Most here can be easily understood.
Federation with AD FS and Federation with PingFederate simply means users can use their on-premises network credentials.
For AD FS, they will be redirected to their on-premises instance, while the other to their PingFederate instance.
Note that the “enable single sign-on” option is unavailable for AD FS customers since it’s already on the same SSO level.
Step 3: Sync pages
One difference with the custom path is that you will see a “sync” section.
The first part is to connect your directories, which requires the forest name and credentials:
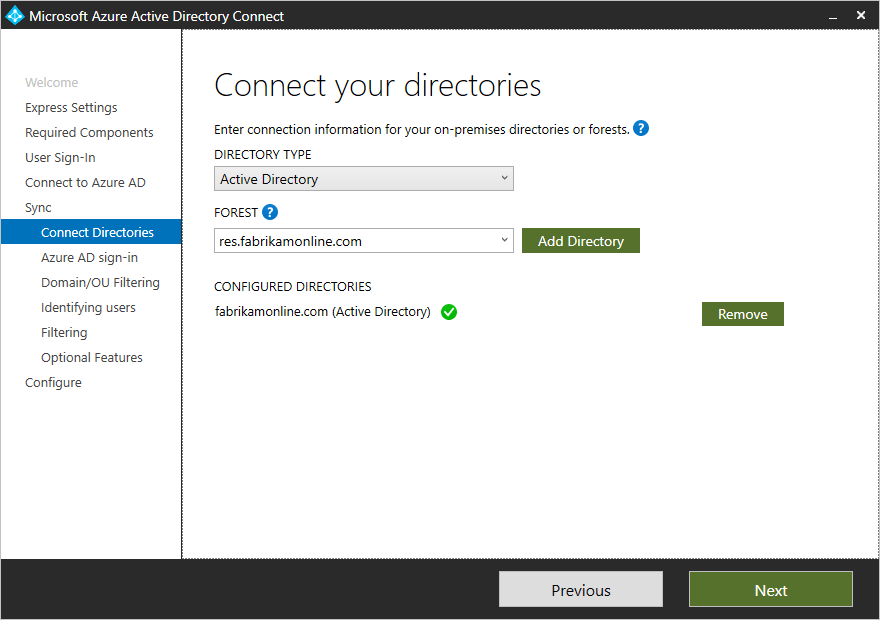
Click the “add directory” button and a new window will appear where you can choose account options:
- Create new AD account
- Use existing AD account
This is what you will see:
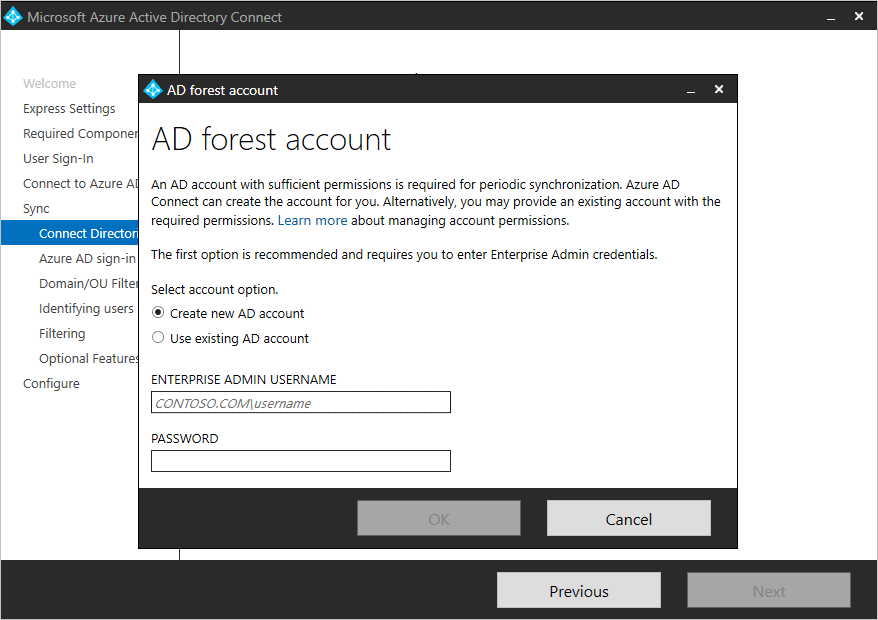
Note that with the new build, enterprise, and domain admin accounts can’t be used as the AD DS connector account.
Instead, allow Microsoft Entra Connect to create the account or specify a sync account with proper permissions.
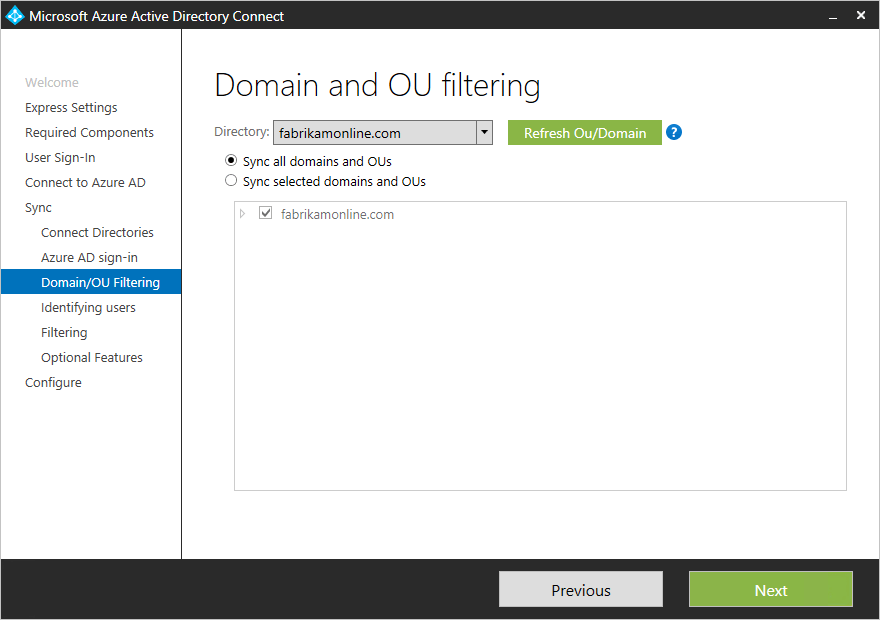
Step 4: Domain and OU filtering
By default, Microsoft Entra Connect syncs all domains and organizational units (OUs).
To exclude certain domains or OUs, simply deselect them:
Some notes here:
- Refer to domain-based filtering and OU-based filtering for details if you plan to make changes.
- Remember that essential OUs should remain selected for proper functionality.
- In versions older than 1.1.524.0, new OUs are synced automatically when using OU-based filtering.
To prevent this, adjust the default settings after the filtering step (in newer versions, you can choose whether to sync new OUs).
If you’re using group-based filtering, confirm that the OU containing the group isn’t excluded, as OU filtering is processed before group filtering.
If any domains appear unreachable due to firewall settings, they’re unselected by default and marked with a warning.
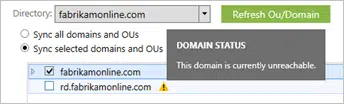
When you see this warning, verify these domains are indeed unreachable and the alert is expected.
Step 5: Uniquely identifying your users
The Matching across forests feature allows you to specify how users from your AD DS forests are represented in Microsoft Entra ID.
A user may appear once across all forests, as both active and inactive accounts, or as a contact in some forests.
Here’s the section to uniquely identify users:
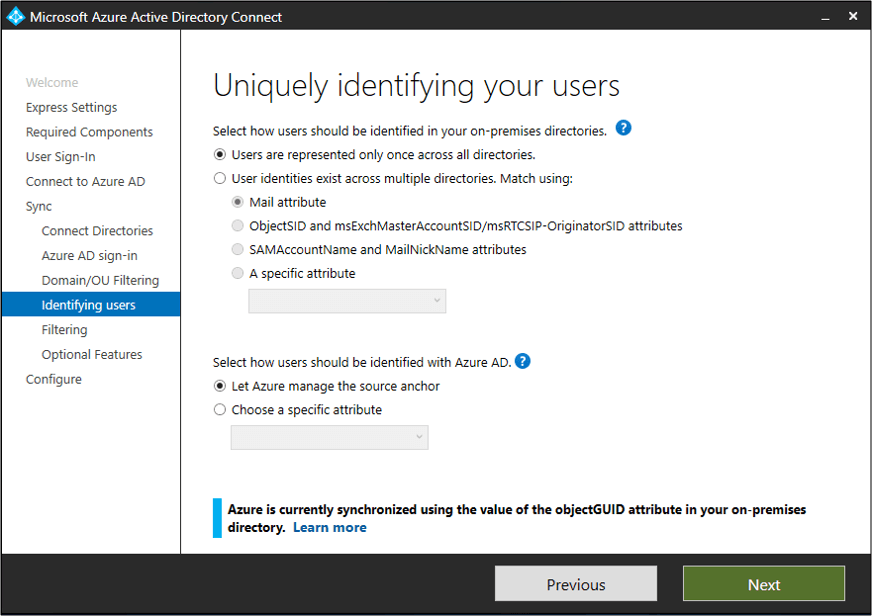
The primary choices here are whether users are represented only once, or match across the forests through:
- Mail attribute
- ObjectSID and msExchangeMasterAccountSID/ msRTCSIP-OriginatorSID attributes
- SAMAccountName and MailNickName attributes
- Choose a specific attribute
Afterward, you can select how users should be identified with Azure AD.
You can either let Azure manage the source anchor, or choose a specific attribute yourself.
Some notes here:
- Since the sourceAnchor attribute can’t be modified once set, it’s important to select one carefully.
- A strong choice is objectGUID, which only changes if the account moves between forests or domains.
- Avoid using attributes that may change, such as those affected by name or role changes.
- Attributes with an “@” symbol, like email and userPrincipalName, aren’t allowed.
Remember, the attribute is case-sensitive, so preserve capitalization if moving an object across forests.
Step 6: Filter users and devices (optional)
I made this “optional” since this feature is designed for pilot deployments and is not recommended for full production.
The filtering-on-groups option lets you sync a small subset of objects for testing.
To use it:
- Create a group in your on-premises Active Directory specifically for this purpose
- Add only the users and groups you want to be synced to Microsoft Entra ID as direct members
You can update the group to control which objects are synchronized.
Here’s what you will see:
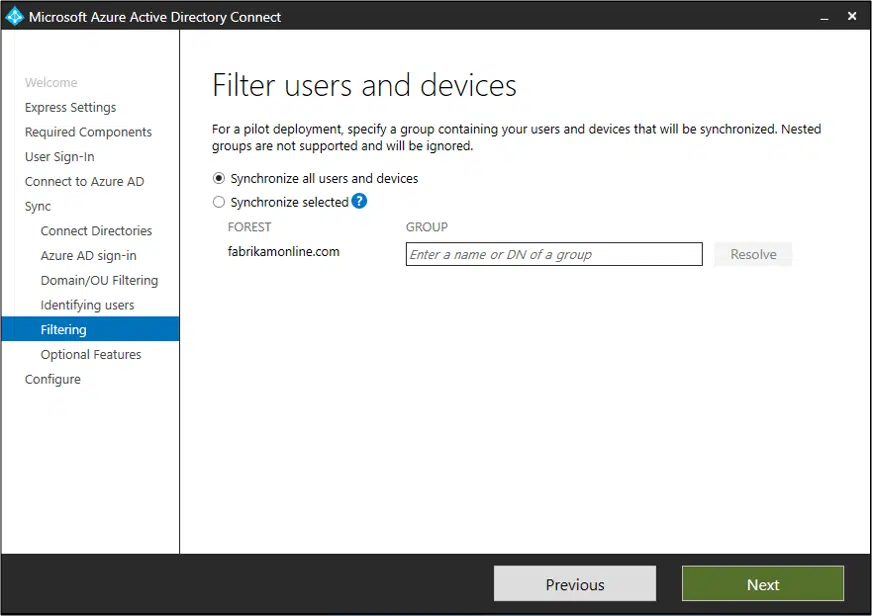
Only direct members will sync, including users, groups, contacts, and devices.
Nested groups aren’t supported—if a group is added as a member, only that group will sync, not its members.
In a full production environment, maintaining a single group would be challenging.
Step 7: Optional features:
You can also select optional features that are useful for your case:
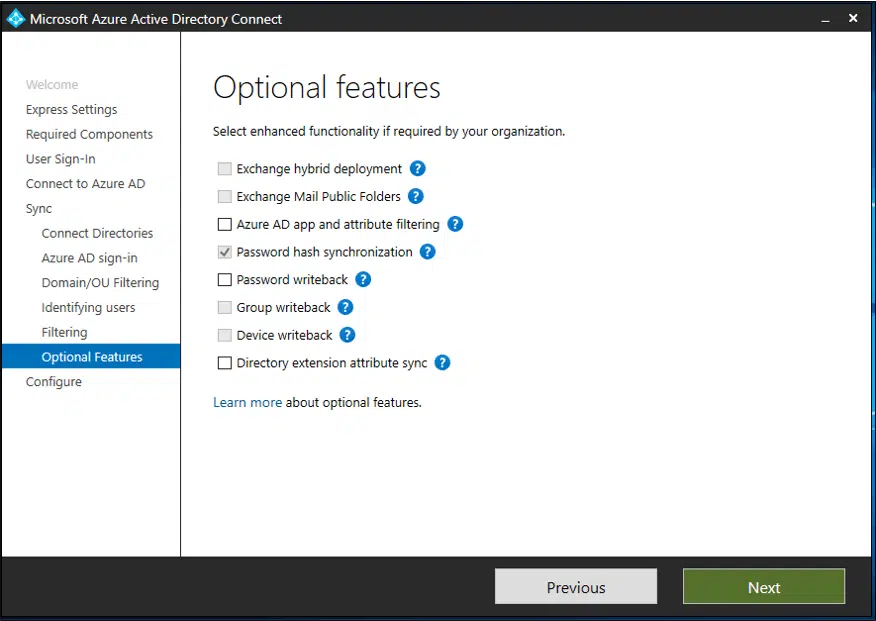
The options here include:
- Exchange hybrid deployment
- Exchange mail public folders
- Microsoft Entra app and attribute filtering
- Password hash synchronization
- Password writeback
- Group writeback
- Device writeback
- Directory extension attribute sync
Some notes here:
- Earlier versions of Entra Connect or Azure AD Connect have a future problem with password writeback.
- If Azure AD Sync or DirSync are active, avoid enabling any writeback features in Microsoft Entra Connect.
Naturally, the settings that you enable here would give you further options as well.
Troubleshooting Common Issues
Microsoft Entra Connect is reliable, but you can still encounter issues related to setup and sync.
Here are some of the common ones.
- Connection errors (check network settings)
- Sync failures (restart the sync service)
- Password sync problems (verify that password hash sync is enabled)
- User not found errors (might be due to misconfigured sync scope)
Regularly reviewing Microsoft Entra Connect logs can help identify ongoing issues
There’s Microsoft’s troubleshooting tools can also resolve persistent errors.
For more complex problems, check for updates on the Microsoft Entra Connect service or consult the Microsoft support community.
Do you have any questions about installing Microsoft Entra Connect? Let me know in the comments.
For any business-related queries or concerns, contact me through the contact form. I always reply. 🙂


What about synchronization of azure ad with 2 different SharePoint tenants?
Is this what you are referring to? https://learn.microsoft.com/en-us/azure/active-directory/hybrid/plan-connect-topologies#sync-ad-objects-to-multiple-azure-ad-tenants