

Last Updated on August 8, 2024
Getting problems related to external forwarding?
In this guide, I will walk you through enabling external forwarding in Microsoft 365, and my predicament that led to this.
Let’s get started.
Table of Contents:
What is external forwarding in Microsoft 365?
If you’ve been using email platforms before, then you must already be familiar with external forwarding.
Basically, it’s a feature that allows emails from a Microsoft 365 mailbox to be automatically sent to an external email address.
It works like this:
- Users create inbox rules to automatically forward their emails to an external email address.
- Administrators set up forwarding for specific users or the entire organization through Microsoft 365’s security policies.
- Emails can be forwarded to several external addresses at once, depending on the configuration.
It’s useful for smooth communication across different platforms or ensuring important messages reach external contacts.
Unfortunately, as you would later see, it’s disabled by default in Microsoft 365 as protection against security threats.
That’s why you must weigh the benefits first against such risks and make sure there are safeguards in place.
👉 Related: How to Add a Shared Mailbox in Outlook 365 (Easy Guide)
Sign up for exclusive updates, tips, and strategies
The Problem With External Forwarding
A few weeks ago, I was experiencing problems with my helpdesk and I didn’t even know it.
Apparently, if you need mail to be forwarded, you have to enable external forwarding first in Microsoft 365.
This was by default since most companies have restrictions over automatically forwarded messages going out of the organization.
In fact, many of you might have received the following error:
“550 5.7.520 Access denied, Your organization does not allow external forwarding. Please contact your administrator for further assistance. AS(7555)”
But as you may know already, it also poses a security risk as you might disclose confidential information.
However, if you need to enable external forwarding, it’s actually super easy.
Enabling External Forwarding for All Users
If you want to enable external email forwarding for all users, you need to change the default outbound spam policy.
Here’s how:
Step 1: Go to Microsoft Defender
While on any Microsoft 365 page, click the app launcher on the top left corner > admin button:
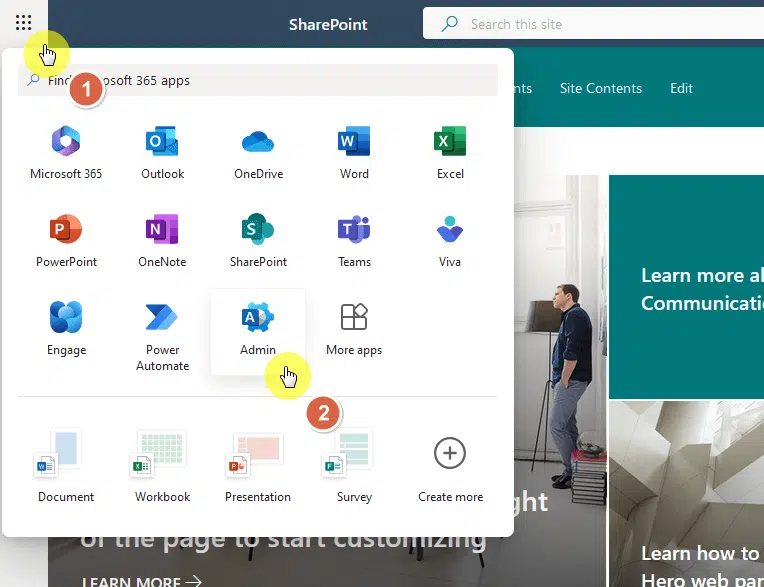
This will bring you to the Microsoft 365 admin center.
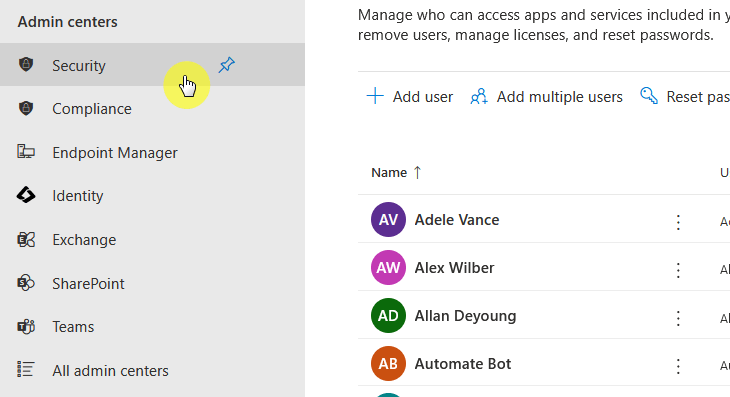
Now what you need to do is expand the admin center options in the left panel and select the security option.
Like this:
You should now be on the home page of Microsoft Defender. 🙂
This part is easy since you just need to navigate to the right page.
From the home page, expand the email and collaboration item in the left panel > policies and rules page:
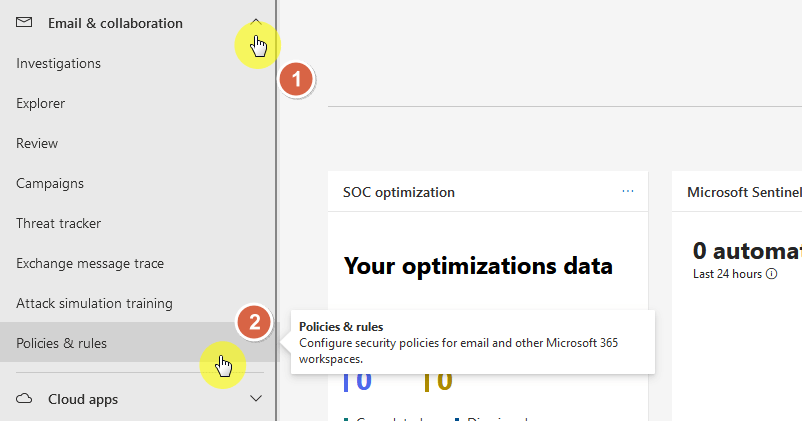
You will land on a page where you can set up policies and rules to manage devices.
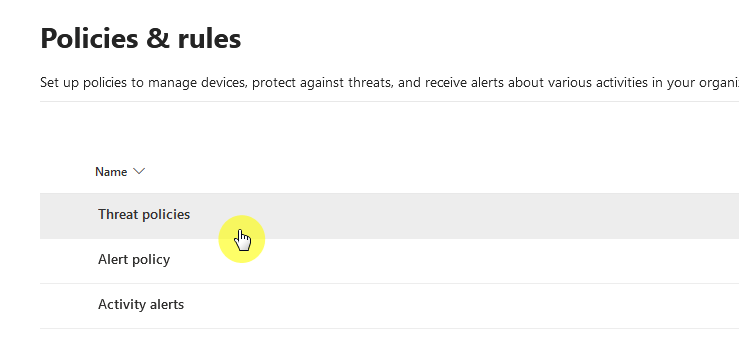
What you need to do here is click on the threat policies item.
Like this:
You’re almost there. 😅
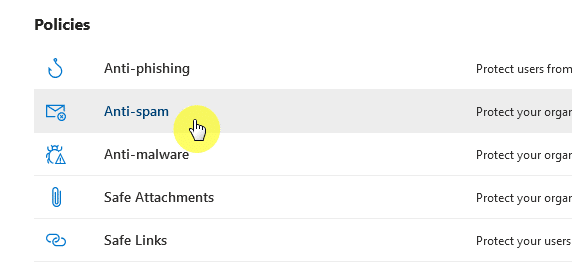
Now click on the anti-spam item in the policies section:
This will now bring you to another page.
Step 3: Edit the default policy
Click the anti-spam outbound policy (default) item:
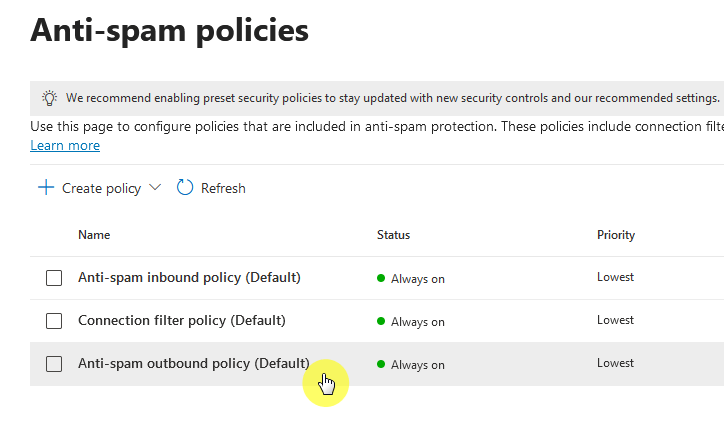
That should open the right panel with some details about the policy.
From here, click the edit protection settings link at the bottom:
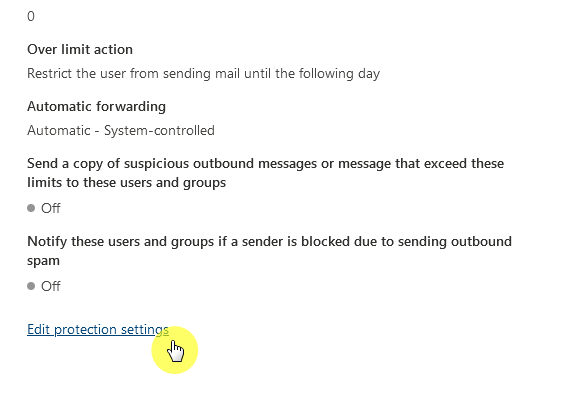
Nice! 🙂
Step 4: Enable forwarding
On the next page, you should see a forwarding rules section near the bottom.
Select the dropdown for automatic forwarding rules and select the “on-forwarding is enabled” option:
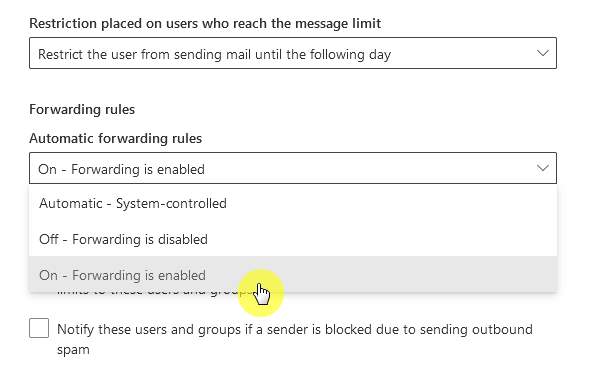
Don’t forget to click the save button at the bottom. 🙂
Once enabled, all users within the organization will be able to forward their emails to external recipients.
⛔ Warning: For security, regularly monitor this setting and review who’s using external forwarding.
Enabling External Forwarding for Specific Users or Groups
Unfortunately, you need to create a new outbound spam policy here to control which users can forward emails to external addresses.
It’s not as hard as you imagine though:
Step 1: Create a new policy
For this step, you need to go back to the anti-spam policies page (check steps 1-2 from the previous section).
This time, click the create policy > outbound button:
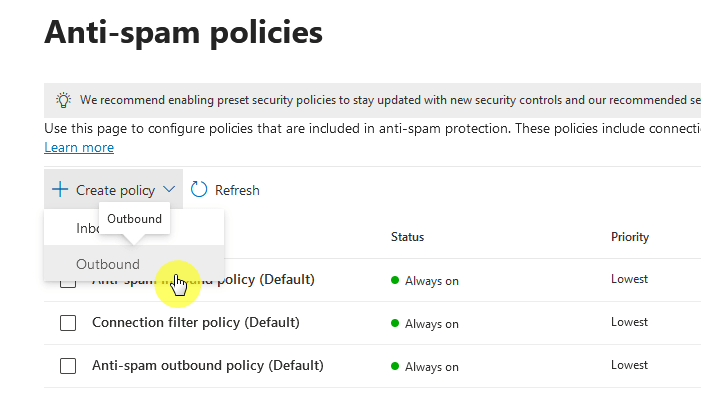
If you have difficulty finding this page, kindly review the previous section. 🙂
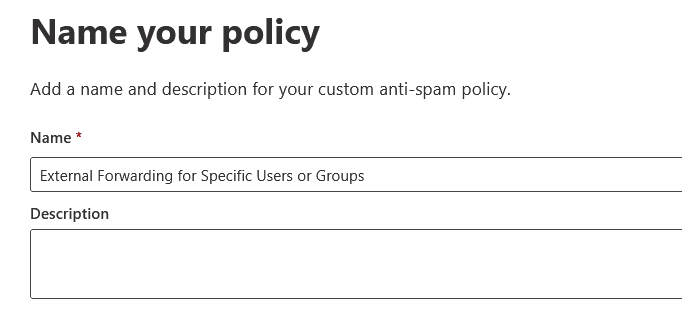
Step 2: Configure the policy
The next part is the setup process, starting with the name and description.
It looks like this:
The next page is selecting the specific users or groups that will be allowed to forward emails externally.
Like this:
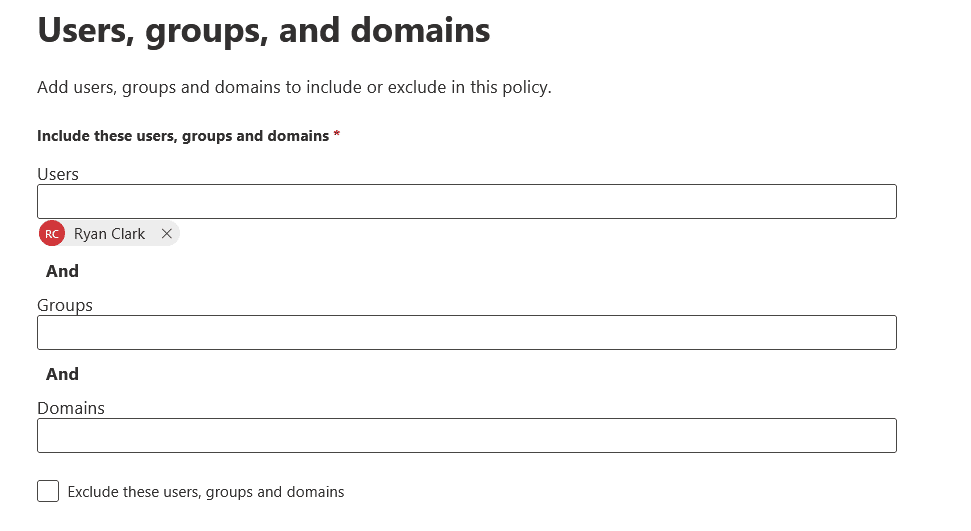
Don’t forget to press the next button. 🙂
Step 3: Enable automatic external forwarding
The next page will be about protection settings.
As you can see, this is a similar page to what you see in the last step in the previous section.
All you have to do here is to select “on – forwarding is enabled” in the forwarding rules:

Review and then create the new outbound policy. 🙂
This is actually better than enabling it for the whole organization since you can maintain better control of it.
But still, regularly review and update these policies to make sure they align with your organization’s security needs. 🙂
Troubleshooting Issues
If you encounter issues, you might be surprised at how the cause is actually a common problem.
Some examples:
- Non-delivery reports (NDRs)
- Policy conflicts
- Permission issues
If a user received an NDR that forwarding isn’t allowed, simply check the outbound spam filter policy settings.
For policy conflicts, there might be mail flow or transport rules that block external forwarding.
For permission issues, well, check that the administrator account used to configure forwarding has the necessary permissions.
It’s also important to check if there are any additional layers of security or third-party integrations.
Balance Functionality With Security
While this feature can improve communication, it also introduces potential risks.
That’s why I always recommend to review your policies regularly to maintain both security and efficiency.
Anyway, got any questions about enabling external forwarding in Microsoft 365? Let me know.
For any business-related queries or concerns, contact me through the contact form. I always reply. 🙂


